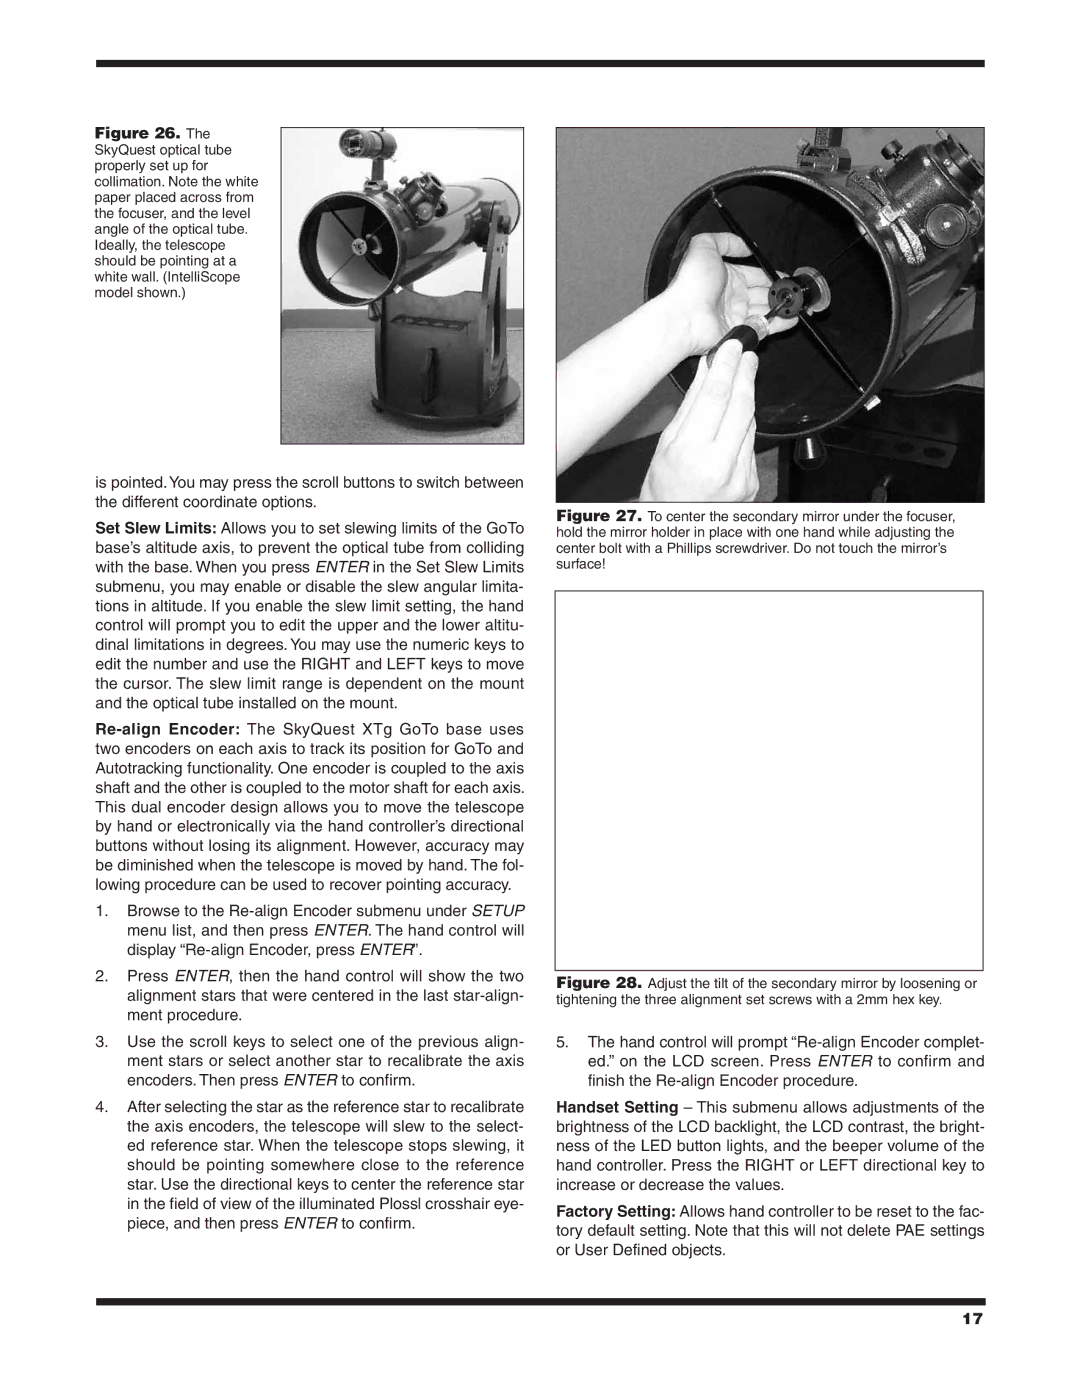
Figure 26. The SkyQuest optical tube properly set up for collimation. Note the white paper placed across from the focuser, and the level angle of the optical tube. Ideally, the telescope should be pointing at a white wall. (IntelliScope model shown.)

is pointed. You may press the scroll buttons to switch between the different coordinate options.

Set Slew Limits: Allows you to set slewing limits of the GoTo base’s altitude axis, to prevent the optical tube from colliding with the base. When you press ENTER in the Set Slew Limits submenu, you may enable or disable the slew angular limita- tions in altitude. If you enable the slew limit setting, the hand control will prompt you to edit the upper and the lower altitu- dinal limitations in degrees. You may use the numeric keys to edit the number and use the RIGHT and LEFT keys to move the cursor. The slew limit range is dependent on the mount and the optical tube installed on the mount.

Re-align Encoder: The SkyQuest XTg GoTo base uses two encoders on each axis to track its position for GoTo and Autotracking functionality. One encoder is coupled to the axis shaft and the other is coupled to the motor shaft for each axis. This dual encoder design allows you to move the telescope by hand or electronically via the hand controller’s directional buttons without losing its alignment. However, accuracy may be diminished when the telescope is moved by hand. The fol- lowing procedure can be used to recover pointing accuracy.

1.Browse to the Re-align Encoder submenu under SETUP menu list, and then press ENTER. The hand control will display “Re-align Encoder, press ENTER”.

2.Press ENTER, then the hand control will show the two alignment stars that were centered in the last star-align- ment procedure.

3.Use the scroll keys to select one of the previous align- ment stars or select another star to recalibrate the axis encoders. Then press ENTER to confirm.

4.After selecting the star as the reference star to recalibrate the axis encoders, the telescope will slew to the select- ed reference star. When the telescope stops slewing, it should be pointing somewhere close to the reference star. Use the directional keys to center the reference star in the field of view of the illuminated Plossl crosshair eye- piece, and then press ENTER to confirm.

Figure 27. To center the secondary mirror under the focuser, hold the mirror holder in place with one hand while adjusting the center bolt with a Phillips screwdriver. Do not touch the mirror’s surface!

Figure 28. Adjust the tilt of the secondary mirror by loosening or tightening the three alignment set screws with a 2mm hex key.

5.The hand control will prompt “Re-align Encoder complet- ed.” on the LCD screen. Press ENTER to confirm and finish the Re-align Encoder procedure.

Handset Setting – This submenu allows adjustments of the brightness of the LCD backlight, the LCD contrast, the bright- ness of the LED button lights, and the beeper volume of the hand controller. Press the RIGHT or LEFT directional key to increase or decrease the values.

Factory Setting: Allows hand controller to be reset to the fac- tory default setting. Note that this will not delete PAE settings or User Defined objects.

17

Page 17
Image 17
Orion 10135XT12g, 10135 XT10g, #10134 XT8g, 10134 XTBg instruction manual

10135 XT10g, 10134 XTBg, 10135XT12g, #10134 XT8g specifications

The Orion #10134 XT8g, #10135 XT12g, #10134 XTBg, and #10135 XT10g are exceptional choices in the realm of computerized telescopes, catering to both novice stargazers and seasoned astronomers. These models are designed for easy use while delivering stellar performance and high-quality optics.

At the heart of these telescopes is the high-quality optics that Orion is renowned for. Each model features a primary mirror made from durable glass, enhanced with a parabolic shape to minimize optical distortions and improve light gathering capabilities. The XT8g and XT10g utilize an 8-inch and 10-inch mirror, respectively, while the XT12g boasts a large 12-inch aperture, providing users with deeper views of celestial phenomena. The larger the aperture, the more light the telescope can collect, revealing fainter objects in the night sky.

In terms of technology, the "g" designation signifies that these telescopes are equipped with Orion’s innovative GoTo system. This advanced motorized mount enables users to easily locate and track celestial objects with the push of a button, making the stargazing experience more enjoyable and accessible. The system includes a database of thousands of celestial objects, allowing users to explore the universe with ease.

The XTg models also come with an intuitive hand controller that features a user-friendly interface for navigating the night sky. Additionally, the telescopes can be controlled via a smartphone or tablet, providing flexibility for tech-savvy users who prefer modern conveniences.

Durability and stability are crucial in any telescope, and the XT series does not disappoint. Each model is constructed on a robust and stable base, designed to minimize vibrations and provide a steady view, even at higher magnifications. This stability ensures that amateur astronomers can enjoy detailed views, from the craters of the moon to the rings of Saturn and beyond.

Each telescope comes with a cradle-style altazimuth mount for easier adjustments and tracking capabilities. The included eyepieces allow for various magnifications, enhancing the viewing experience and enabling observers to appreciate the beauty of the cosmos.

In summary, the Orion XT series, including the #10134 XT8g, #10135 XT12g, #10134 XTBg, and #10135 XT10g, stands out for their exceptional optics, innovative GoTo technology, robust build quality, and user-friendly operation. These telescopes are ideal for anyone wishing to explore the wonders of the night sky, making them a worthy investment for years of astronomical discovery.