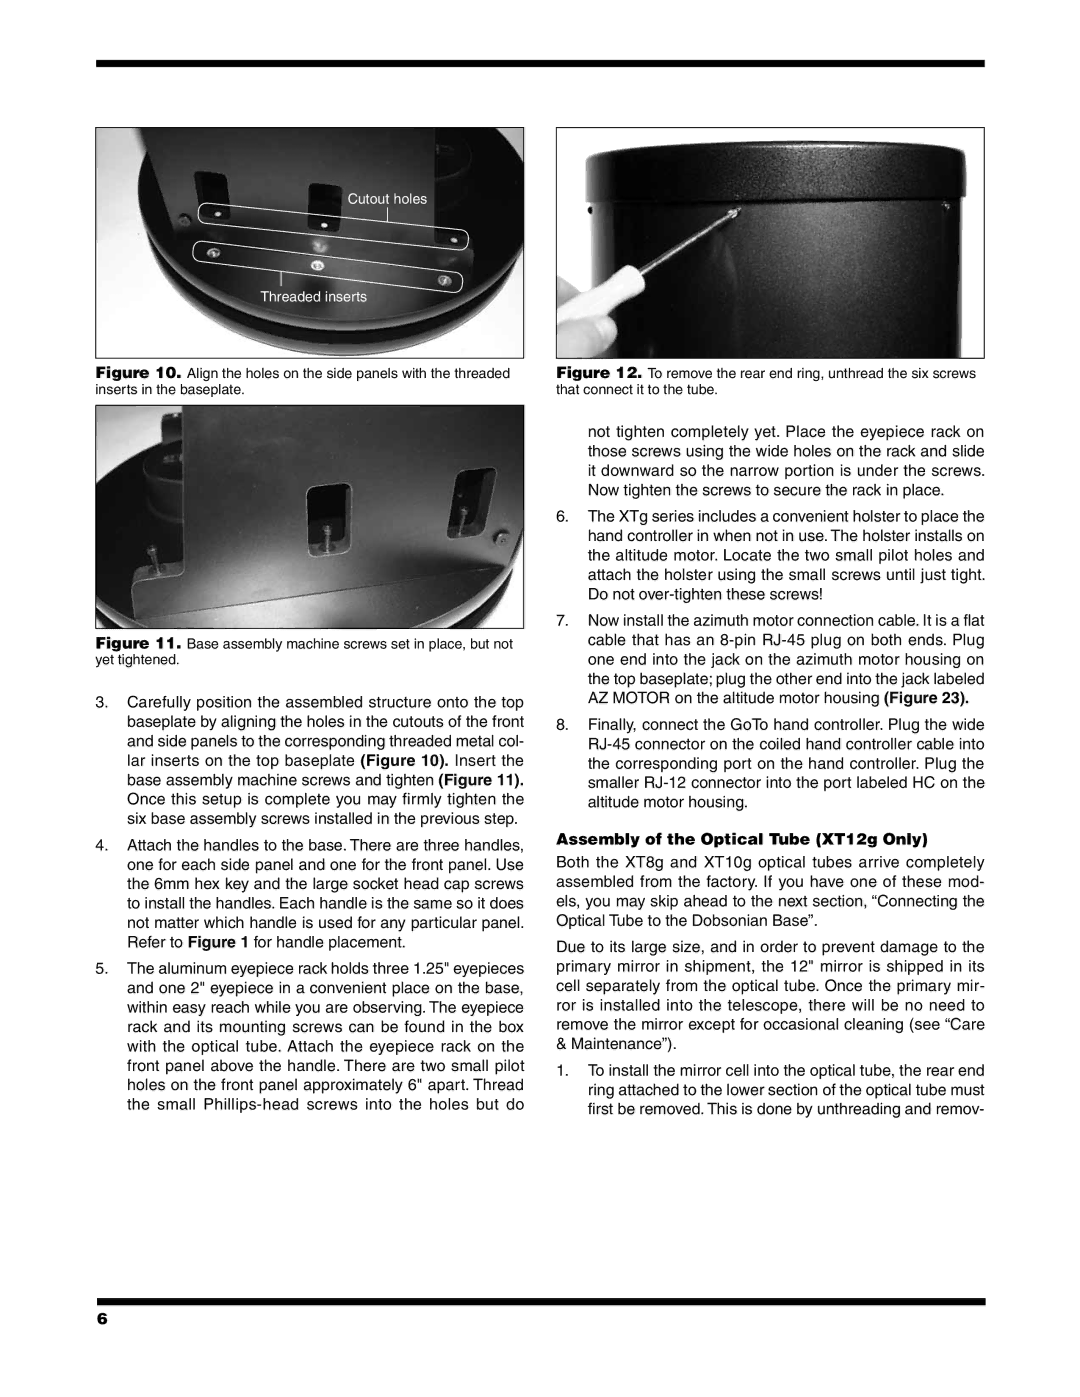
Cutout holes

Threaded inserts

Figure 10. Align the holes on the side panels with the threaded inserts in the baseplate.

Figure 12. To remove the rear end ring, unthread the six screws that connect it to the tube.

Figure 11. Base assembly machine screws set in place, but not yet tightened.

3.Carefully position the assembled structure onto the top baseplate by aligning the holes in the cutouts of the front and side panels to the corresponding threaded metal col- lar inserts on the top baseplate (Figure 10). Insert the base assembly machine screws and tighten (Figure 11). Once this setup is complete you may firmly tighten the six base assembly screws installed in the previous step.

4.Attach the handles to the base. There are three handles, one for each side panel and one for the front panel. Use the 6mm hex key and the large socket head cap screws to install the handles. Each handle is the same so it does not matter which handle is used for any particular panel. Refer to Figure 1 for handle placement.

5.The aluminum eyepiece rack holds three 1.25" eyepieces and one 2" eyepiece in a convenient place on the base, within easy reach while you are observing. The eyepiece rack and its mounting screws can be found in the box with the optical tube. Attach the eyepiece rack on the front panel above the handle. There are two small pilot holes on the front panel approximately 6" apart. Thread the small Phillips-head screws into the holes but do

not tighten completely yet. Place the eyepiece rack on those screws using the wide holes on the rack and slide it downward so the narrow portion is under the screws. Now tighten the screws to secure the rack in place.

6.The XTg series includes a convenient holster to place the hand controller in when not in use. The holster installs on the altitude motor. Locate the two small pilot holes and attach the holster using the small screws until just tight. Do not over-tighten these screws!

7.Now install the azimuth motor connection cable. It is a flat cable that has an 8-pin RJ-45 plug on both ends. Plug one end into the jack on the azimuth motor housing on the top baseplate; plug the other end into the jack labeled AZ MOTOR on the altitude motor housing (Figure 23).

8.Finally, connect the GoTo hand controller. Plug the wide RJ-45 connector on the coiled hand controller cable into the corresponding port on the hand controller. Plug the smaller RJ-12 connector into the port labeled HC on the altitude motor housing.

Assembly of the Optical Tube (XT12g Only)

Both the XT8g and XT10g optical tubes arrive completely assembled from the factory. If you have one of these mod- els, you may skip ahead to the next section, “Connecting the Optical Tube to the Dobsonian Base”.

Due to its large size, and in order to prevent damage to the primary mirror in shipment, the 12" mirror is shipped in its cell separately from the optical tube. Once the primary mir- ror is installed into the telescope, there will be no need to remove the mirror except for occasional cleaning (see “Care & Maintenance”).

1.To install the mirror cell into the optical tube, the rear end ring attached to the lower section of the optical tube must first be removed. This is done by unthreading and remov-

6

Page 6
Image 6
Orion #10134 XT8g, 10135 XT10g, 10135XT12g, 10134 XTBg instruction manual Assembly of the Optical Tube XT12g Only

10135 XT10g, 10134 XTBg, 10135XT12g, #10134 XT8g specifications

The Orion #10134 XT8g, #10135 XT12g, #10134 XTBg, and #10135 XT10g are exceptional choices in the realm of computerized telescopes, catering to both novice stargazers and seasoned astronomers. These models are designed for easy use while delivering stellar performance and high-quality optics.

At the heart of these telescopes is the high-quality optics that Orion is renowned for. Each model features a primary mirror made from durable glass, enhanced with a parabolic shape to minimize optical distortions and improve light gathering capabilities. The XT8g and XT10g utilize an 8-inch and 10-inch mirror, respectively, while the XT12g boasts a large 12-inch aperture, providing users with deeper views of celestial phenomena. The larger the aperture, the more light the telescope can collect, revealing fainter objects in the night sky.

In terms of technology, the "g" designation signifies that these telescopes are equipped with Orion’s innovative GoTo system. This advanced motorized mount enables users to easily locate and track celestial objects with the push of a button, making the stargazing experience more enjoyable and accessible. The system includes a database of thousands of celestial objects, allowing users to explore the universe with ease.

The XTg models also come with an intuitive hand controller that features a user-friendly interface for navigating the night sky. Additionally, the telescopes can be controlled via a smartphone or tablet, providing flexibility for tech-savvy users who prefer modern conveniences.

Durability and stability are crucial in any telescope, and the XT series does not disappoint. Each model is constructed on a robust and stable base, designed to minimize vibrations and provide a steady view, even at higher magnifications. This stability ensures that amateur astronomers can enjoy detailed views, from the craters of the moon to the rings of Saturn and beyond.

Each telescope comes with a cradle-style altazimuth mount for easier adjustments and tracking capabilities. The included eyepieces allow for various magnifications, enhancing the viewing experience and enabling observers to appreciate the beauty of the cosmos.

In summary, the Orion XT series, including the #10134 XT8g, #10135 XT12g, #10134 XTBg, and #10135 XT10g, stands out for their exceptional optics, innovative GoTo technology, robust build quality, and user-friendly operation. These telescopes are ideal for anyone wishing to explore the wonders of the night sky, making them a worthy investment for years of astronomical discovery.