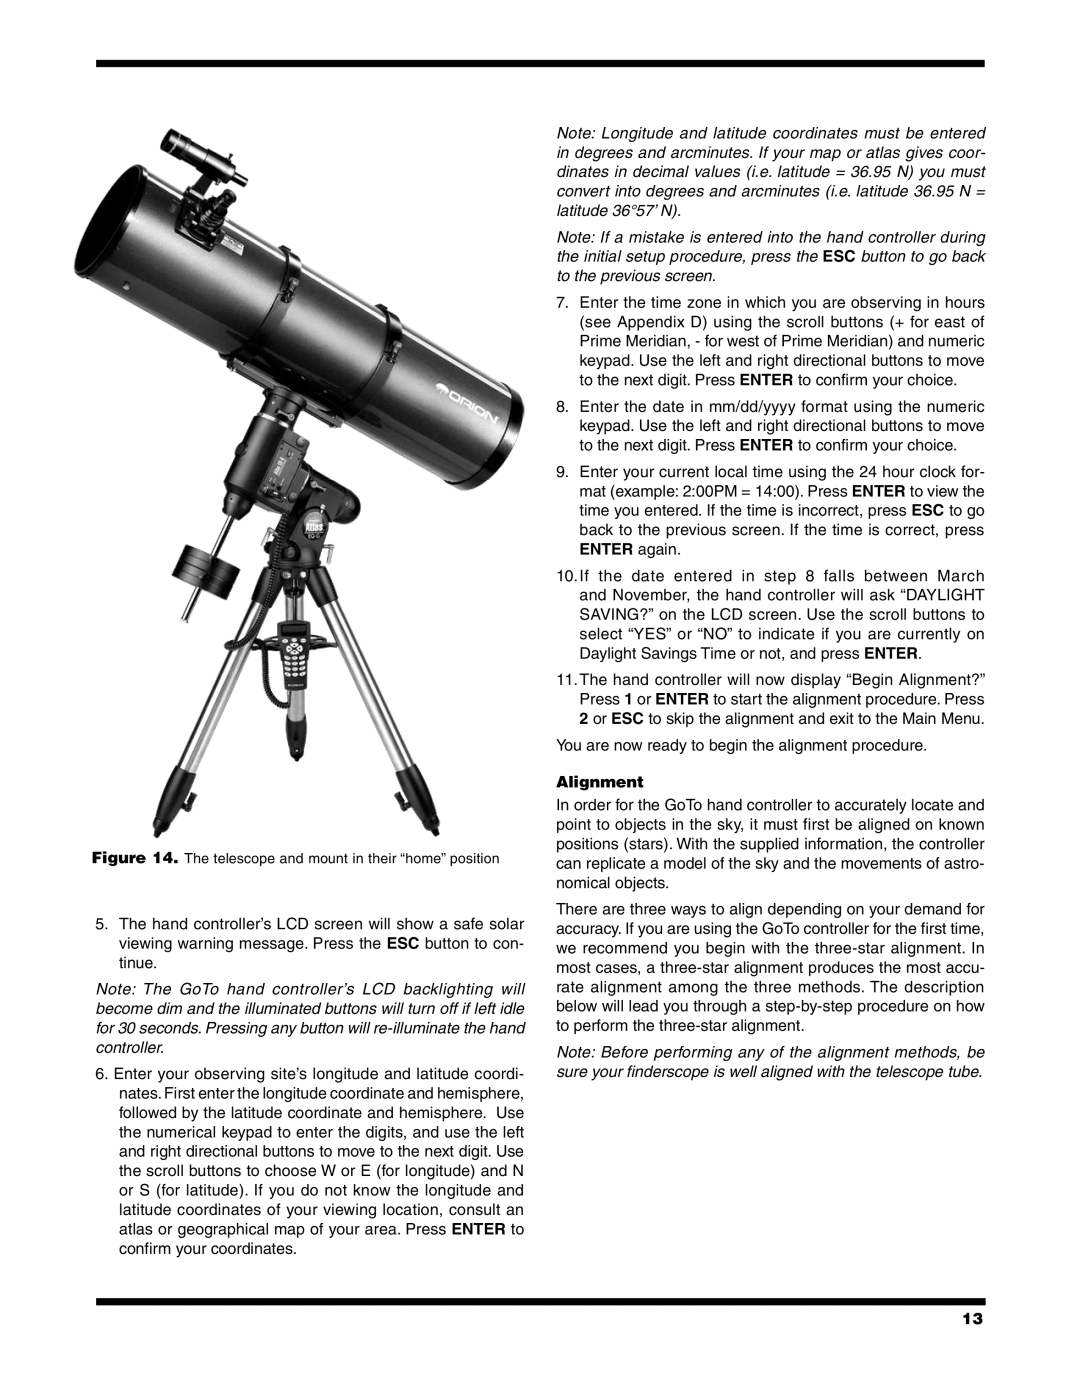
Figure 14. The telescope and mount in their “home” position

5.The hand controller’s LCD screen will show a safe solar viewing warning message. Press the ESC button to con- tinue.

Note: The GoTo hand controller’s LCD backlighting will become dim and the illuminated buttons will turn off if left idle for 30 seconds. Pressing any button will re-illuminate the hand controller.

6.Enter your observing site’s longitude and latitude coordi- nates. First enter the longitude coordinate and hemisphere, followed by the latitude coordinate and hemisphere. Use the numerical keypad to enter the digits, and use the left and right directional buttons to move to the next digit. Use the scroll buttons to choose W or E (for longitude) and N or S (for latitude). If you do not know the longitude and latitude coordinates of your viewing location, consult an atlas or geographical map of your area. Press ENTER to confirm your coordinates.

Note: Longitude and latitude coordinates must be entered in degrees and arcminutes. If your map or atlas gives coor- dinates in decimal values (i.e. latitude = 36.95 N) you must convert into degrees and arcminutes (i.e. latitude 36.95 N = latitude 36°57’ N).

Note: If a mistake is entered into the hand controller during the initial setup procedure, press the ESC button to go back to the previous screen.

7.Enter the time zone in which you are observing in hours (see Appendix D) using the scroll buttons (+ for east of Prime Meridian, - for west of Prime Meridian) and numeric keypad. Use the left and right directional buttons to move to the next digit. Press ENTER to confirm your choice.

8.Enter the date in mm/dd/yyyy format using the numeric keypad. Use the left and right directional buttons to move to the next digit. Press ENTER to confirm your choice.

9.Enter your current local time using the 24 hour clock for- mat (example: 2:00PM = 14:00). Press ENTER to view the time you entered. If the time is incorrect, press ESC to go back to the previous screen. If the time is correct, press ENTER again.

10.If the date entered in step 8 falls between March and November, the hand controller will ask “DAYLIGHT SAVING?” on the LCD screen. Use the scroll buttons to select “YES” or “NO” to indicate if you are currently on Daylight Savings Time or not, and press ENTER.

11.The hand controller will now display “Begin Alignment?” Press 1 or ENTER to start the alignment procedure. Press 2 or ESC to skip the alignment and exit to the Main Menu.

You are now ready to begin the alignment procedure.

Alignment

In order for the GoTo hand controller to accurately locate and point to objects in the sky, it must first be aligned on known positions (stars). With the supplied information, the controller can replicate a model of the sky and the movements of astro- nomical objects.

There are three ways to align depending on your demand for accuracy. If you are using the GoTo controller for the first time, we recommend you begin with the three-star alignment. In most cases, a three-star alignment produces the most accu- rate alignment among the three methods. The description below will lead you through a step-by-step procedure on how to perform the three-star alignment.

Note: Before performing any of the alignment methods, be sure your finderscope is well aligned with the telescope tube.

13

Page 13
Image 13
Orion EQ-G instruction manual Alignment, Telescope and mount in their home position

EQ-G specifications

The Orion EQ-G Equatorial Mount is a popular choice among amateur astronomers and astrophotographers seeking a reliable and versatile platform for their telescopes. Known for its robust build and advanced technology, the EQ-G mount can support a wide range of telescope sizes, making it ideal for both visual observations and astrophotography.

One of the standout features of the Orion EQ-G is its precision go-to capability. Equipped with a computer-controlled system, users can easily locate and track celestial objects with remarkable accuracy. The mount comes with a database that includes thousands of celestial objects, allowing users to automatically point their telescope to stars, planets, galaxies, and more with the push of a button.

The EQ-G mount features a sturdy aluminum construction, ensuring stability even under heavy loads. It can support telescopes weighing up to 30 lbs, making it suitable for medium to large telescopes. The mount's adjustable altitude and azimuth motions allow for smooth tracking of celestial objects as they move across the sky, a vital characteristic for long-exposure astrophotography.

To enhance user experience, the EQ-G is equipped with a built-in dual-axis servo motor drive system. This drive system delivers precise movement control, ensuring that the telescope can be accurately guided to desired targets. Furthermore, the mount is compatible with various control options, including hand controllers and computer software, allowing for a customizable and convenient observing experience.

Another notable technology within the EQ-G is the polar alignment scope. This feature aids in achieving accurate polar alignment, which is crucial for minimizing tracking errors during long exposures. By correctly aligning the mount, users can take stunning astrophotographs with minimal star trails.

For portability, the EQ-G mount comes with a quick-release design that allows for easy setup and takedown. Its adjustable tripod legs provide a stable base on various terrains, making it possible to observe from different locations, whether in the backyard or at a remote dark-sky site.

In summary, the Orion EQ-G Equatorial Mount combines an intuitive design with high-quality features, making it a fantastic choice for astronomy enthusiasts. With its go-to capability, sturdy construction, precise tracking, and user-friendly setup, the EQ-G stands out as a reliable and effective tool for exploring the wonders of the night sky. Whether you are capturing stunning images of celestial objects or simply enjoying visual astronomy, the Orion EQ-G meets the diverse needs of astronomers at all levels.