Using Your Product
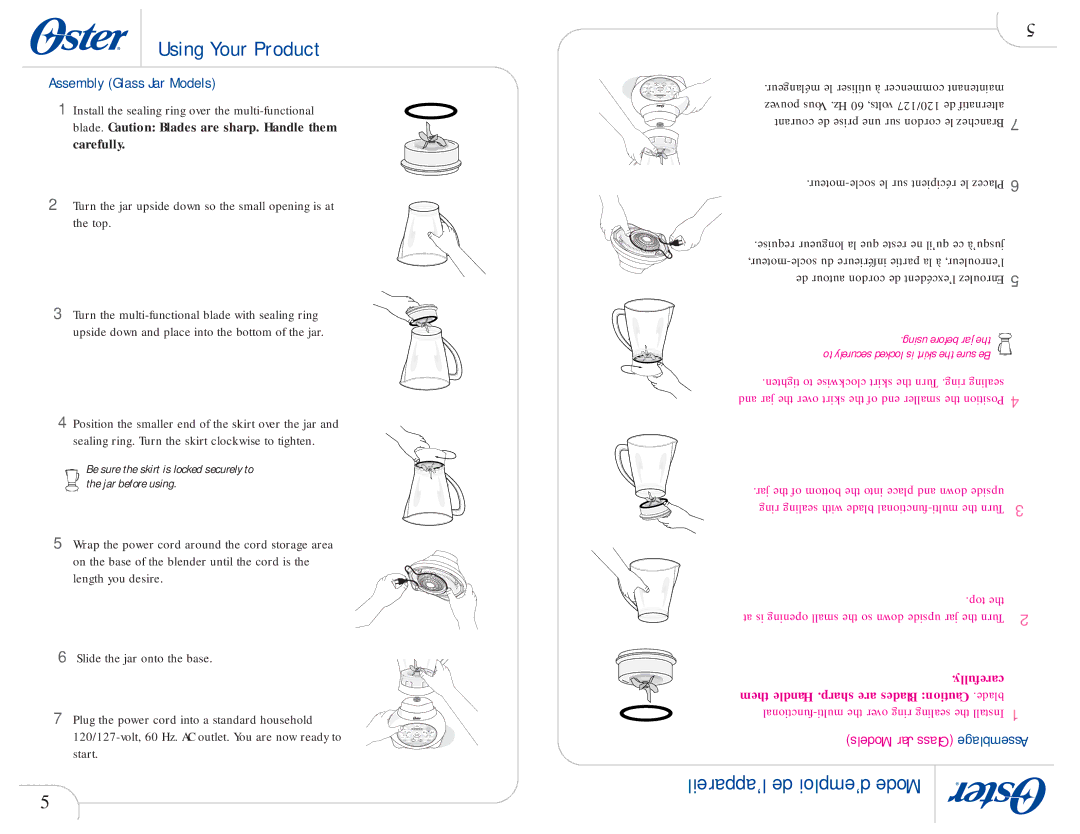
Assembly (Glass Jar Models)
1 Install the sealing ring over the
carefully.
2 Turn the jar upside down so the small opening is at the top.
3 Turn the
4 Position the smaller end of the skirt over the jar and sealing ring. Turn the skirt clockwise to tighten.
Be sure the skirt is locked securely to the jar before using.
5 Wrap the power cord around the cord storage area on the base of the blender until the cord is the length you desire.
6 Slide the jar onto the base.
7 Plug the power cord into a standard household
5
START
STOP
Pause Pulse
|
| 5 |
Pulse Pause | .mélangeur le utiliser à commencer maintenant |
|
STOP |
|
|
START |
|
|
| pouvez Vous .Hz 60 volts, 120/127 de alternatif | 7 |
| courant de prise une sur cordon le Branchez | |
| 6 | |
| .requise longueur la que reste ne qu’il ce jusqu’à |
|
| 5 | |
| de autour cordon de l’excédent Enroulez | |
| .using before jar the |
|
| to securely locked is skirt the sure Be |
|
| .tighten to clockwise skirt the Turn .ring sealing | 4 |
| and jar the over skirt the of end smaller the Position |
.jar the of bottom the into place and down upside | 3 |
ring sealing with blade |
| .top the | 2 |
at is opening small the so down upside jar the Turn | ||
| .carefully |
|
them Handle .sharp are Blades Caution: .blade | 1 | |
Models) Jar (Glass Assemblage | ||
|
| |
l’appareil de d’emploi Mode |
|
|
|
|
|
