Installation Guide
![]() WARNING
WARNING
❐This installation information is designed for professional installers with knowledge of automobile electrical safety systems and is not intended for non- technical,
Any attempt to install this product in a motor vehicle by anyone other than a professional installer could cause damage to the electrical safety system and could result in serious personal injury or death.
❐If your car is equipped with air bag and/or
Before attempting installation of this electronic component against the manufacturer's recommendation, you must contact your car dealer or manufacturer to determine the required procedure and strictly follow their instructions.
FAILURE TO FOLLOW THE PROCEDURE MAY RESULT IN THE UNINTENDED DEPLOYMENT OF AIR BAGS OR ACTIVATION OF THE
❐Overview
This product should be installed by a professional. However, should you decide to install the product against the manufacturer’s recommendation, these operating Instructions do not contain electrical installation instructions. You must contact your car dealer or manufacturer for electrical connection instructions to avoid possible damage to your electrical safety systems and resulting injury or death. (Please
refer to the “WARNING” statement above).
Your next step is to decide where to install the unit. The instructions in these pages will guide you through the remaining steps:
•Identify and label the car wires.
•Connect the vehicle wires to the wires of the power connector.
•Install the unit in the dashboard.
•Check the operation of the unit.
If you encounter problems, please consult your nearest professional installer.
![]() Warning
Warning
Before you begin installation, look for the following items which are packed with your unit.
•Operating Instructions (including “Limited Warranty” and “Customer Service Directory”).
•Installation Hardware .....Needed for Installation.
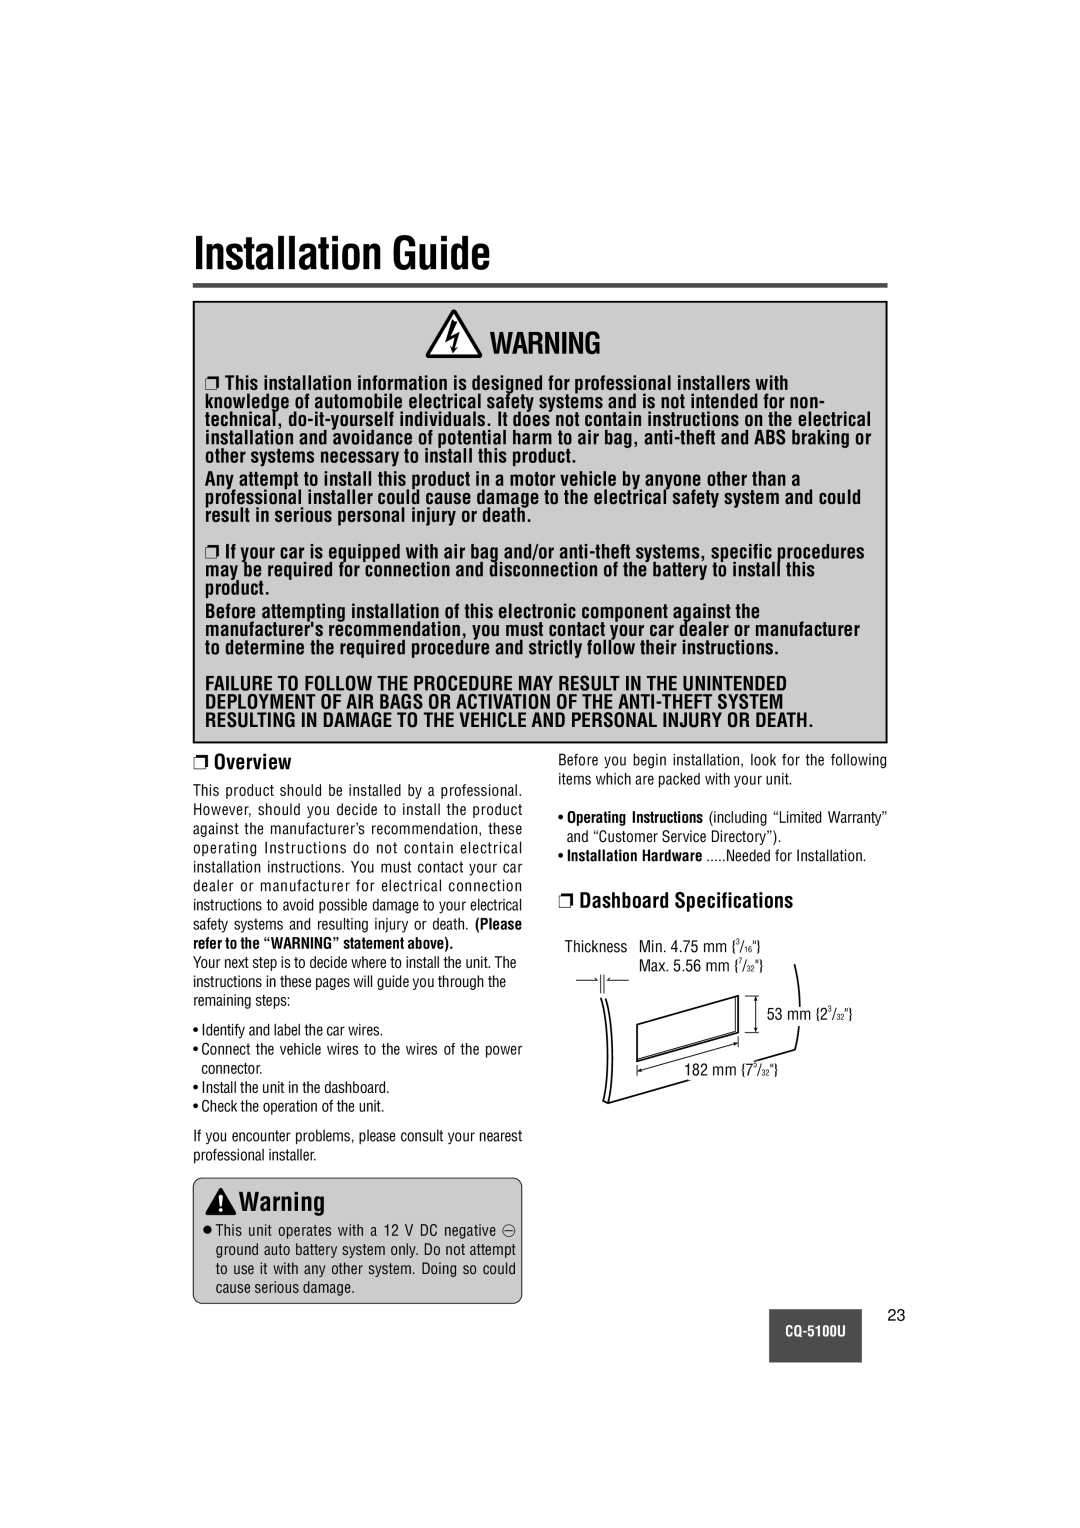
❐Dashboard Specifications
Thickness Min. 4.75 mm {3/16"}
Max. 5.56 mm {7/32"}
53 mm {23/32"}
182 mm {75/32"}
¡This unit operates with a 12 V DC negative @ ground auto battery system only. Do not attempt to use it with any other system. Doing so could cause serious damage.
23