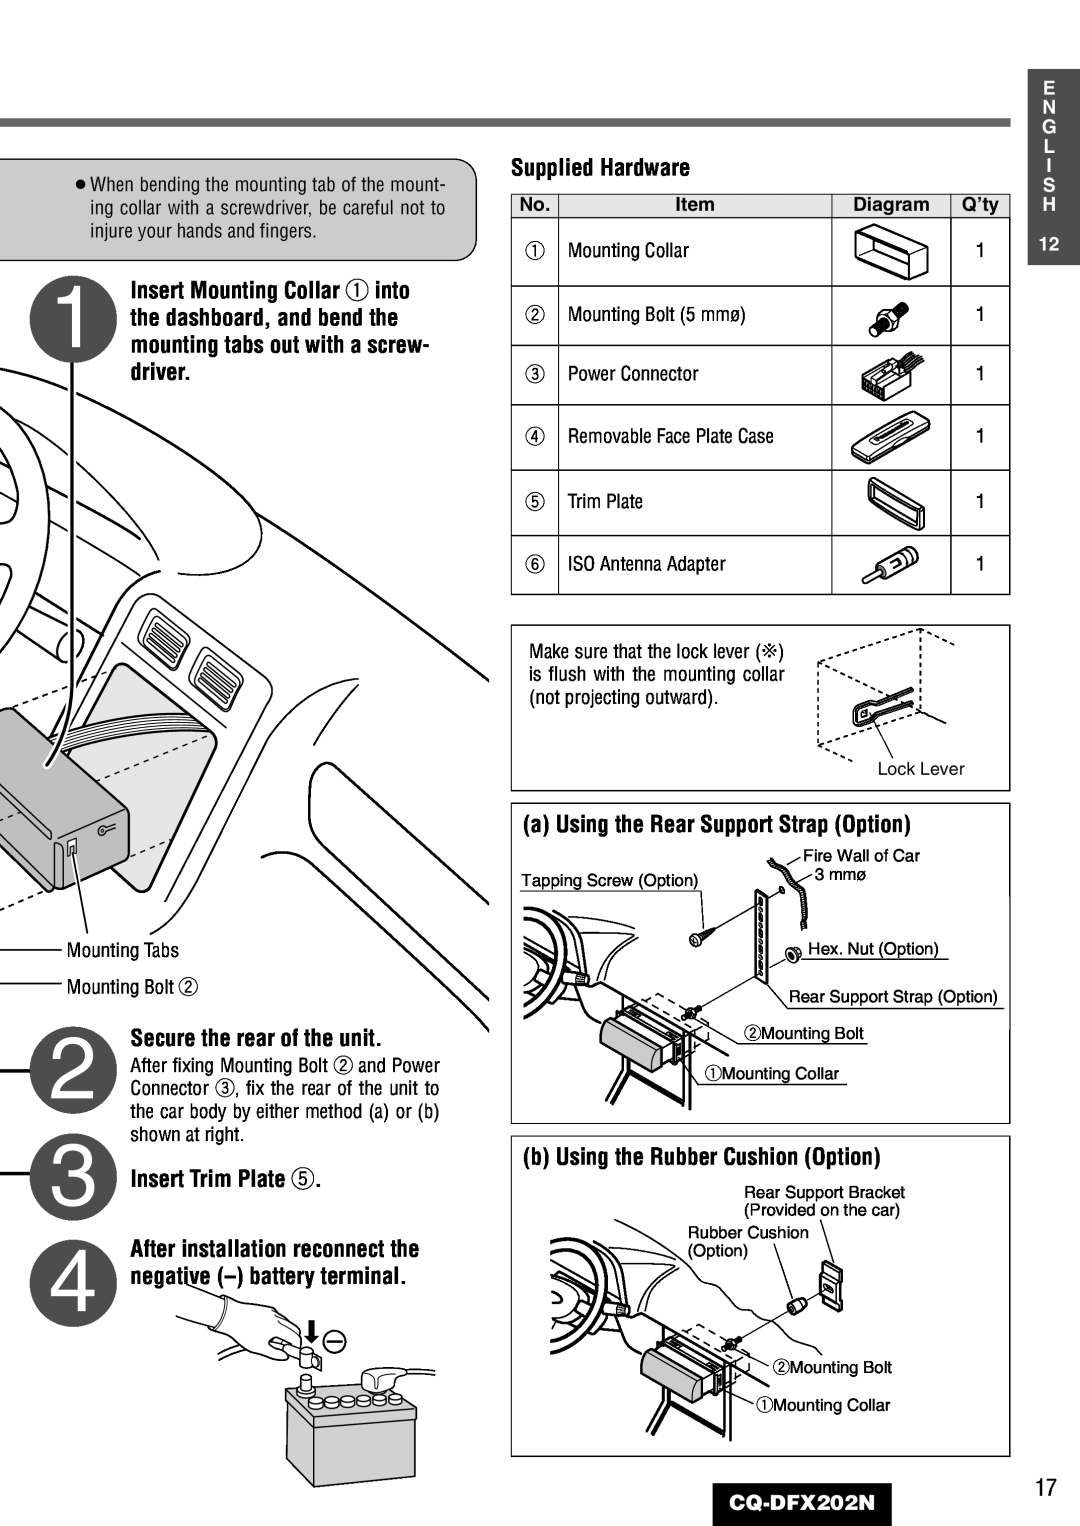
¡When bending the mounting tab of the mount- ing collar with a screwdriver, be careful not to injure your hands and fingers.
Insert Mounting Collar q into
1 the dashboard, and bend the mounting tabs out with a screw- driver.
Mounting Tabs
Mounting Bolt w
Secure the rear of the unit.
2 After fixing Mounting Bolt w and Power Connector e, fix the rear of the unit to the car body by either method (a) or (b) shown at right.
3 Insert Trim Plate t.
After installation reconnect the
4 negative (–) battery terminal.
|
|
| E |
|
|
| N |
|
|
| G |
Supplied Hardware |
| L | |
| I | ||
No. | Item | Diagram Q’ty | S |
H | |||
q | Mounting Collar | 1 | 12 |
| |||
w Mounting Bolt (5 mmø) | 1 |
| |
e | Power Connector | 1 |
|
r Removable Face Plate Case | 1 |
| |
t | Trim Plate | 1 |
|
y | ISO Antenna Adapter | 1 |
|
Make sure that the lock lever (C) is flush with the mounting collar (not projecting outward).
Lock Lever
(a) Using the Rear Support Strap (Option) | |
| Fire Wall of Car |
Tapping Screw (Option) | 3 mmø |
| |
| Hex. Nut (Option) |
| Rear Support Strap (Option) |
| wMounting Bolt |
| qMounting Collar |
(b) Using the Rubber Cushion (Option)
Rear Support Bracket (Provided on the car)
Rubber Cushion (Option)
wMounting Bolt
qMounting Collar
17