CARE & MAINTENANCE
Switch off the power supply before cleaning
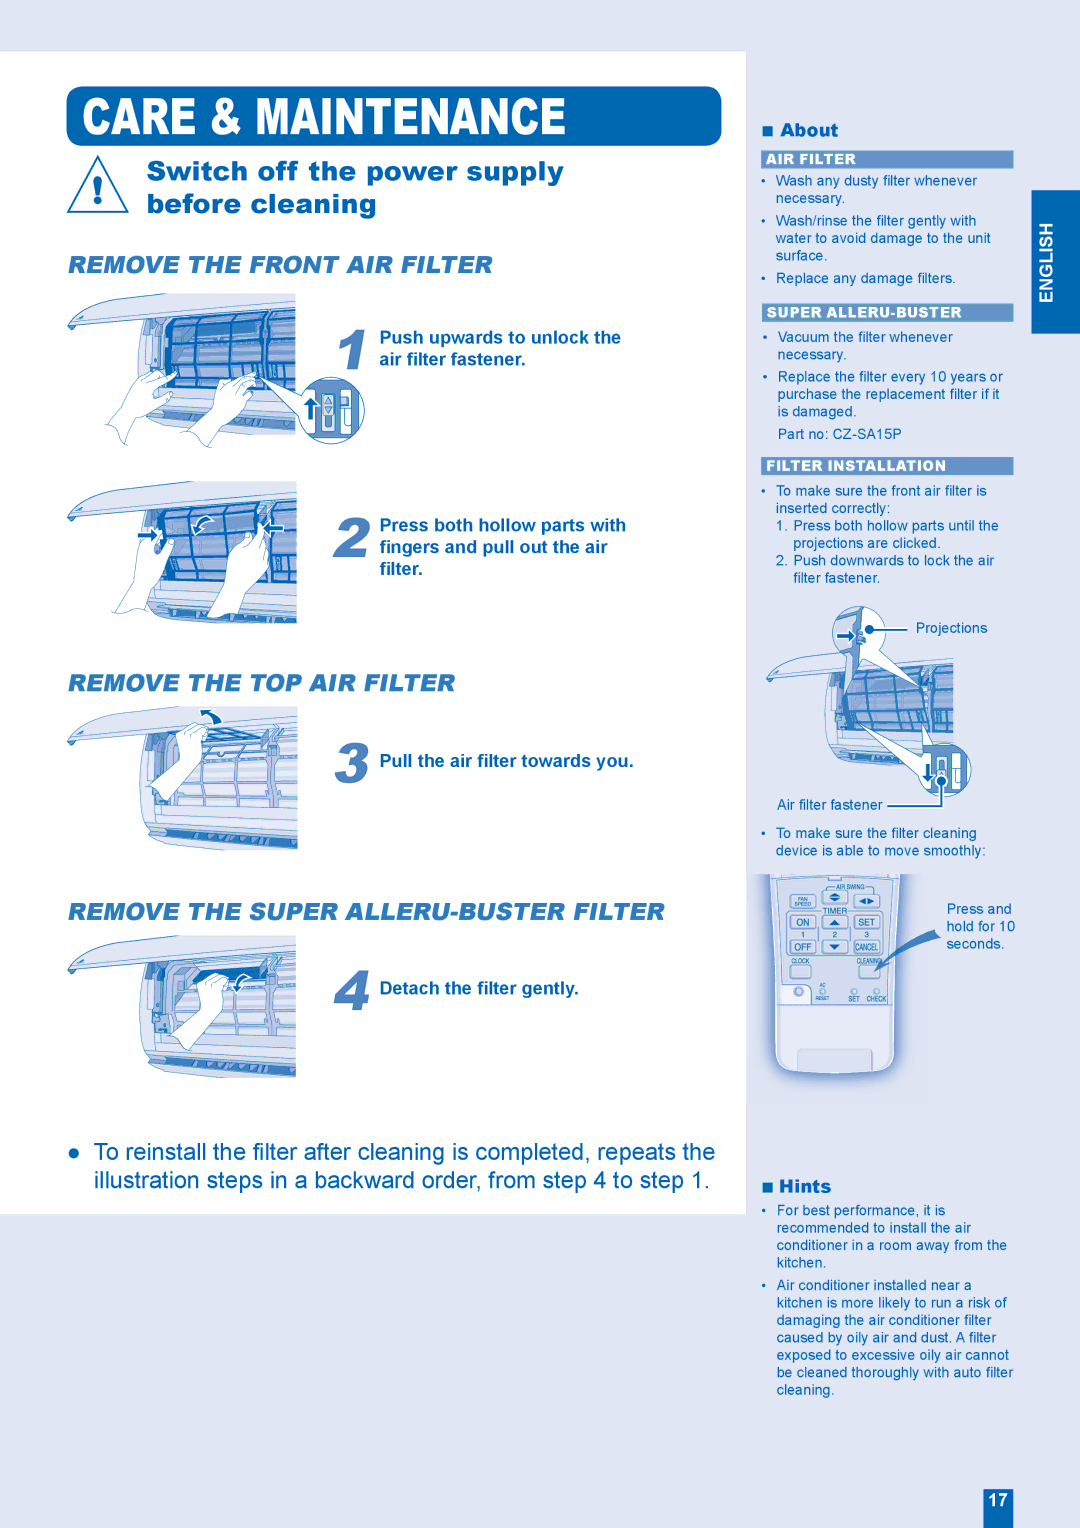
REMOVE THE FRONT AIR FILTER
■ About
AIR FILTER |
|
• Wash any dusty filter whenever |
|
necessary. |
|
• Wash/rinse the filter gently with | ENGLISH |
water to avoid damage to the unit | |
surface. | |
• Replace any damage filters. | |
|
 1
1  2
2
Push upwards to unlock the air filter fastener.
Press both hollow parts with fingers and pull out the air filter.
SUPER |
•Vacuum the filter whenever necessary.
•Replace the filter every 10 years or purchase the replacement filter if it is damaged.
Part no:
FILTER INSTALLATION
•To make sure the front air filter is inserted correctly:
1.Press both hollow parts until the projections are clicked.
2.Push downwards to lock the air filter fastener.
Projections
REMOVE THE TOP AIR FILTER
3 Pull the air filter towards you.
REMOVE THE SUPER ALLERU-BUSTER FILTER
4 Detach the filter gently.
●To reinstall the filter after cleaning is completed, repeats the illustration steps in a backward order, from step 4 to step 1.
Air filter fastener ![]()
•To make sure the filter cleaning device is able to move smoothly:
Press and hold for 10 seconds.
■Hints
•For best performance, it is recommended to install the air conditioner in a room away from the kitchen.
•Air conditioner installed near a kitchen is more likely to run a risk of damaging the air conditioner filter caused by oily air and dust. A filter exposed to excessive oily air cannot be cleaned thoroughly with auto filter cleaning.
17