PRODUCT OVERVIEW | ■ About |
Remote Control | Remote Control Preparation |
| |
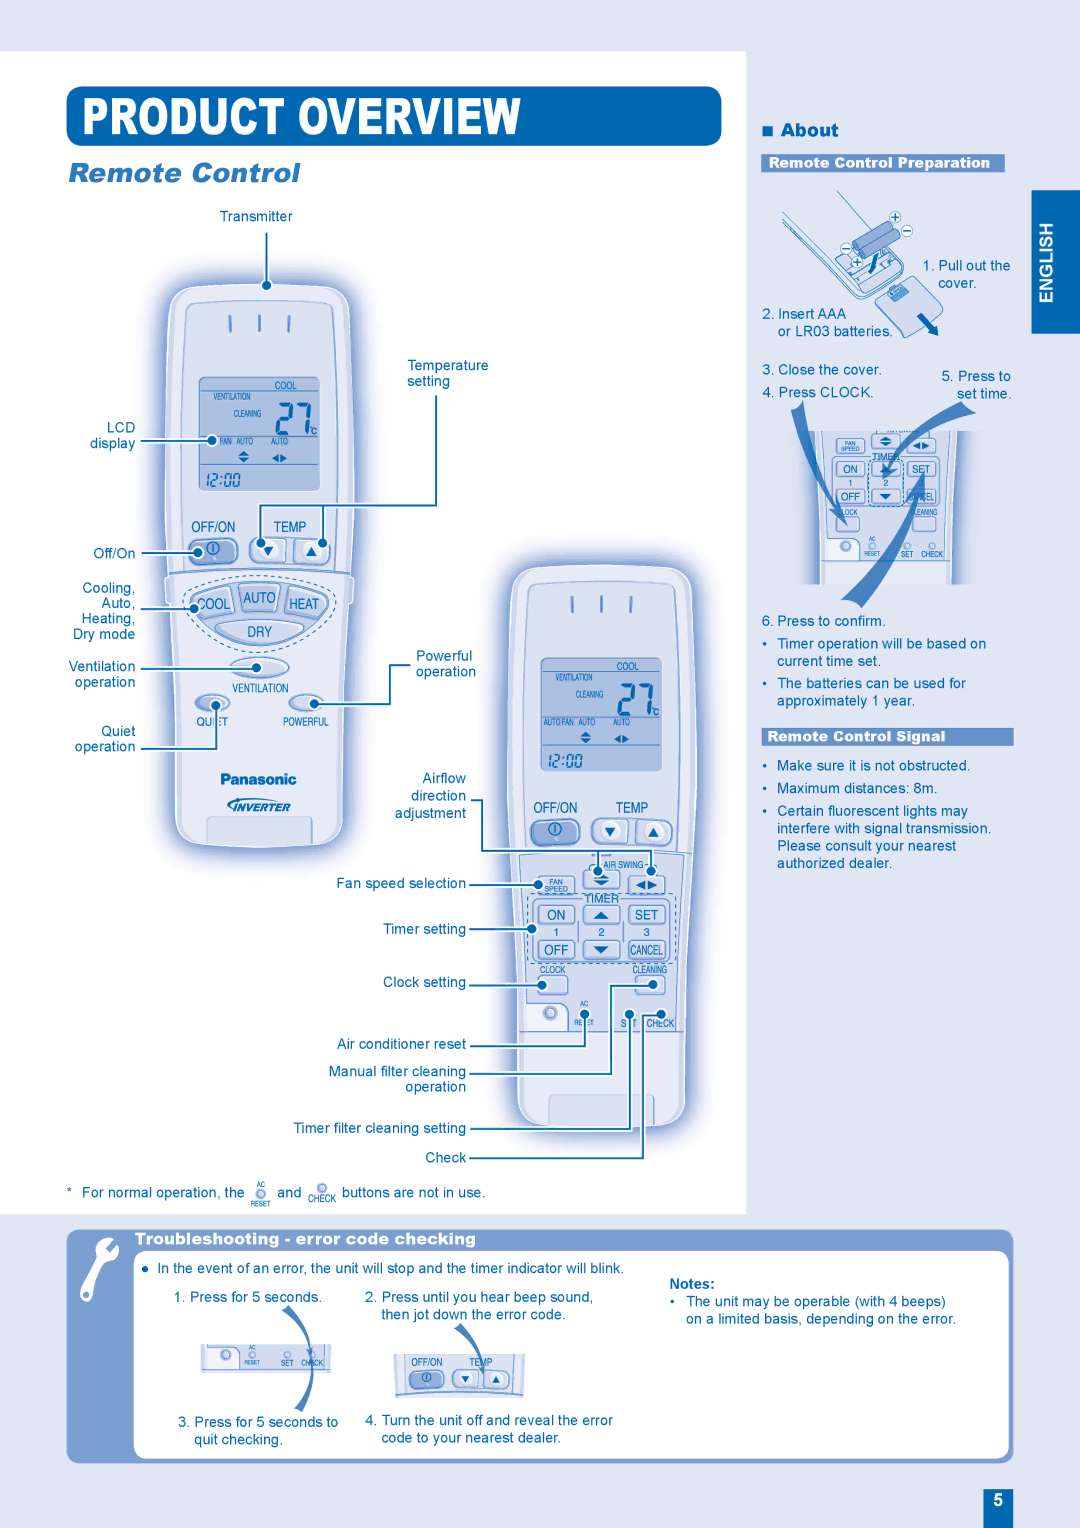
Transmitter |
|
| 1. Pull out the |
| cover. |
| 2. Insert AAA |
| or LR03 batteries. |
ENGLISH
| Temperature | |
| setting | |
LCD |
| |
display |
| |
Off/On |
| |
Cooling, |
| |
Auto, |
| |
Heating, |
| |
Dry mode |
| |
Ventilation | Powerful | |
operation | ||
operation | ||
| ||
Quiet |
| |
operation |
|
Airflow |
direction |
adjustment |
Fan speed selection |
Timer setting ![]()
Clock setting ![]()
Air conditioner reset
Manual filter cleaning operation
Timer filter cleaning setting
Check
* For normal operation, the | and | buttons are not in use. |
3. Close the cover. | 5. Press to | |
4. Press CLOCK. | ||
set time. |
6. Press to confirm.
•Timer operation will be based on current time set.
•The batteries can be used for approximately 1 year.
Remote Control Signal
•Make sure it is not obstructed.
•Maximum distances: 8m.
•Certain fluorescent lights may interfere with signal transmission. Please consult your nearest authorized dealer.
Troubleshooting - error code checking
●In the event of an error, the unit will stop and the timer indicator will blink.
1. Press for 5 seconds. | 2. Press until you hear beep sound, | Notes: |
• The unit may be operable (with 4 beeps) | ||
| then jot down the error code. | on a limited basis, depending on the error. |
3.Press for 5 seconds to quit checking.
4.Turn the unit off and reveal the error code to your nearest dealer.
5
