Forward Rotation Switch Operation
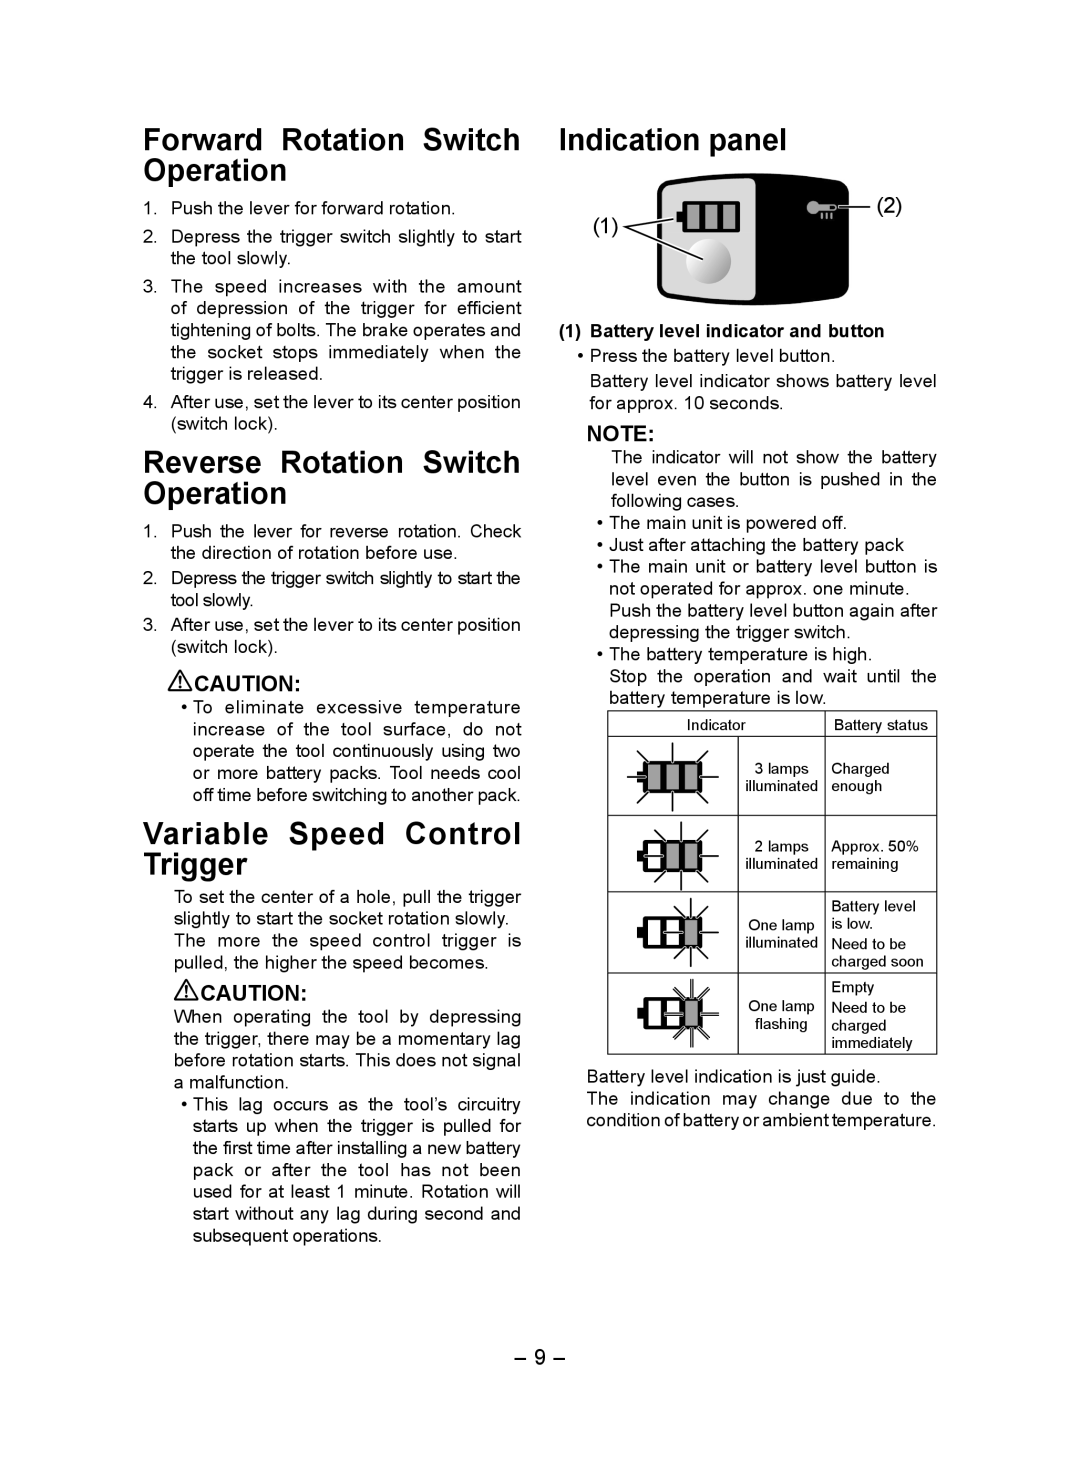
Indication panel
1. | Push the lever for forward rotation. |
2. | Depress the trigger switch slightly to start |
| the tool slowly. |
3. | The speed increases with the amount |
| of depression of the trigger for efficient |
(1)![]()
(2)
tightening of bolts. The brake operates and |
the socket stops immediately when the |
trigger is released. |
4. After use, set the lever to its center position |
(switch lock). |
Reverse Rotation Switch Operation
1.Push the lever for reverse rotation. Check the direction of rotation before use.
2.Depress the trigger switch slightly to start the tool slowly.
3.After use, set the lever to its center position (switch lock).
![]() CAUTION:
CAUTION:
•To eliminate excessive temperature increase of the tool surface, do not operate the tool continuously using two or more battery packs. Tool needs cool off time before switching to another pack.
Variable Speed Control Trigger
To set the center of a hole, pull the trigger slightly to start the socket rotation slowly. The more the speed control trigger is pulled, the higher the speed becomes.
![]() CAUTION:
CAUTION:
When operating the tool by depressing the trigger, there may be a momentary lag before rotation starts. This does not signal
amalfunction.
•This lag occurs as the tool’s circuitry starts up when the trigger is pulled for the first time after installing a new battery pack or after the tool has not been used for at least 1 minute. Rotation will start without any lag during second and subsequent operations.
(1)Battery level indicator and button
•Press the battery level button.
Battery level indicator shows battery level for approx. 10 seconds.
NOTE:
The indicator will not show the battery level even the button is pushed in the following cases.
•The main unit is powered off.
•Just after attaching the battery pack
•The main unit or battery level button is not operated for approx. one minute. Push the battery level button again after depressing the trigger switch.
•The battery temperature is high.
Stop the operation and wait until the battery temperature is low.
|
|
|
|
|
|
| Indicator | Battery status | ||
|
|
|
|
|
|
|
|
| 3 lamps | Charged |
|
|
|
|
|
|
|
|
| ||
|
|
|
|
|
|
|
|
| illuminated | enough |
|
|
|
|
|
|
|
|
| ||
|
|
|
|
|
|
|
|
| ||
|
|
|
|
|
|
|
|
|
|
|
|
|
|
|
|
|
|
|
| 2 lamps | Approx. 50% |
|
|
|
|
|
|
|
|
| ||
|
|
|
|
|
|
|
|
| illuminated | remaining |
|
|
|
|
|
|
|
|
| ||
|
|
|
|
|
|
|
|
| ||
|
|
|
|
|
|
|
|
|
|
|
|
|
|
|
|
|
|
|
|
| Battery level |
|
|
|
|
|
|
|
|
| One lamp | is low. |
|
|
|
|
|
|
|
|
| ||
|
|
|
|
|
|
|
|
| illuminated | Need to be |
|
|
|
|
|
|
|
|
| ||
|
|
|
|
|
|
|
|
|
| charged soon |
|
|
|
|
|
|
|
|
| One lamp | Empty |
|
|
|
|
|
|
|
|
| Need to be | |
|
|
|
|
|
|
|
|
| ||
|
|
|
|
|
|
|
|
| flashing | charged |
|
|
|
|
|
|
|
|
| ||
|
|
|
|
|
|
|
|
|
| immediately |
Battery level indication is just guide.
The indication may change due to the condition of battery or ambient temperature.
- 9 -