TGA914E(e).book Page 17 Friday, July 28, 2006 12:09 PM
Useful Information
Mounting the cordless camera on the wall
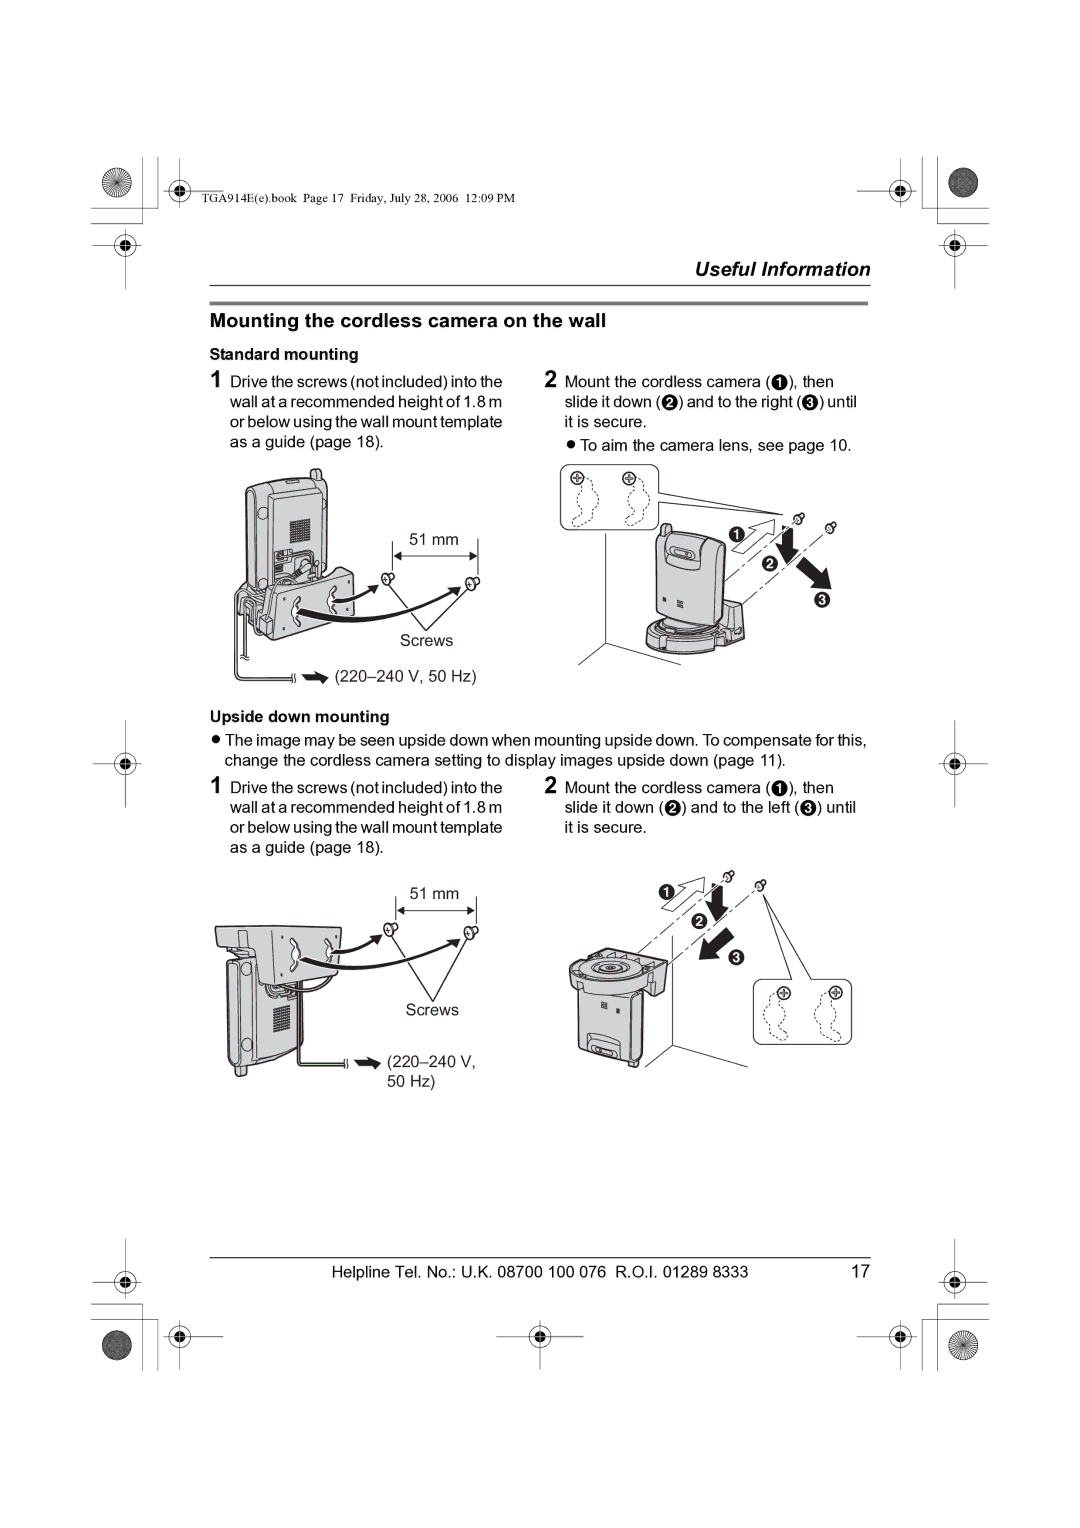
Standard mounting
1 Drive the screws (not included) into the wall at a recommended height of 1.8 m or below using the wall mount template as a guide (page 18).
51 mm
Screws
![]()
![]()
Upside down mounting
2 Mount the cordless camera (A), then slide it down (B) and to the right (C) until it is secure.
LTo aim the camera lens, see page 10.
A
B
C
LThe image may be seen upside down when mounting upside down. To compensate for this, change the cordless camera setting to display images upside down (page 11).
1 Drive the screws (not included) into the wall at a recommended height of 1.8 m or below using the wall mount template as a guide (page 18).
51 mm
Screws
![]()
![]()
50 Hz)
2 Mount the cordless camera (A), then slide it down (B) and to the left (C) until it is secure.
A
B
C
Helpline Tel. No.: U.K. 08700 100 076 R.O.I. 01289 8333 | 17 |
| ||||
|
|
|
|
|
|
|
|
|
|
|
|
|
|
|
|
|
|
|
|
|