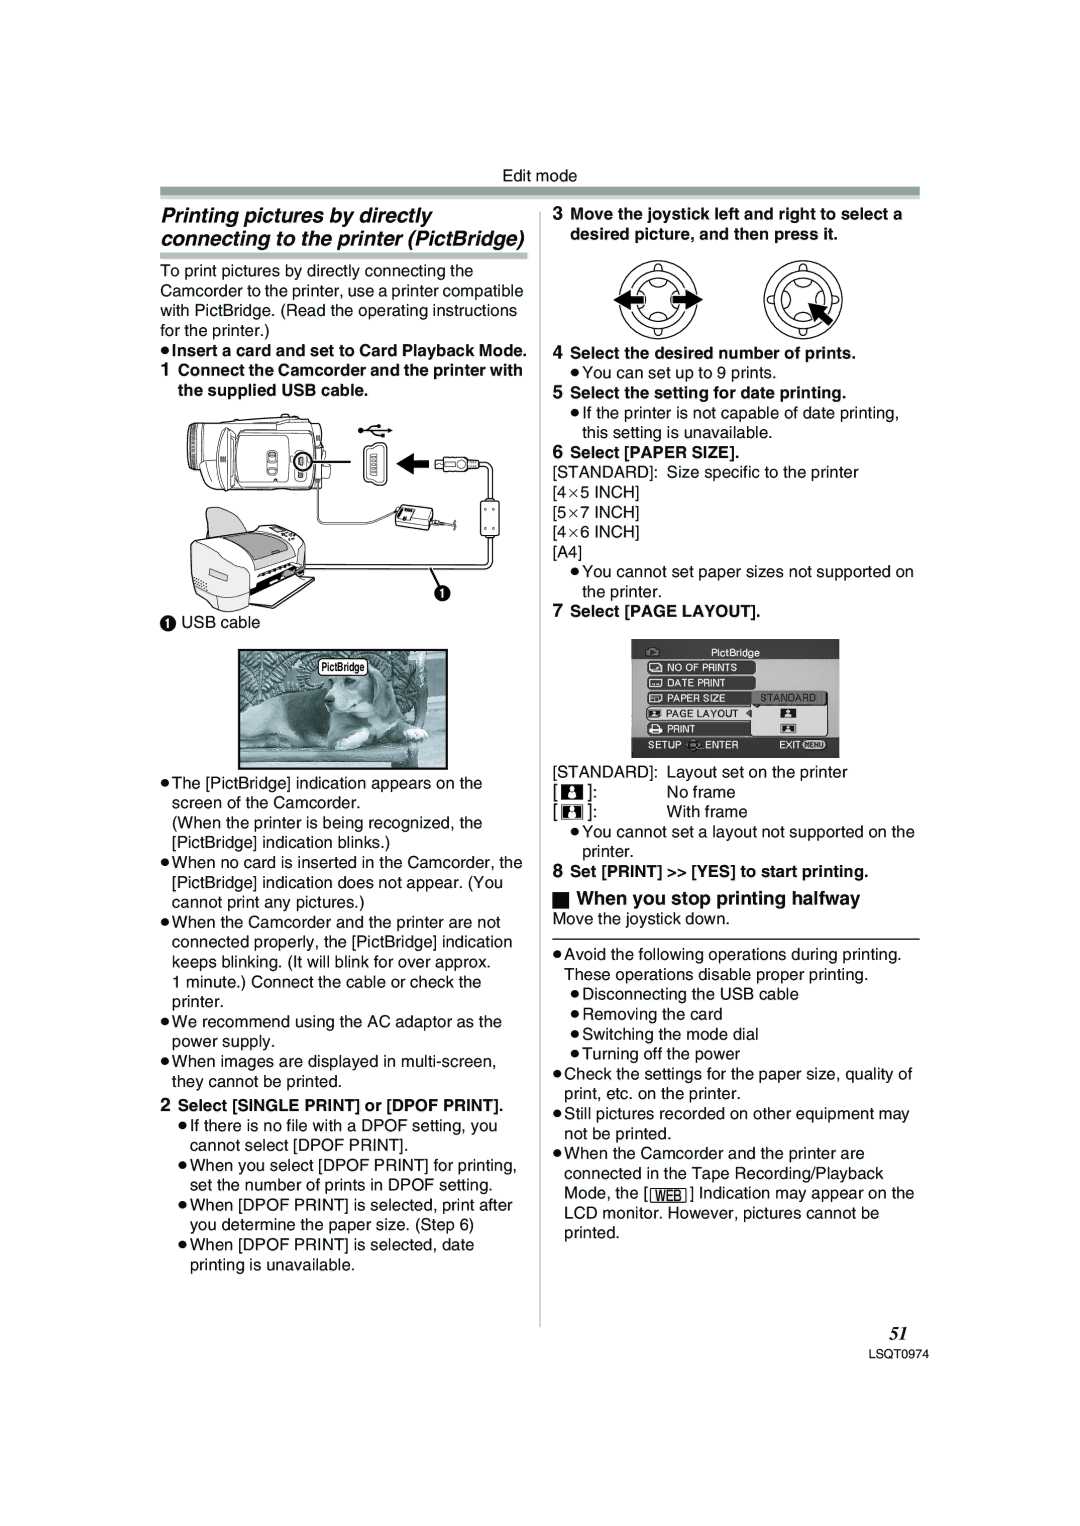
PV-GS300, NV-GS300B specifications
The Panasonic NV-GS300B and PV-GS300 camcorders are renowned models that cater to both amateur and semi-professional videographers seeking high-quality video capabilities. These camcorders stand out due to their advanced features, ergonomic design, and user-friendly interfaces, which make them ideal for capturing life's moments with clarity and precision.One of the main features of the NV-GS300B and PV-GS300 is their 3CCD technology. This system allows for accurate color reproduction by utilizing three separate image sensors for red, green, and blue. The result is vibrant and true-to-life colors, making these camcorders an excellent choice for filming in various lighting conditions. The 1/6-inch CCD sensors provide high-resolution output, ensuring sharp images and smooth video playback.
Both models are equipped with a Leica Dicomar lens, known for its exceptional quality and performance. With a focal length of 6.0-72.0mm, these lenses deliver a versatile zoom range of 10x optical zoom, complemented by a 700x digital zoom, enabling users to capture distant subjects without compromising on image quality. The optical image stabilization feature further enhances stability, reducing shakes and blurring for clear footage, even during handheld shooting.
The NV-GS300B and PV-GS300 also incorporate an intuitive touchscreen LCD display that measures 2.7 inches diagonally. This display provides easy navigation through menus and settings, allowing users to quickly adjust their configurations and review footage with minimal hassle. The camcorders also support various recording formats, including DV and MPEG-2, giving users flexibility in choosing how to store and share their videos.
For audio quality, these models include built-in stereo microphones and support for external microphones, ensuring high-fidelity sound capture to complement the impressive video. With features such as a built-in speaker and headphone jack, users can monitor audio levels during recording.
Moreover, both camcorders support digital effects and transitions, enabling users to enhance their videos creatively. They also offer various scene modes, auto-focus options, and manual controls to accommodate different shooting scenarios, making them versatile tools for storytelling.
In conclusion, the Panasonic NV-GS300B and PV-GS300 are equipped with state-of-the-art features and technologies that enhance video quality, versatility, and usability. With their compact design, advanced recording capabilities, and user-friendly interfaces, these camcorders are reliable choices for anyone looking to capture high-definition, memorable moments with ease.