NOTE:
B If using this projector in places |
such as cafes or hotels to display |
programmes for a commercial |
purpose or for public |
presentation, note that if the |
aspect ratio (16:9) selection |
function is used to change the |
aspect ratio of the screen |
picture, you may be infringing the |
rights of the original copyright |
DETAILED SETUP
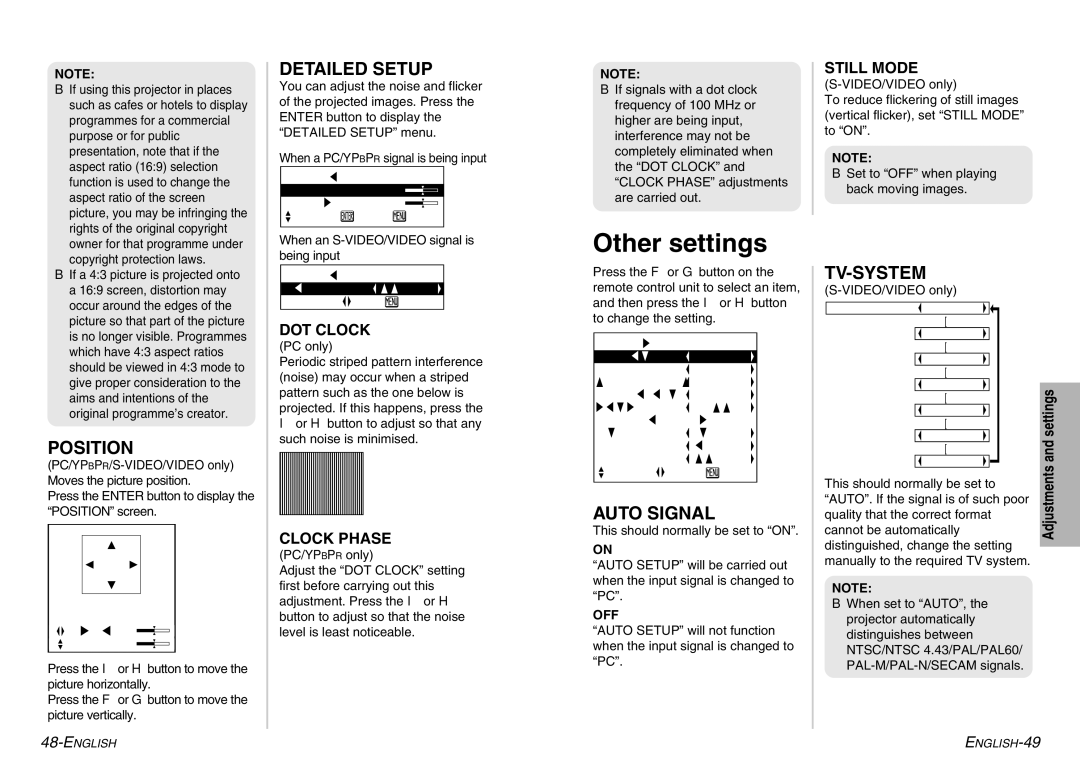
You can adjust the noise and flicker of the projected images. Press the ENTER button to display the “DETAILED SETUP” menu.
When a PC/YPBPR signal is being input
DETAILED | SETUP |
DOT CLOCK | 32 |
CLOCK PHASE | 16 |
![]() SELECT
SELECT![]() ENTER
ENTER![]() RETRN
RETRN
NOTE:
BIf signals with a dot clock frequency of 100 MHz or higher are being input, interference may not be completely eliminated when the “DOT CLOCK” and “CLOCK PHASE” adjustments are carried out.
STILL MODE
To reduce flickering of still images (vertical flicker), set “STILL MODE” to “ON”.
NOTE:
BSet to “OFF” when playing back moving images.
owner for that programme under |
copyright protection laws. |
B If a 4:3 picture is projected onto |
a 16:9 screen, distortion may |
occur around the edges of the |
picture so that part of the picture |
is no longer visible. Programmes |
which have 4:3 aspect ratios |
should be viewed in 4:3 mode to |
give proper consideration to the |
aims and intentions of the |
original programme’s creator. |
POSITION
Press the ENTER button to display the “POSITION” screen.
HORIZ.32![]()
VERT. 16![]()
Press the I or H button to move the picture horizontally.
Press the F or G button to move the picture vertically.
When an
DETAILED | SETUP | ||
STILL MODE | OFF | ||
|
| ADJ | RETRN |
|
| ||
|
|
|
|
DOT CLOCK
(PC only)
Periodic striped pattern interference (noise) may occur when a striped pattern such as the one below is projected. If this happens, press the
Ior H button to adjust so that any such noise is minimised.
CLOCK PHASE
(PC/YPBPR only)
Adjust the “DOT CLOCK” setting first before carrying out this adjustment. Press the I or H button to adjust so that the noise level is least noticeable.
Other settings
Press the F or G button on the remote control unit to select an item, and then press the I or H button to change the setting.
| OTHER SETUP | |||
AUTO | SIGNAL | ON | ||
AUTO | ||||
FRONT/REAR | FRONT | |||
DESK/CEILING | DESK | |||
HIGHLAND | OFF | |||
LAMP | RUNTIME | 10H | ||
SXGA | MODE | SXGA | ||
CTRL | PANEL | VALID | ||
NR |
|
|
| OFF |
|
| |||
SELECT |
| ADJ | RETRN | |
AUTO SIGNAL
This should normally be set to “ON”.
ON
“AUTO SETUP” will be carried out when the input signal is changed to “PC”.
OFF
“AUTO SETUP” will not function when the input signal is changed to “PC”.
TV-SYSTEM
[
NTSC
[
![]() NTSC4.43
NTSC4.43 ![]()
[
PAL
[
![]()
[
![]()
[
![]() SECAM
SECAM
This should normally be set to “AUTO”. If the signal is of such poor quality that the correct format cannot be automatically distinguished, change the setting manually to the required TV system.
NOTE:
BWhen set to “AUTO”, the projector automatically distinguishes between NTSC/NTSC 4.43/PAL/PAL60/
Adjustments and settings
