Before Requesting Service

Check the following points once again if you are having trouble with your VCR.

(BO : refers to “Basic Operations” Instruction book.)

(AO : refers to “Advanced Operations” Instruction book.)

Power


Correction

No power…

Completely insert Power Plug into an AC outlet.


Set POWER button to on.


Make sure power source is active.


Recording & Playback


Correction

TV program cannot be recorded...

Check connections between VCR, external antenna, and


TV.


Check connections selection. (BO p. 4, AO p. 3)


Make sure your antenna system (CABLE or TV) is


correctly set. (Channels [AO p. 12])


Make sure cassette record tab is intact. (BO p. 3)


Timer recording cannot be

Confirm that clock is set to current time and date.

performed…

Make sure Cable/DSS box (if used) is left on and tuned to


channel to be recorded.


Set recording start/stop times correctly. (BO p. 6)


Make sure VCR POWER button is pressed off. (BO p. 6)


Timer recording may not be performed or continued if a


power interruption occurs before or during a Timer


Recording, even after power is restored.


There is no playback picture, or the

Select channel 3 or 4 on TV to match VCR output channel

playback picture is noisy or contains


(3 or 4) (BO p. 4) or select LINE.

streaks...

Set VCR/TV selector to “VCR.”


Adjust TRACKING control in either direction. (BO p. 3)


Try Head Cleaning. (BO p. 3)

Special effects playback, picture may

Set TV’s Vertical Hold Control to MANUAL, then adjust.

contain some vertical jitter when using


a TV with an Automatic Vertical Hold


Control...


VCR cannot be controlled...

Make sure VCR power is on.


Check Remote batteries.


Make sure VCR LOCK is set to off. (AO p. 10)


Make sure Timer Record is not in progress.


Remote Control


Correction

VCR cannot be remote controlled...

Make sure VCR power is on.

Make sure Remote is in VCR mode.


Aim Remote Control directly at remote sensor on VCR.


(BO p. 7)


Avoid any object blocking signal path.


Check Remote batteries. (BO p. 3)


Make sure VCR LOCK is set to off. (AO p. 10)


Exposing VCR remote sensor to direct fluorescent or


outdoor light may cause signal interference.


ACTION and PROG buttons do not

Check connections between VCR, external antenna, and

respond...


TV.


Press VCR button for VCR mode. (AO p. 2)


Check Remote batteries. (BO p. 3)


Miscellaneous


Correction

Programs cannot be viewed on TV...

Make sure TV power is on.

Make sure TV is set to output of VCR.


Check connections between VCR, external antenna, and


TV.


Set VCR/TV selector to “TV.” (BO p. 5, AO p.10)

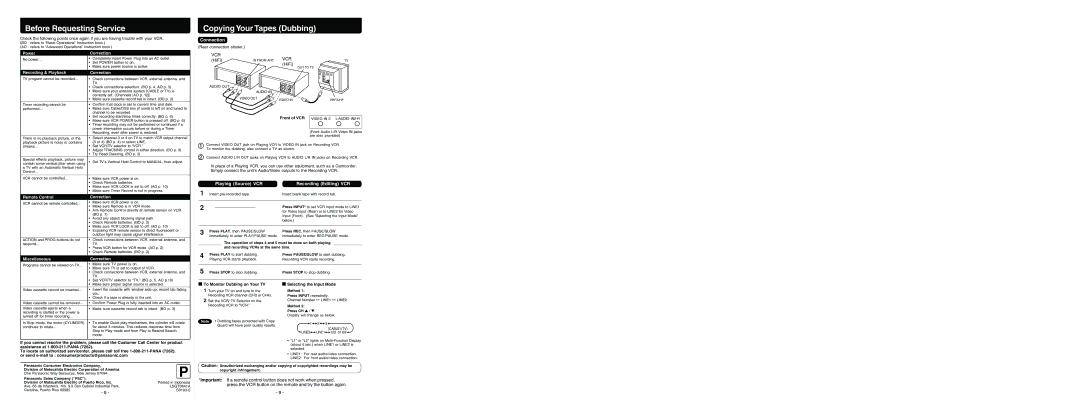
Copying Your Tapes (Dubbing)

Connection

(Rear connection shown.)

VCR


(HiFi)

IN FROM ANT.

VCR

TV


(HiFi)


OUT TO TV


R


R


L


L


AUDIO OUT


R


L


AUDIO IN


VIDEO OUT

VIDEO IN

VHF/UHF


Front of VCR

VIDEO IN 2 L-AUDIO IN2-R


(Front Audio L/R Video IN jacks


are also provided)

1

Connect VIDEO OUT jack on Playing VCR to VIDEO IN jack on Recording VCR.


To monitor the dubbing, also connect a TV as shown.


2

Connect AUDIO L/R OUT jacks on Playing VCR to AUDIO L/R IN jacks on Recording VCR.

In place of a Playing VCR, you can use other equipment, such as a Camcorder. Simply connect the unit’s Audio/Video outputs to the Recording VCR.


Playing (Source) VCR

Recording (Editing) VCR

1

Insert pre-recorded tape.

Insert blank tape with record tab.


2


Press INPUT* to set VCR Input mode to LINE1


for Video Input (Rear) or to LINE2 for Video


Input (Front). (See “Selecting the Input Mode”


below.)


3

Press PLAY, then PAUSE/SLOW

Press REC, then PAUSE/SLOW


immediately to enter PLAY/PAUSE mode. immediately to enter REC/PAUSE mode.


The operation of steps 4 and 5 must be done on both playing


4


and recording VCRs at the same time.


Press PLAY to start dubbing.

Press PAUSE/SLOW to start dubbing.


Playing VCR starts playback.

Recording VCR starts recording.


5

Press STOP to stop dubbing.

Press STOP to stop dubbing.


Make sure proper signal source is selected.

Video cassette cannot be inserted...

Insert the cassette with window side up; record tab facing


you.


Check if a tape is already in the unit.


Video cassette cannot be removed...

Confirm Power Plug is fully inserted into an AC outlet.


Video cassette ejects when a

Make sure cassette record tab is intact. (BO p. 3)

recording is started or the power is


turned off for timer recording...


In Stop mode, the motor (CYLINDER)

To enable Quick play mechanism, the cylinder will rotate

continues to rotate...


for about 3 minutes. This reduces response time from


Stop to Play mode and from Play to Rewind Search


mode.

If you cannot resolve the problem, please call the Customer Call Center for product assistance at 1-800-211-PANA (7262).

To locate an authorized servicenter, please call toll free 1-800-211-PANA (7262). or send e-mail to : consumerproducts@panasonic.com

To Monitor Dubbing on Your TV

1Turn your TV on and tune to the Recording VCR channel (CH3 or CH4).

2Set the VCR/ TV Selector on the Recording VCR to “VCR.”

Note • Dubbing tapes protected with Copy Guard will have poor quality results.

Selecting the Input Mode

Method 1:

Press INPUT repeatedly.

Channel Number LINE1 LINE2

Method 2:

Press CH / .

Display will change as below.

123

(CABLE) (TV) LINE2LINE1125 or 69

“L1” or “L2” lights on Multi-Function Display (about 4 sec.) when LINE1 or LINE2 is selected.

LINE1: For rear audio/video connection.

LINE2: For front audio/video connection.

Panasonic Consumer Electronics Company,


P


Division of Matsushita Electric Corporation of America


One Panasonic Way Secaucus, New Jersey 07094


Panasonic Sales Company (“ PSC” ),


Division of Matsushita Electric of Puerto Rico, Inc.

Printed in Indonesia

Ave. 65 de Infantería. Km. 9.5 San Gabriel Industrial Park,

LSQT0641A

Carolina, Puerto Rico 00985

- 8 -

S0103-0


Caution : Unauthorized exchanging and/or copying of copyrighted recordings may be copyright infringement.

*Important: If a remote control button does not work when pressed, press the VCR button on the remote and try the button again.

- 9 -

Page 11
Image 11
Panasonic PV-V4603S Before Requesting Service, Copying Your Tapes Dubbing, Playing Source VCR Recording Editing VCR

PV-V4603S specifications

The Panasonic PV-V4603S is a high-performance VHS camcorder that epitomizes the technology of its time, combining ease of use with a range of features designed for both amateur and professional videographers. Known for its reliable performance, this camcorder was designed to cater to the needs of users who sought high-quality video recording capabilities.

One of the standout features of the Panasonic PV-V4603S is its advanced video processing technology. It employs a robust VHS format that delivers good image clarity and sound quality, making it an excellent choice for capturing life’s fleeting moments. The camcorder offers a compact design, making it easy to handle and transport, which is ideal for outdoor events, family gatherings, or vacation recordings.

Equipped with a powerful zoom lens, the PV-V4603S allows users to get close to their subjects with minimal loss of quality. The camcorder features a 22x optical zoom and a 700x digital zoom, providing exceptional versatility when it comes to framing shots from varying distances. This capability is particularly beneficial for capturing distant subjects with great detail.

The PV-V4603S also incorporates a sophisticated image stabilization technology that minimizes the impact of camera shake, resulting in smoother footage. This feature is particularly useful when shooting handheld or while moving, ensuring that the video remains steady and watchable.

In terms of user interface, the Panasonic PV-V4603S features an intuitive control layout, complete with a bright LCD screen that allows users to view and compose their shots effortlessly. This display provides real-time feedback when recording, enabling adjustments on the fly.

For those looking to maintain footage over time, the camcorder supports long-play mode, allowing for extended recording times without compromising video quality. Additionally, the PV-V4603S supports various playback functionalities, enabling users to review their recordings conveniently.

Overall, the Panasonic PV-V4603S is a reliable and feature-rich camcorder, offering exceptional video quality, user-friendly operation, and advanced recording technologies. Its blend of performance and portability makes it a valued choice for anyone looking to capture high-quality home videos or professional projects. As an embodiment of VHS technology, it continues to hold nostalgia for many while delivering essential features that were groundbreaking in its era.