Changing the sound settings
For more details on each setting, refer to “Sound Settings” on the Option menu. (> 36)
Surround Effects
1Press [SURROUND].
2Press [3, 4] to select “MULTI CH SOURCE” or “2CH SOURCE”, and then press [OK]. e.g.,
3 While the mode is displayed |
Press [3, 4] to select the desired setting. |
Speaker installation option
Consult a qualified building contractor when attaching the speakers to a wall. Improper attachment may result in damage to the wall and speakers and personal injury.
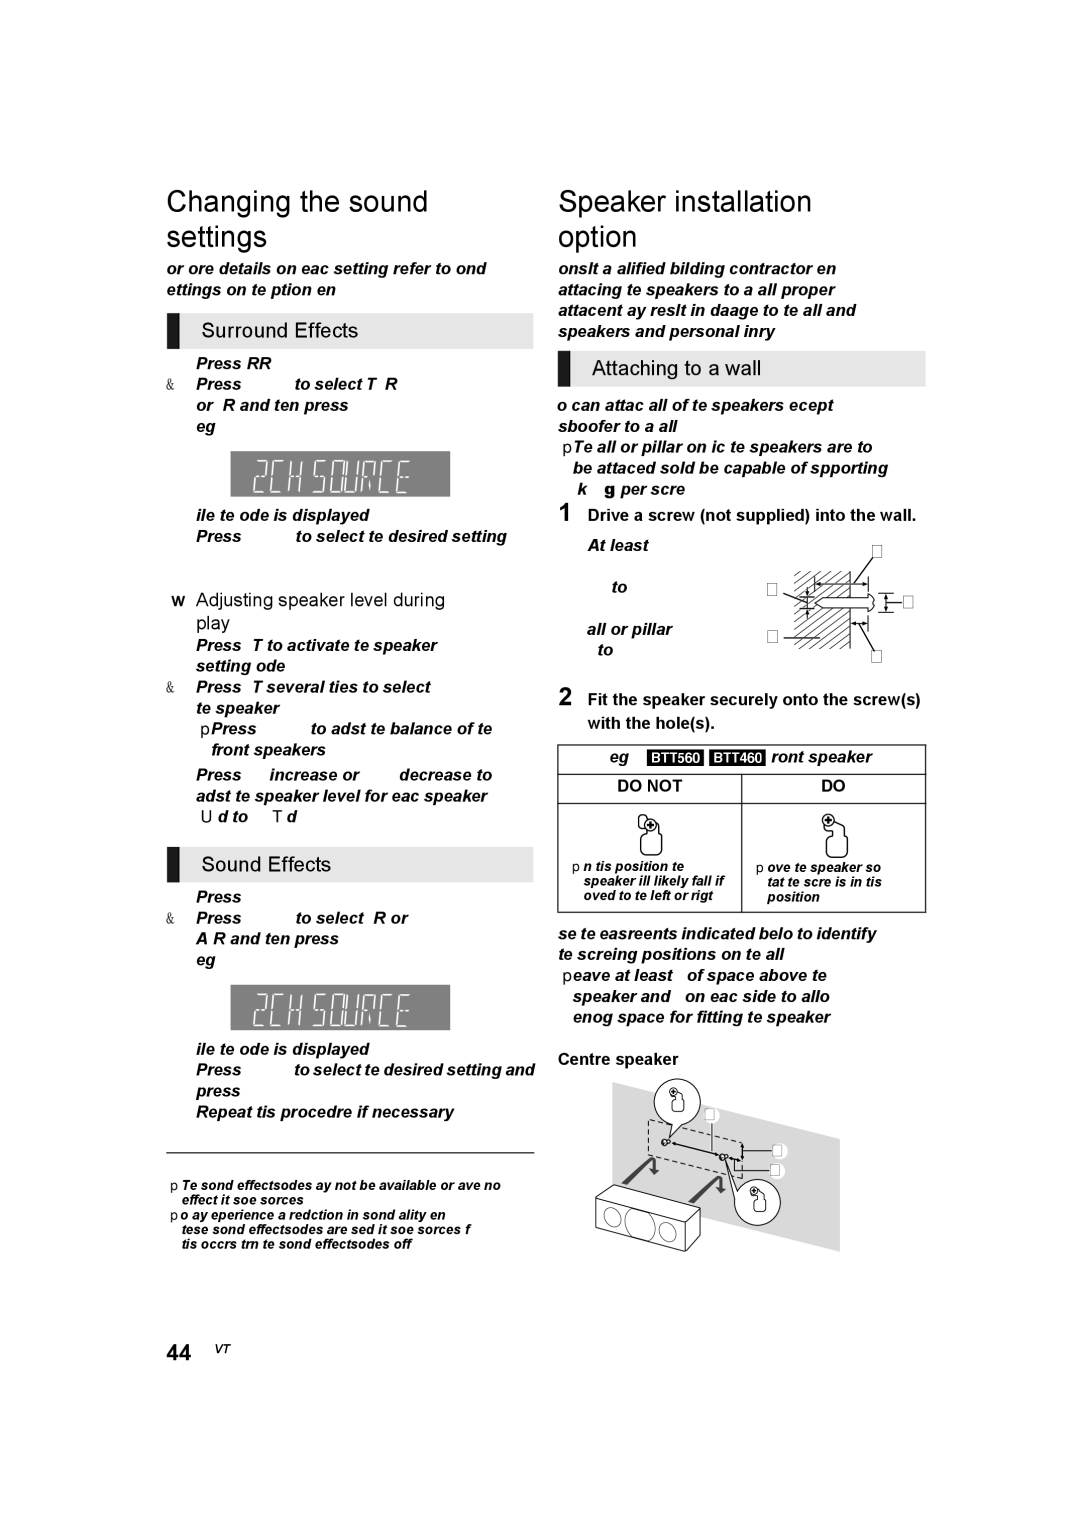
Attaching to a wall
You can attach all of the speakers (except subwoofer) to a wall.
≥The wall or pillar on which the speakers are to be attached should be capable of supporting 10 kg per screw.
1 Drive a screw (not supplied) into the wall.
(> 36) |
∫Adjusting speaker level during
play
1Press [CH SELECT] to activate the speaker setting mode.
AAt least 30 mm B ‰ 4.0 mm
C ‰ 7.0 mm to
‰9.4 mm
D Wall or pillar
E 5.5 mm to 7.5 mm
| |
| |
| |
|
|
| |
2Press [CH SELECT] several times to select the speaker.
≥Press [2, 1] to adjust the balance of the front speakers.
3Press [3] (increase) or [4] (decrease) to adjust the speaker level for each speaker. s6 dB to r6 dB
Sound Effects
1Press [SOUND].
2Press [3, 4] to select “2CH SOURCE” or “ALL SOURCE”, and then press [OK]. e.g.,
3While the mode is displayed
Press [3, 4] to select the desired setting and press [OK].
Repeat this procedure if necessary. (> 36)
≥The sound effects/modes may not be available or have no effect with some sources.
≥You may experience a reduction in sound quality when these sound effects/modes are used with some sources. If this occurs, turn the sound effects/modes off.
2 Fit the speaker securely onto the screw(s) with the hole(s).
e.g., [BTT560] [BTT460] Front speaker
DO NOT | DO |
≥ In this position, the | ≥ Move the speaker so |
speaker will likely fall if | that the screw is in this |
moved to the left or right. | position. |
Use the measurements indicated below to identify the screwing positions on the wall.
≥Leave at least 20 mm of space above the speaker and 10 mm on each side to allow enough space for fitting the speaker.
Centre speaker
![]()
![]()
A 17 mm B 52 mm C 175 mm
44 VQT4Q16