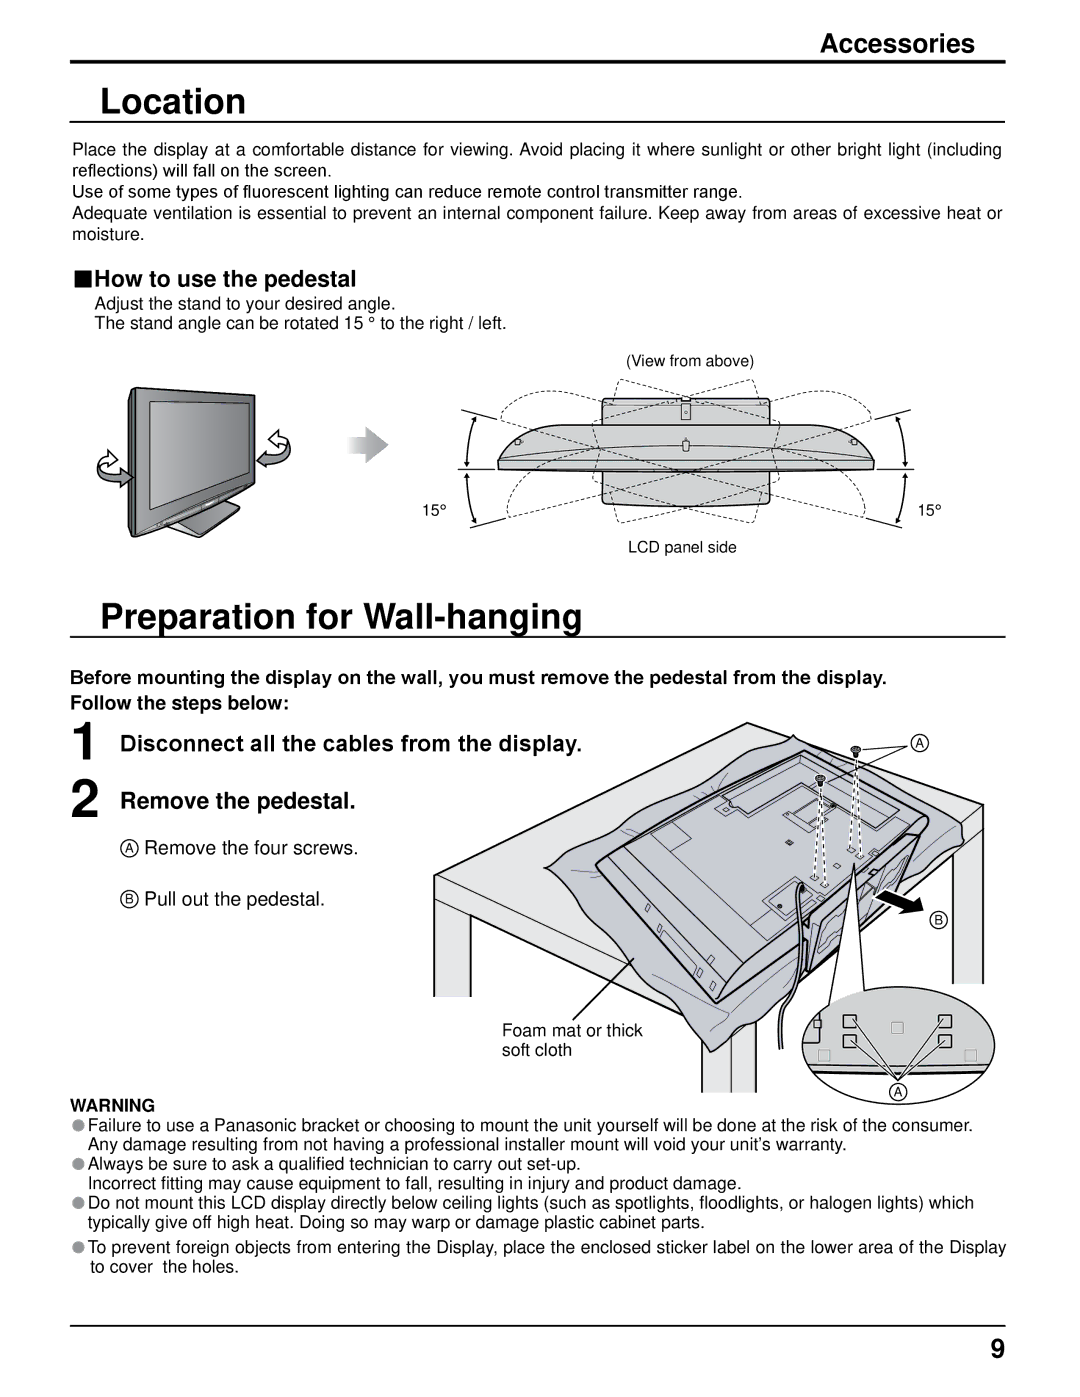
Foam mat or thick soft cloth
A
•WARNING
Failure to use a Panasonic bracket or choosing to mount the unit yourself will be done at the risk of the consumer.
•Any damage resulting from not having a professional installer mount will void your unit’s warranty. Always be sure to ask a qualified technician to carry out set-up.
•Incorrect fitting may cause equipment to fall, resulting in injury and product damage.
Do not mount this LCD display directly below ceiling lights (such as spotlights, floodlights, or halogen lights) which typically give off high heat. Doing so may warp or damage plastic cabinet parts.
•To prevent foreign objects from entering the Display, place the enclosed sticker label on the lower area of the Display to cover the holes.
B
A Remove the four screws. B Pull out the pedestal.
Remove the pedestal.
A
Disconnect all the cables from the display.
Before mounting the display on the wall, you must remove the pedestal from the display. Follow the steps below:
1
2
Preparation for Wall-hanging
LCD panel side
15°
15°
Accessories
Location
Place the display at a comfortable distance for viewing. Avoid placing it where sunlight or other bright light (including reflections) will fall on the screen.
Use of some types of fluorescent lighting can reduce remote control transmitter range.
Adequate ventilation is essential to prevent an internal component failure. Keep away from areas of excessive heat or moisture.
■How to use the pedestal
Adjust the stand to your desired angle.
The stand angle can be rotated 15 ° to the right / left.
(View from above)
