Adjusting Picture Pos./Size
Adjusting screen
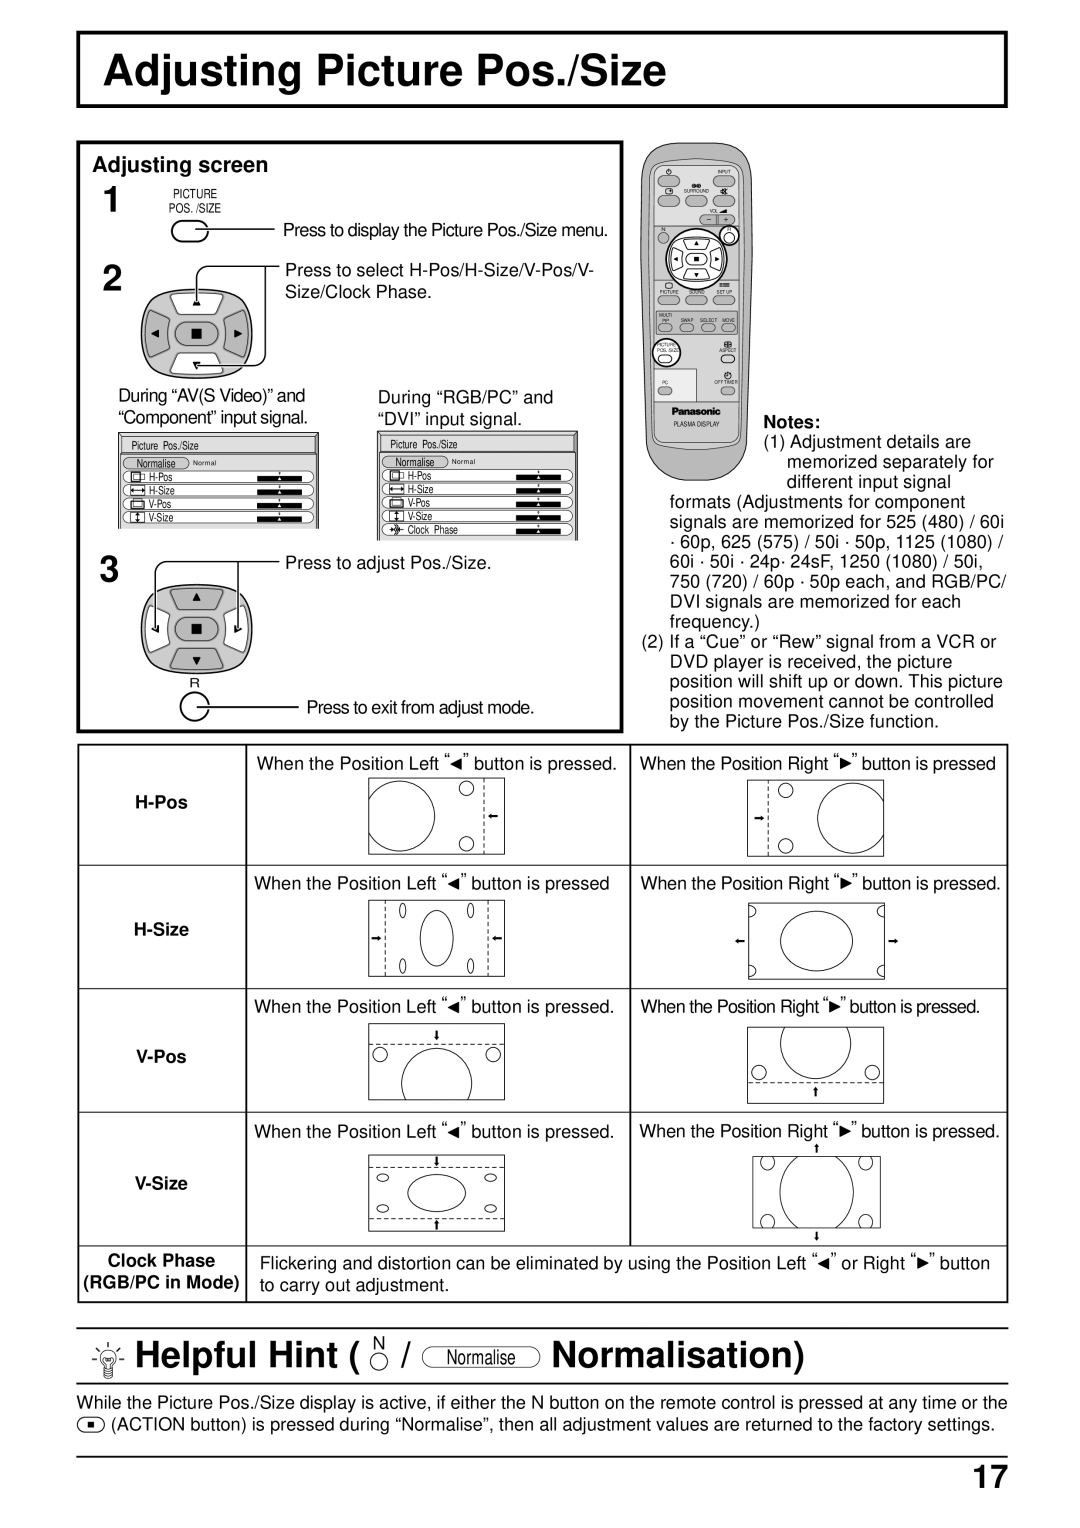
1 PICTURE POS. /SIZE
Press to display the Picture Pos./Size menu.
2 | Press to select |
Size/Clock Phase. |
During “AV(S Video)” and | During “RGB/PC” and |
“Component” input signal. | “DVI” input signal. |
Picture Pos./Size | Picture Pos./Size | ||
Normalise | Normal | Normalise | Normal |
|
| ||
|
| ||
|
| ||
|
| ||
|
| Clock Phase | |
3 | Press to adjust Pos./Size. |
|
R
Press to exit from adjust mode.
|
| INPUT |
| SURROUND |
|
|
| VOL |
N |
| R |
PICTURE | SOUND | SET UP |
MULTI |
|
|
PIP | SWAP SELECT MOVE | |
PICTURE |
|
|
POS. /SIZE |
| ASPECT |
PC |
| OFF TIMER |
Notes:
(1)Adjustment details are memorized separately for
different input signal
formats (Adjustments for component signals are memorized for 525 (480) / 60i
· 60p, 625 (575) / 50i · 50p, 1125 (1080) / 60i · 50i · 24p· 24sF, 1250 (1080) / 50i, 750 (720) / 60p · 50p each, and RGB/PC/ DVI signals are memorized for each frequency.)
(2)If a “Cue” or “Rew” signal from a VCR or DVD player is received, the picture position will shift up or down. This picture position movement cannot be controlled by the Picture Pos./Size function.
When the Position Left “![]() ” button is pressed. When the Position Right “
” button is pressed. When the Position Right “![]() ” button is pressed
” button is pressed
When the Position Left “![]() ” button is pressed When the Position Right “
” button is pressed When the Position Right “![]() ” button is pressed.
” button is pressed.
When the Position Left “![]() ” button is pressed. When the Position Right “
” button is pressed. When the Position Right “![]() ” button is pressed.
” button is pressed.
When the Position Left “![]() ” button is pressed. When the Position Right “
” button is pressed. When the Position Right “![]() ” button is pressed.
” button is pressed.
| |
Clock Phase | Flickering and distortion can be eliminated by using the Position Left “ ” or Right “ ” button |
(RGB/PC in Mode) | to carry out adjustment. |
 Helpful Hint ( N / Normalise Normalisation)
While the Picture Pos./Size display is active, if either the N button on the remote control is pressed at any time or the ![]() (ACTION button) is pressed during “Normalise”, then all adjustment values are returned to the factory settings.
(ACTION button) is pressed during “Normalise”, then all adjustment values are returned to the factory settings.
17