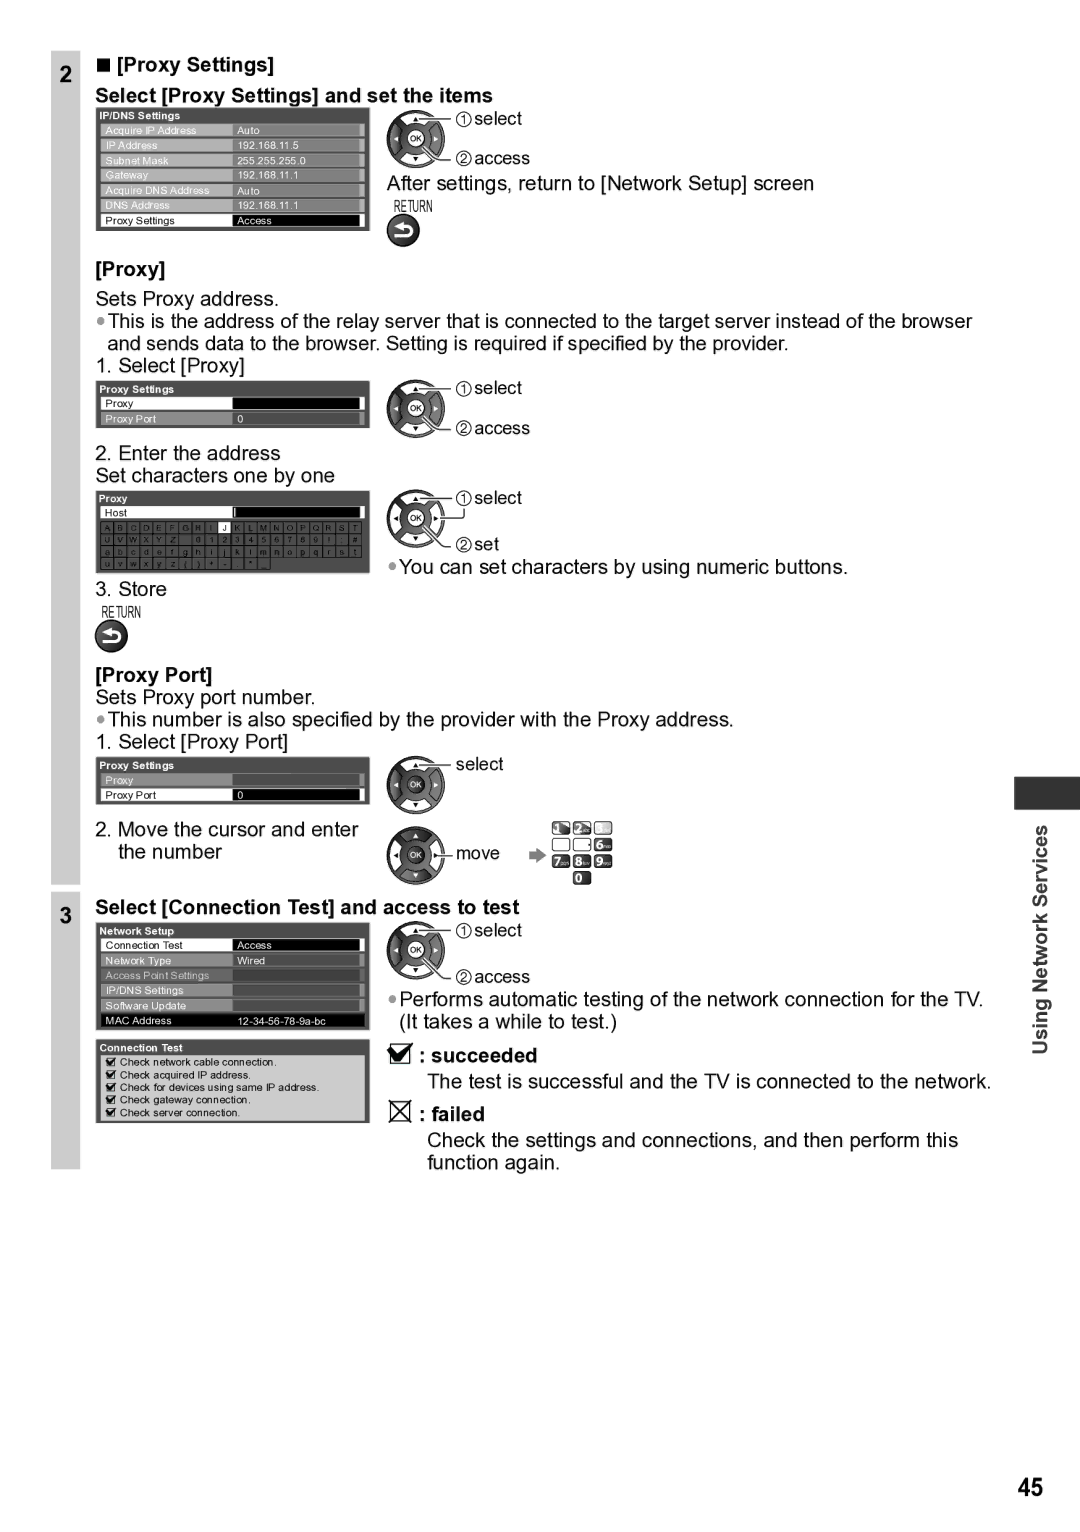
2■ [Proxy Settings]
Select [Proxy Settings] and set the items
IP/DNS Settings | Auto | select |
Acquire IP Address |
| |
IP Address | 192.168.11.5 | access |
Subnet Mask | 255.255.255.0 | |
Gateway | 192.168.11.1 | After settings, return to [Network Setup] screen |
Acquire DNS Address | Auto | |
DNS Address | 192.168.11.1 | RETURN |
Proxy Settings | Access |
|
[Proxy]
Sets Proxy address.
•This is the address of the relay server that is connected to the target server instead of the browser and sends data to the browser. Setting is required if specified by the provider.
1. Select [Proxy]
Proxy Settings |
| select |
Proxy |
|
|
Proxy Port | 0 | access |
|
|
2. Enter the address
Set characters one by one
Proxy |
|
|
|
|
|
|
|
|
|
|
|
|
|
|
|
| select | |||||||
|
|
|
|
|
|
|
|
|
|
|
|
|
|
|
| |||||||||
| Host |
|
|
|
|
|
|
|
|
|
|
|
|
|
|
|
|
| ||||||
|
|
|
|
|
|
|
|
|
|
|
|
|
|
|
|
|
|
|
|
|
|
|
|
|
| A | B | C | D | E | F | G | H | I | J | K | L | M | N | O | P | Q | R | S | T |
|
|
| set |
| U | V | W | X | Y | Z |
| 0 | 1 | 2 | 3 | 4 | 5 | 6 | 7 | 8 | 9 | ! | : | # |
|
|
| |
| a | b | c | d | e | f | g | h | i | j | k | l | m | n | o | p | q | r | s | t |
|
|
| |
|
|
|
|
|
|
|
|
|
|
|
|
|
|
|
|
|
|
|
|
|
| •You can set characters by using numeric buttons. | ||
| u | v | w | x | y | z | ( | ) | + | - | . | * | _ |
|
|
|
|
|
|
|
| |||
3. Store |
|
|
|
|
|
|
|
|
|
|
|
|
|
|
|
|
| |||||||
| RETURN |
|
|
|
|
|
|
|
|
|
|
|
|
|
|
|
|
| ||||||
[Proxy Port]
Sets Proxy port number.
•This number is also specified by the provider with the Proxy address. 1. Select [Proxy Port]
Proxy Settings | select |
Proxy |
|
Proxy Port | 0 |
2. Move the cursor and enter |
|
| abc | def |
the number | move | pqrs | tuv | wxyz |
|
| ghi | jkl | mno |
3Select [Connection Test] and access to test
![]()
![]() selectNetwork Setup
selectNetwork Setup
Connection Test | Access |
|
| |
|
|
|
| |
Network Type | Wired |
| access | |
Access Point Settings |
|
| ||
IP/DNS Settings |
|
| •Performs automatic testing of the network connection for the TV. | |
Software Update |
|
| ||
MAC Address |
| (It takes a while to test.) | ||
Connection Test |
| |||
|
| : succeeded | ||
Check network cable connection. | ||||
Check acquired IP address. | The test is successful and the TV is connected to the network. | |||
Check for devices using same IP address. | ||||
Check gateway connection. | : failed | |||
Check server connection. | ||||
| ||||
Check the settings and connections, and then perform this function again.
Using Network Services
45