3.Installing the wall-hanging bracket on the wall
Notes
•If it is necessary to embed bolts or nuts in the wall prior to installing the wall-hanging bracket because the wall is made of concrete, for instance, locate the positions of the holes by putting the actual wall-hanging bracket in place on the wall or by calculating the hole positions from the outline drawing, and then embed bolts and nuts with a nominal diameter of 6 mm (0.2 inches) or their equivalent. When embedding the bolts, ensure that their heads protrude by 10 to 15 mm (0.4 to 0.6 inches) from the surface of the wall.
In the case of the 46-inch model, limit the extent to which the screws and bolts used in the center holes of the base upper and lower fittings (3 holes on each fitting) protrude from the wall to within 5 mm (0.2 inches).
•For installing the wall-hanging bracket onto the wall, use screws with a nominal diameter of 6 mm (0.2 inches) or their equivalent available from a hardware store and suited to the materials of the installation area on the wall.
•Anchor the screws in at least six locations.
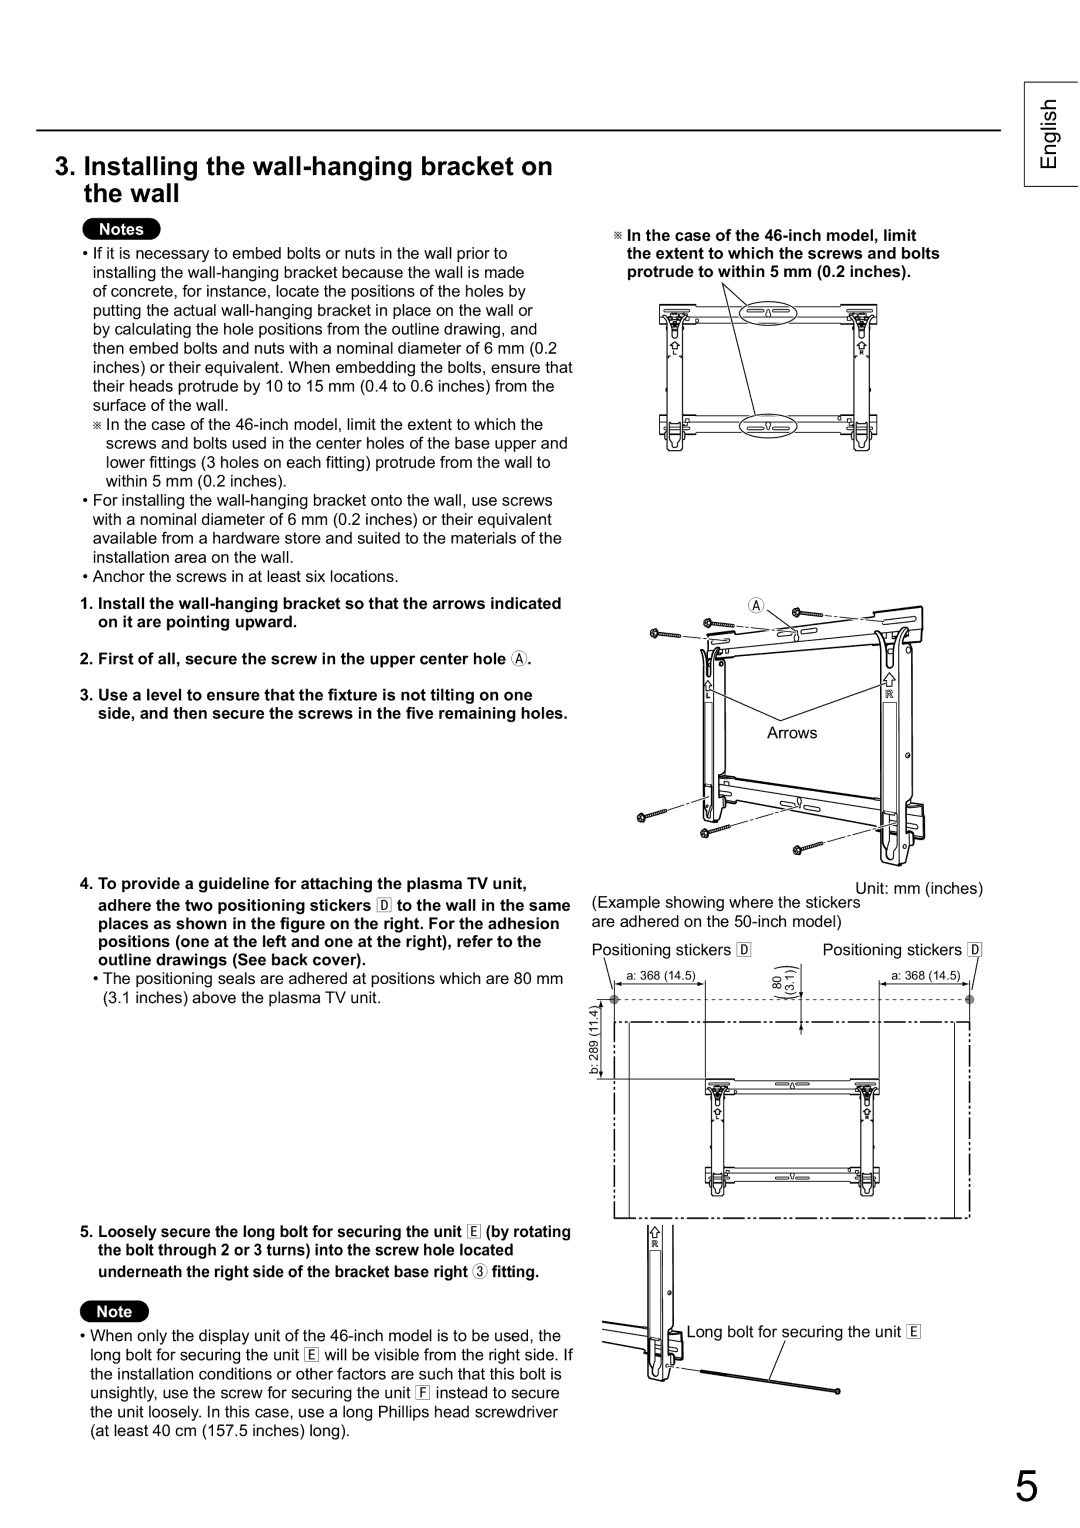
1.Install the wall-hanging bracket so that the arrows indicated on it are pointing upward.
2. First of all, secure the screw in the upper center hole .
3.Use a level to ensure that the fixture is not tilting on one side, and then secure the screws in the five remaining holes.
4. To provide a guideline for attaching the plasma TV unit,
adhere the two positioning stickers to the wall in the same places as shown in the figure on the right. For the adhesion positions (one at the left and one at the right), refer to the outline drawings (See back cover).
•The positioning seals are adhered at positions which are 80 mm (3.1 inches) above the plasma TV unit.
5. Loosely secure the long bolt for securing the unit | (by rotating |
the bolt through 2 or 3 turns) into the screw hole located |
underneath the right side of the bracket base right | fitting. |
Note
• When only the display unit of the 46-inch model is to be used, the long bolt for securing the unit will be visible from the right side. If the installation conditions or other factors are such that this bolt is unsightly, use the screw for securing the unit instead to secure the unit loosely. In this case, use a long Phillips head screwdriver (at least 40 cm (157.5 inches) long).
In the case of the 46-inch model, limit the extent to which the screws and bolts protrude to within 5 mm (0.2 inches).
Arrows
Unit: mm (inches)
(Example showing where the stickers are adhered on the 50-inch model)
Positioning stickers | | Positioning stickers |
| | | | | | | | | | ) | | | | | | |
| | | | | | | | | | | | | | | |
| | | | A: 368 (14.5) | ((3.1) | | | | | A: 368 (14.5) |
| | | | | | | | | | 80 | | | | | | |
B: 289 (11.4) | | | | | | | | | | | | | | | |
| | | | | | | | | | |
| | | | | | | | | | | | | | |
| | | | | | | | | | | | | | |
| | | | | | | | | | | | | | | | |
| | | | | | | | | | | | | | | | |
| | | | | | | | | | | | | | | | |
| | | | | | | | | | | | | | | | |
Long bolt for securing the unit