FIGURE 6 |
|
| TOP BOOM |
| 3/8” WASHER |
| 2”PULLEY |
3/8 X 1” 11 | 3/8” LOCK NUT |
|
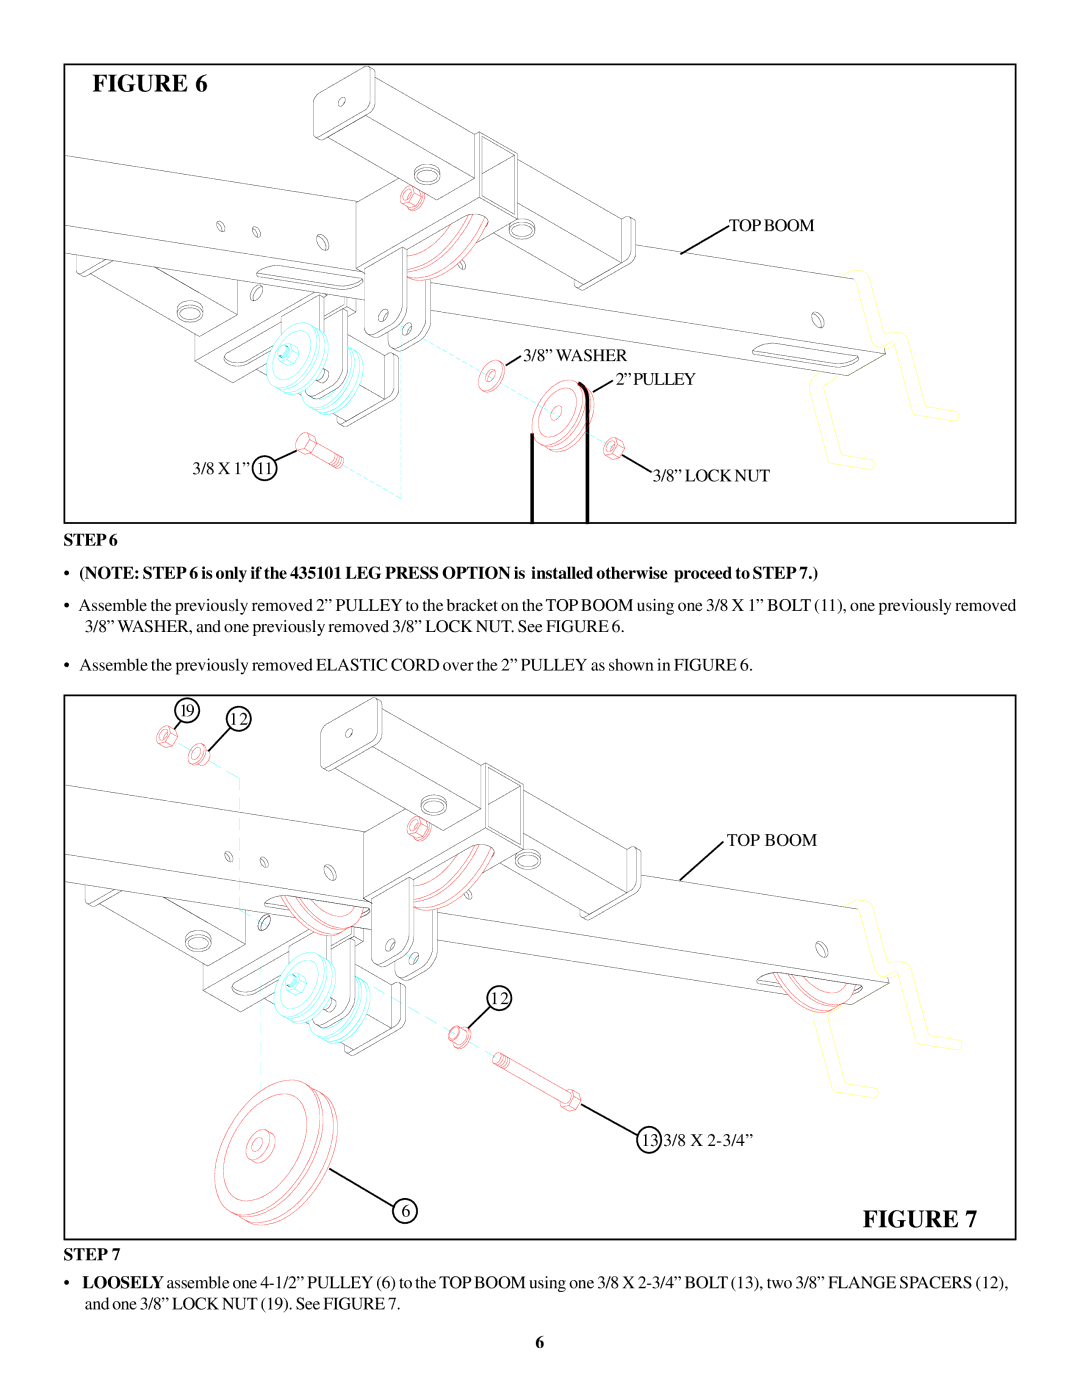
STEP 6
•(NOTE: STEP 6 is only if the 435101 LEG PRESS OPTION is installed otherwise proceed to STEP 7.)
•Assemble the previously removed 2” PULLEY to the bracket on the TOP BOOM using one 3/8 X 1” BOLT (11), one previously removed 3/8” WASHER, and one previously removed 3/8” LOCK NUT. See FIGURE 6.
•Assemble the previously removed ELASTIC CORD over the 2” PULLEY as shown in FIGURE 6.
19 | 12 |
|
|
| |
|
| TOP BOOM |
|
| 12 |
|
| 13 3/8 X |
| 6 | FIGURE 7 |
|
|
STEP 7
•LOOSELY assemble one
6