14 |
|
| 11 |
| 34 |
8 | 36 |
| 34 |
| 12 |
| 34 |
| 37 |
| 7 |
| 14 |
FIGURE 12 |
|
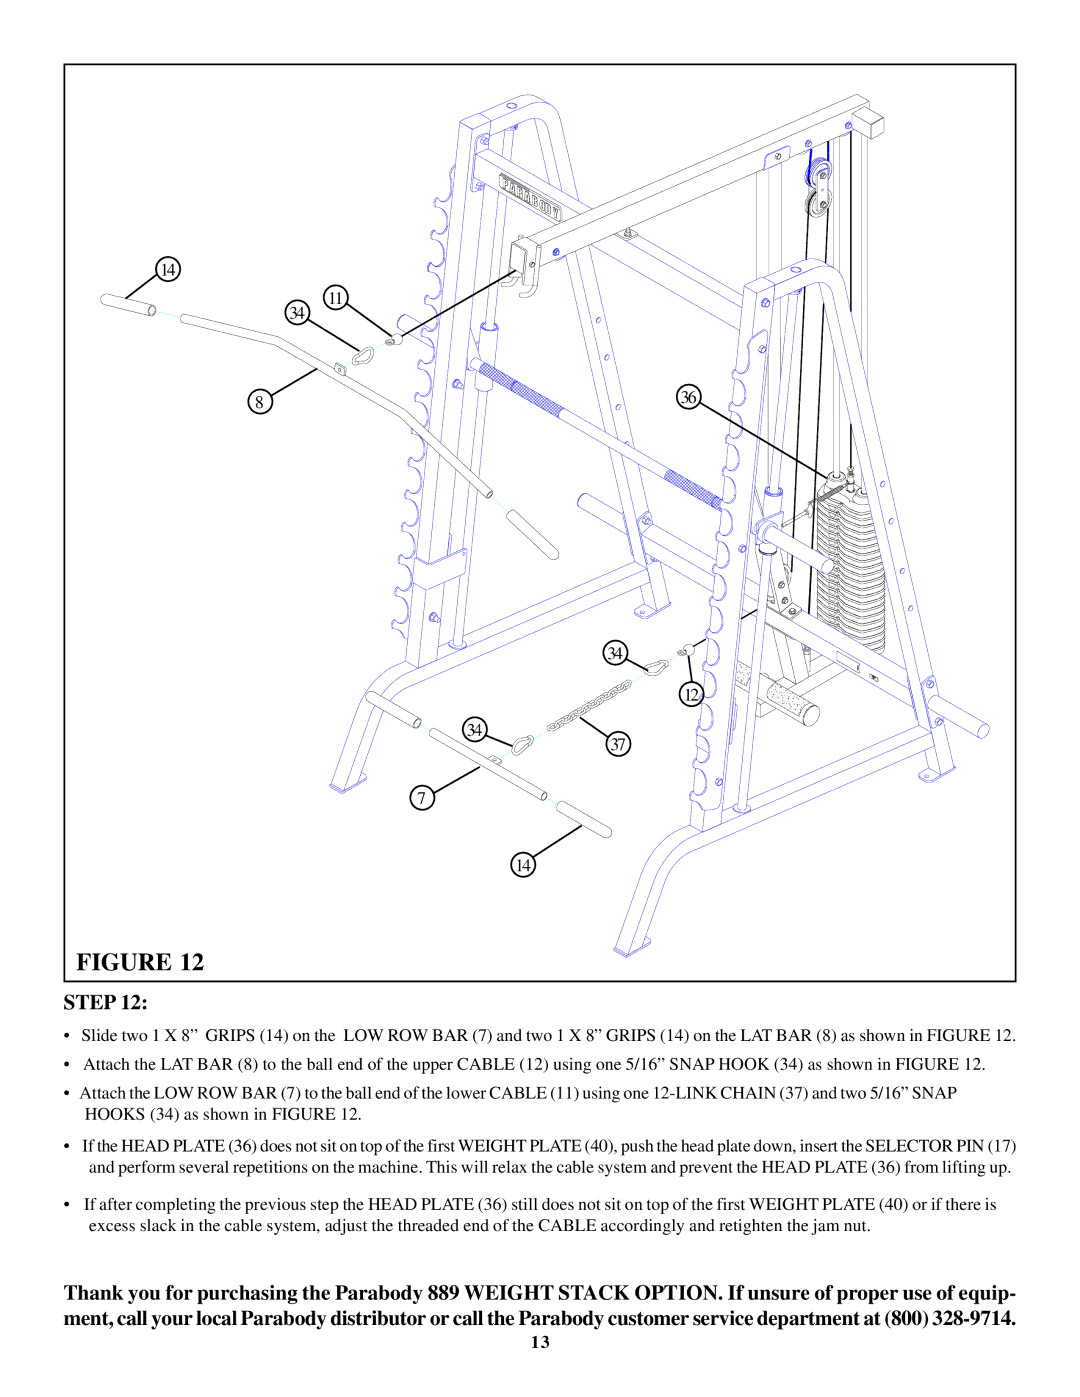
STEP 12:
•Slide two 1 X 8” GRIPS (14) on the LOW ROW BAR (7) and two 1 X 8” GRIPS (14) on the LAT BAR (8) as shown in FIGURE 12.
•Attach the LAT BAR (8) to the ball end of the upper CABLE (12) using one 5/16” SNAP HOOK (34) as shown in FIGURE 12.
•Attach the LOW ROW BAR (7) to the ball end of the lower CABLE (11) using one
•If the HEAD PLATE (36) does not sit on top of the first WEIGHT PLATE (40), push the head plate down, insert the SELECTOR PIN (17) and perform several repetitions on the machine. This will relax the cable system and prevent the HEAD PLATE (36) from lifting up.
•If after completing the previous step the HEAD PLATE (36) still does not sit on top of the first WEIGHT PLATE (40) or if there is excess slack in the cable system, adjust the threaded end of the CABLE accordingly and retighten the jam nut.
Thank you for purchasing the Parabody 889 WEIGHT STACK OPTION. If unsure of proper use of equip- ment, call your local Parabody distributor or call the Parabody customer service department at (800)
13