![]() WARNING
WARNING
• Always use an assistant or mechanical lifting equipment to safely lift and position the projector.
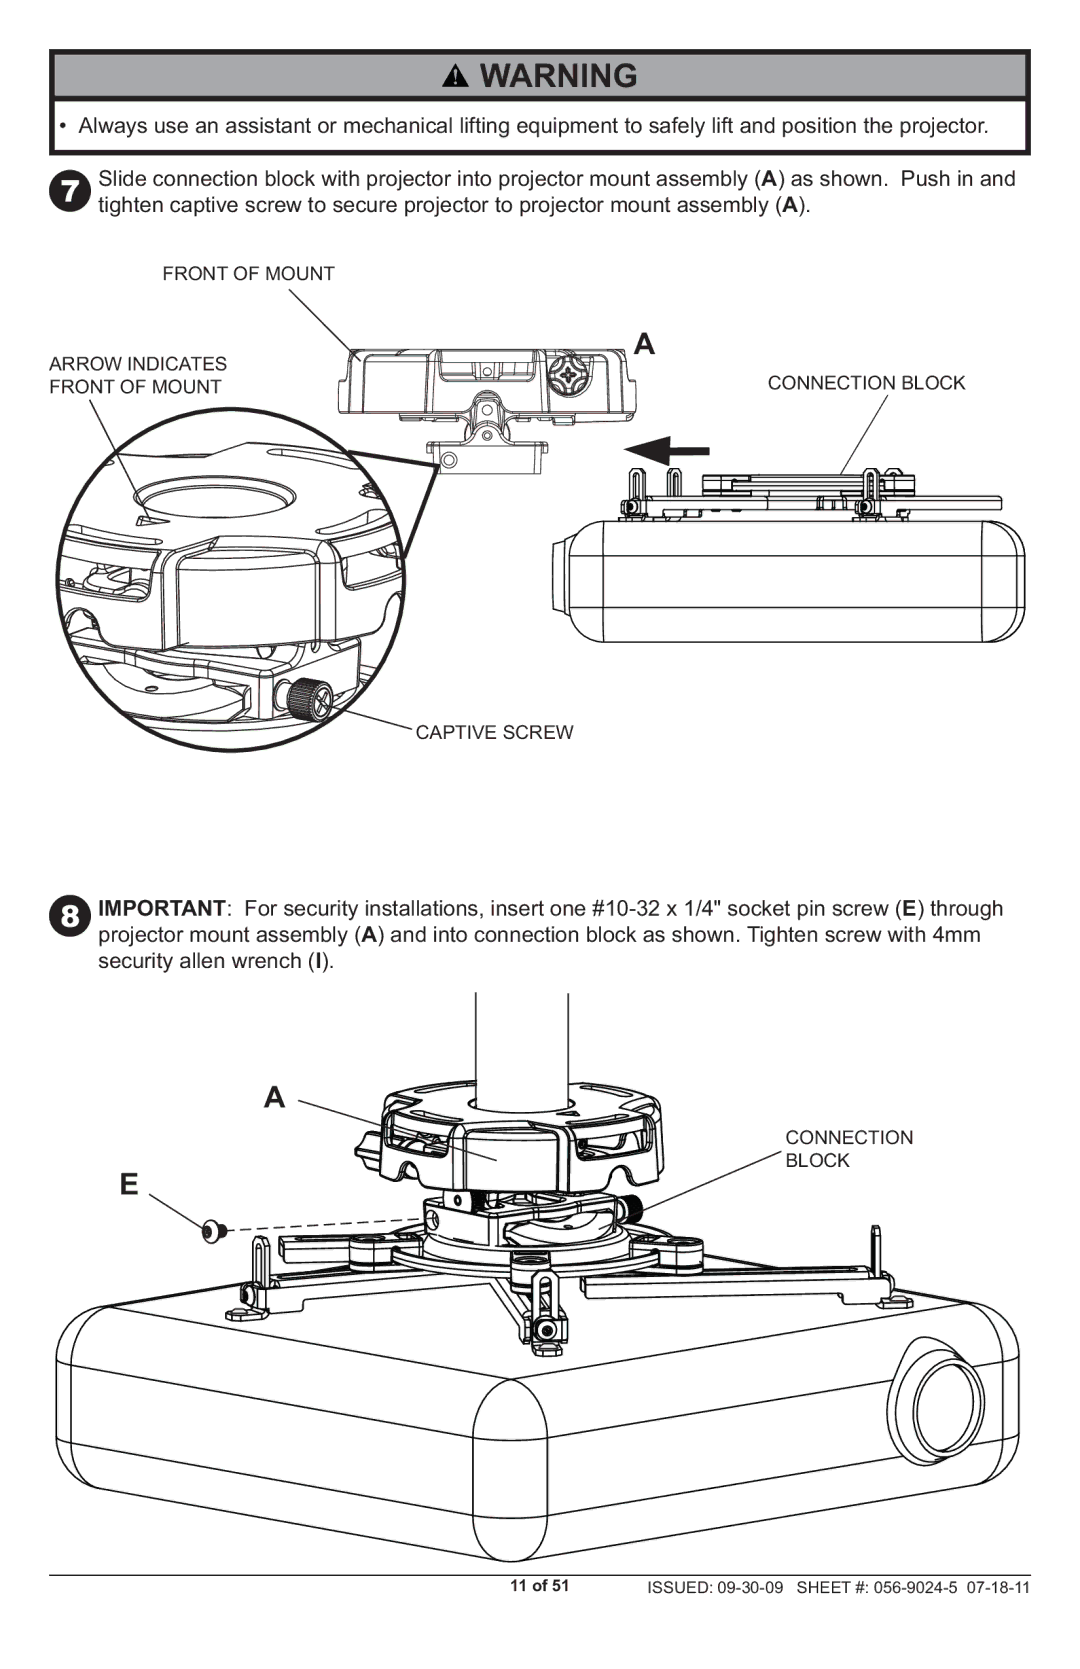
7Slide connection block with projector into projector mount assembly (A) as shown. Push in and tighten captive screw to secure projector to projector mount assembly (A).
FRONT OF MOUNT
ARROW INDICATES
FRONT OF MOUNT
![]()
![]()
![]()
![]()
![]()
![]()
![]()
![]()
![]() A
A
CONNECTION BLOCK
![]()
![]()
![]() CAPTIVE SCREW
CAPTIVE SCREW
8IMPORTANT: For security installations, insert one
A
CONNECTION
BLOCK
E
11 of 51 | ISSUED: |
