Reassemble the Unit
To reassemble the DX8100:
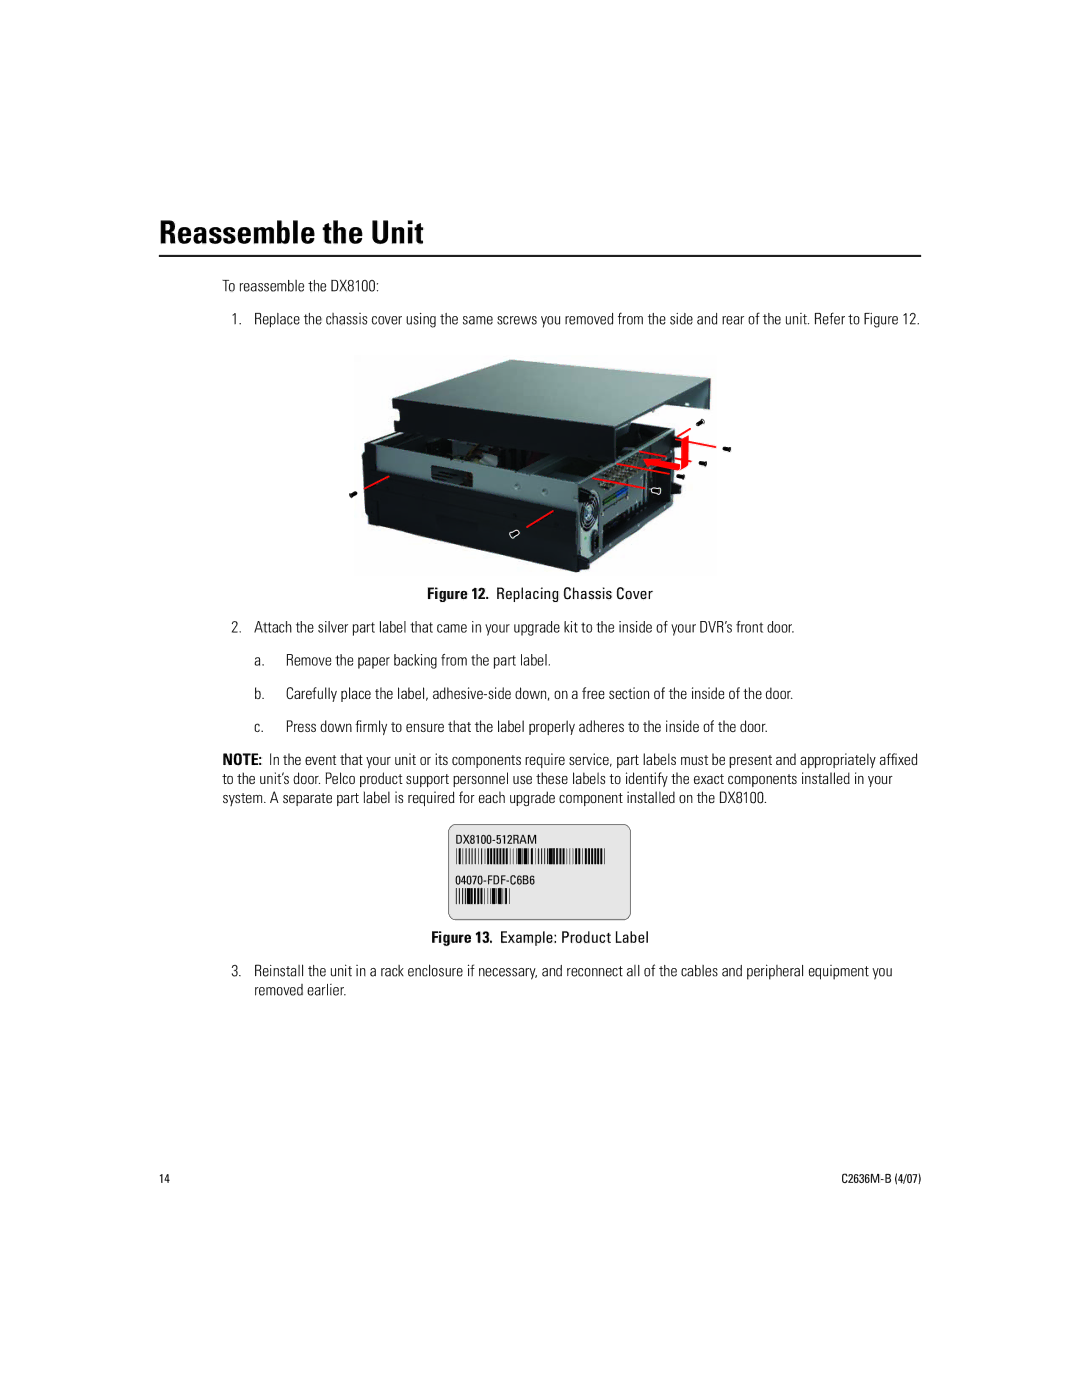
1. Replace the chassis cover using the same screws you removed from the side and rear of the unit. Refer to Figure 12.
Figure 12. Replacing Chassis Cover
2.Attach the silver part label that came in your upgrade kit to the inside of your DVR’s front door.
a.Remove the paper backing from the part label.
b.Carefully place the label, adhesive-side down, on a free section of the inside of the door.
c.Press down firmly to ensure that the label properly adheres to the inside of the door.
NOTE: In the event that your unit or its components require service, part labels must be present and appropriately affixed to the unit’s door. Pelco product support personnel use these labels to identify the exact components installed in your system. A separate part label is required for each upgrade component installed on the DX8100.
Figure 13. Example: Product Label
3.Reinstall the unit in a rack enclosure if necessary, and reconnect all of the cables and peripheral equipment you removed earlier.
14 |