Installation
LENS MOUNTING
The camera can be used with a fixed iris, manual iris, or auto iris lens. The camera is factory set for a CS mount lens, but is easily adjusted for a C mount lens.
1.C mount lens only: Completely rotate the back focus adjustment counterclockwise before installing the C mount lens (refer to Back Focus Adjustment on page 15).
2.Set the lens mode selector switch on the side of the camera to AIV (auto iris video drive) lens or AID (auto iris DC drive) lens. Refer to Switch Settings on page 16. Switch settings are determined by the type of lens used.
3.Screw the lens onto the lens mount. Be careful to prevent dust from entering the space between the lens and the CCD element. If necessary, use clean compressed air to remove any foreign matter.
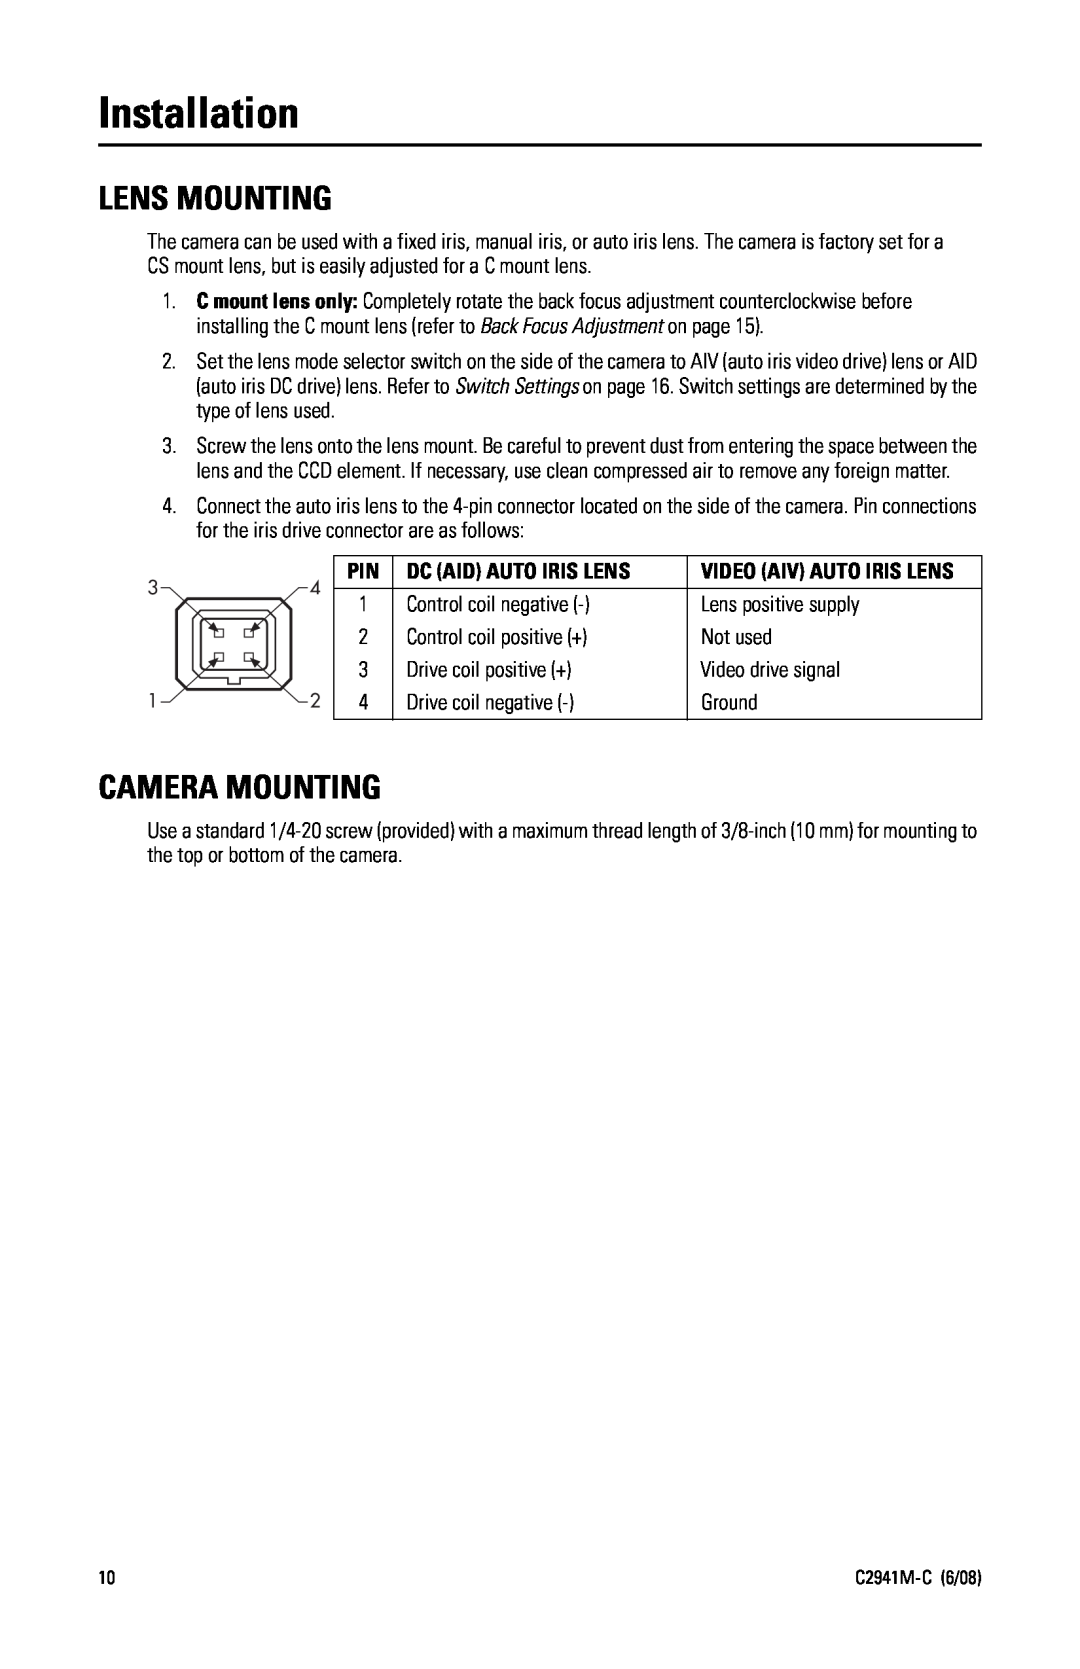
4.Connect the auto iris lens to the
3 | 4 | PIN | DC (AID) AUTO IRIS LENS | VIDEO (AIV) AUTO IRIS LENS | |
|
|
| |||
1 | Control coil negative | Lens positive supply | |||
|
| ||||
|
| 2 | Control coil positive (+) | Not used | |
|
| 3 | Drive coil positive (+) | Video drive signal | |
1 | 2 | 4 | Drive coil negative | Ground | |
|
|
|
|
|
CAMERA MOUNTING
Use a standard
10 |