INSTALLATION - DIRECT MODE
Direct Mode is for a
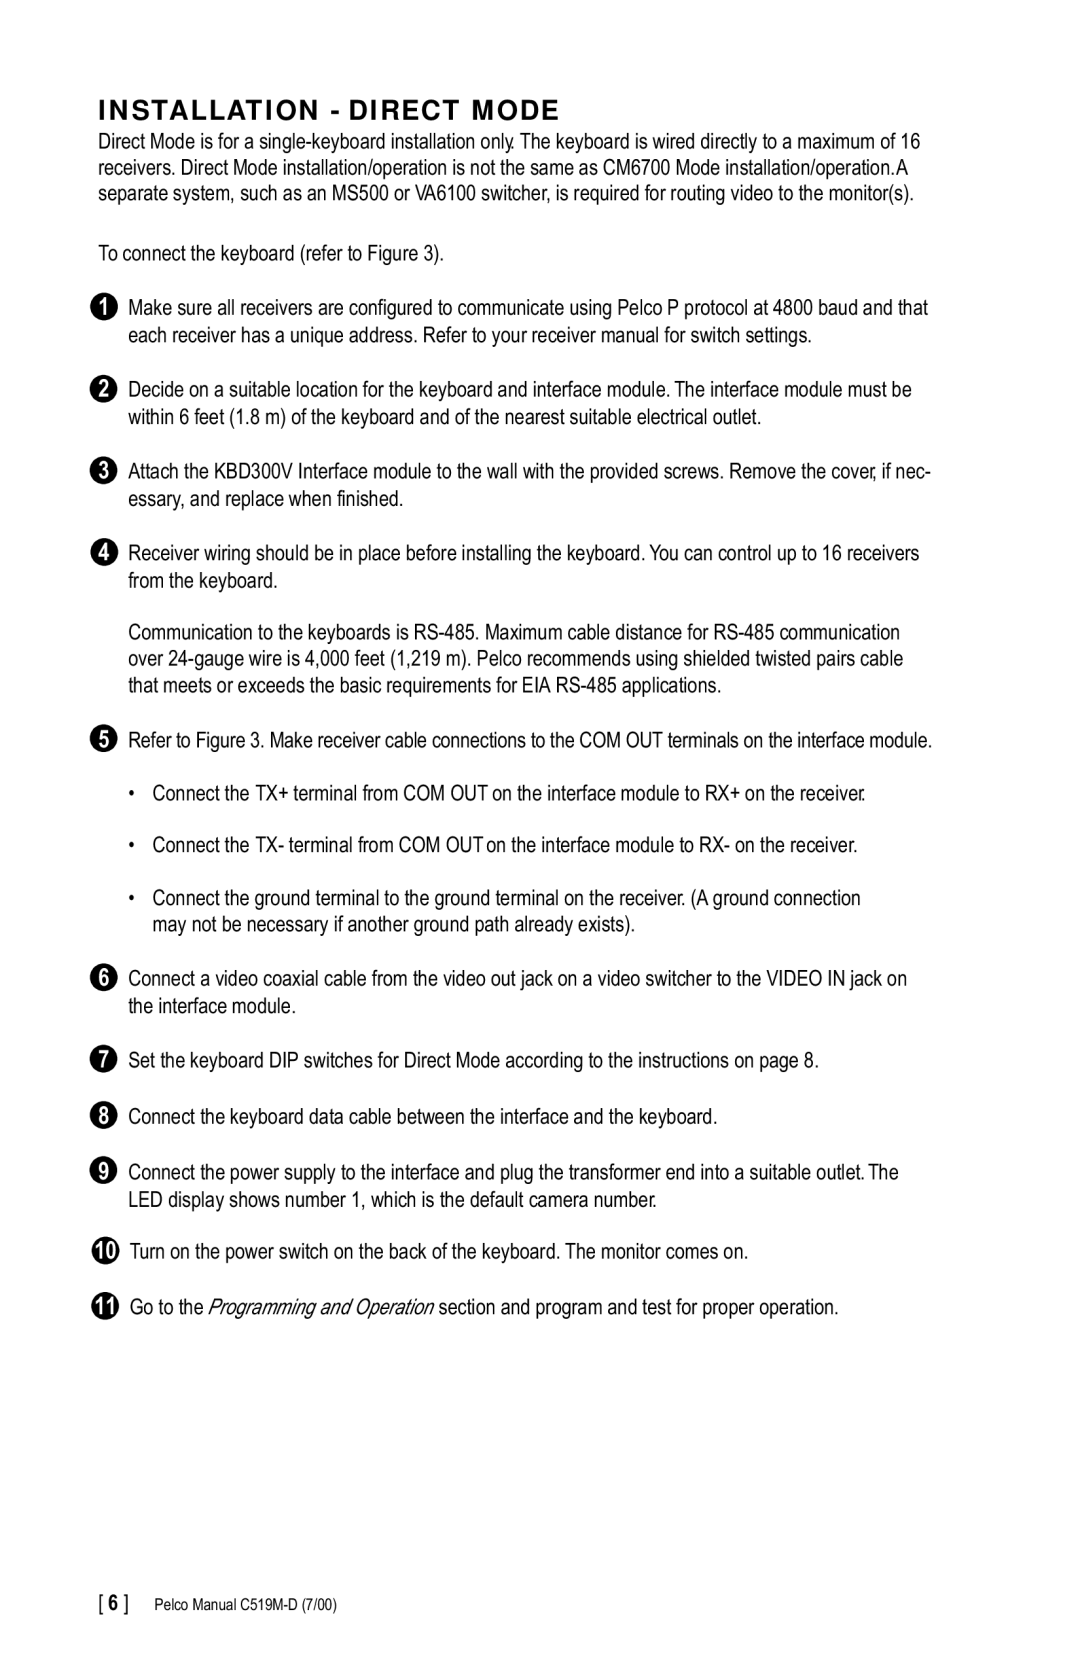
To connect the keyboard (refer to Figure 3).
1Make sure all receivers are configured to communicate using Pelco P protocol at 4800 baud and that each receiver has a unique address. Refer to your receiver manual for switch settings.
2Decide on a suitable location for the keyboard and interface module. The interface module must be within 6 feet (1.8 m) of the keyboard and of the nearest suitable electrical outlet.
3Attach the KBD300V Interface module to the wall with the provided screws. Remove the cover, if nec- essary, and replace when finished.
4Receiver wiring should be in place before installing the keyboard. You can control up to 16 receivers from the keyboard.
Communication to the keyboards is
5Refer to Figure 3. Make receiver cable connections to the COM OUT terminals on the interface module.
¥Connect the TX+ terminal from COM OUT on the interface module to RX+ on the receiver.
¥Connect the TX- terminal from COM OUT on the interface module to RX- on the receiver.
¥Connect the ground terminal to the ground terminal on the receiver. (A ground connection may not be necessary if another ground path already exists).
6Connect a video coaxial cable from the video out jack on a video switcher to the VIDEO IN jack on the interface module.
7Set the keyboard DIP switches for Direct Mode according to the instructions on page 8.
8Connect the keyboard data cable between the interface and the keyboard.
9Connect the power supply to the interface and plug the transformer end into a suitable outlet. The LED display shows number 1, which is the default camera number.
10Turn on the power switch on the back of the keyboard. The monitor comes on.
11Go to the Programming and Operation section and program and test for proper operation.
[ 6 ] Pelco Manual