CONFIGURING DHCP SCOPES
1.Navigate to the DHCP page.
2.Select the scope you want to edit. If you need to create a new DHCP scope, click Add Scope.
3.Type a label for the scope in the Scope Name box.
4.Type the scope’s initial IP address in the Starting IP Address field. The Starting IP Address is included in the scope.
5.Type the scope’s final IP address in the Ending IP Address field. The Ending IP Address is included in the scope.
6.Type the netmask, subnet, and gateway in the appropriate boxes.
7.If applicable, type the addresses of up to two DNS servers in the in the DNS server field.
8.Determine the lease length for address assignments.
NOTE: It is recommended that you set an infinite lease; expiring leases will cause gaps in video as addresses are released and renewed. 9. Click Save Scope.
MANAGING LEASES
On the DHCP page, click Manage Leases to display a list of current IP Address assignments.
You can manually release an address by selecting it and clicking Delete Selected.
SETTING MAC ADDRESS RESERVATIONS
MAC Address Reservations allow administrators to assign permanent IP addresses to network components requiring a static IP address.
1.Navigate to the DHCP page.
2.Select the scope on which you want to reserve IP addresses.
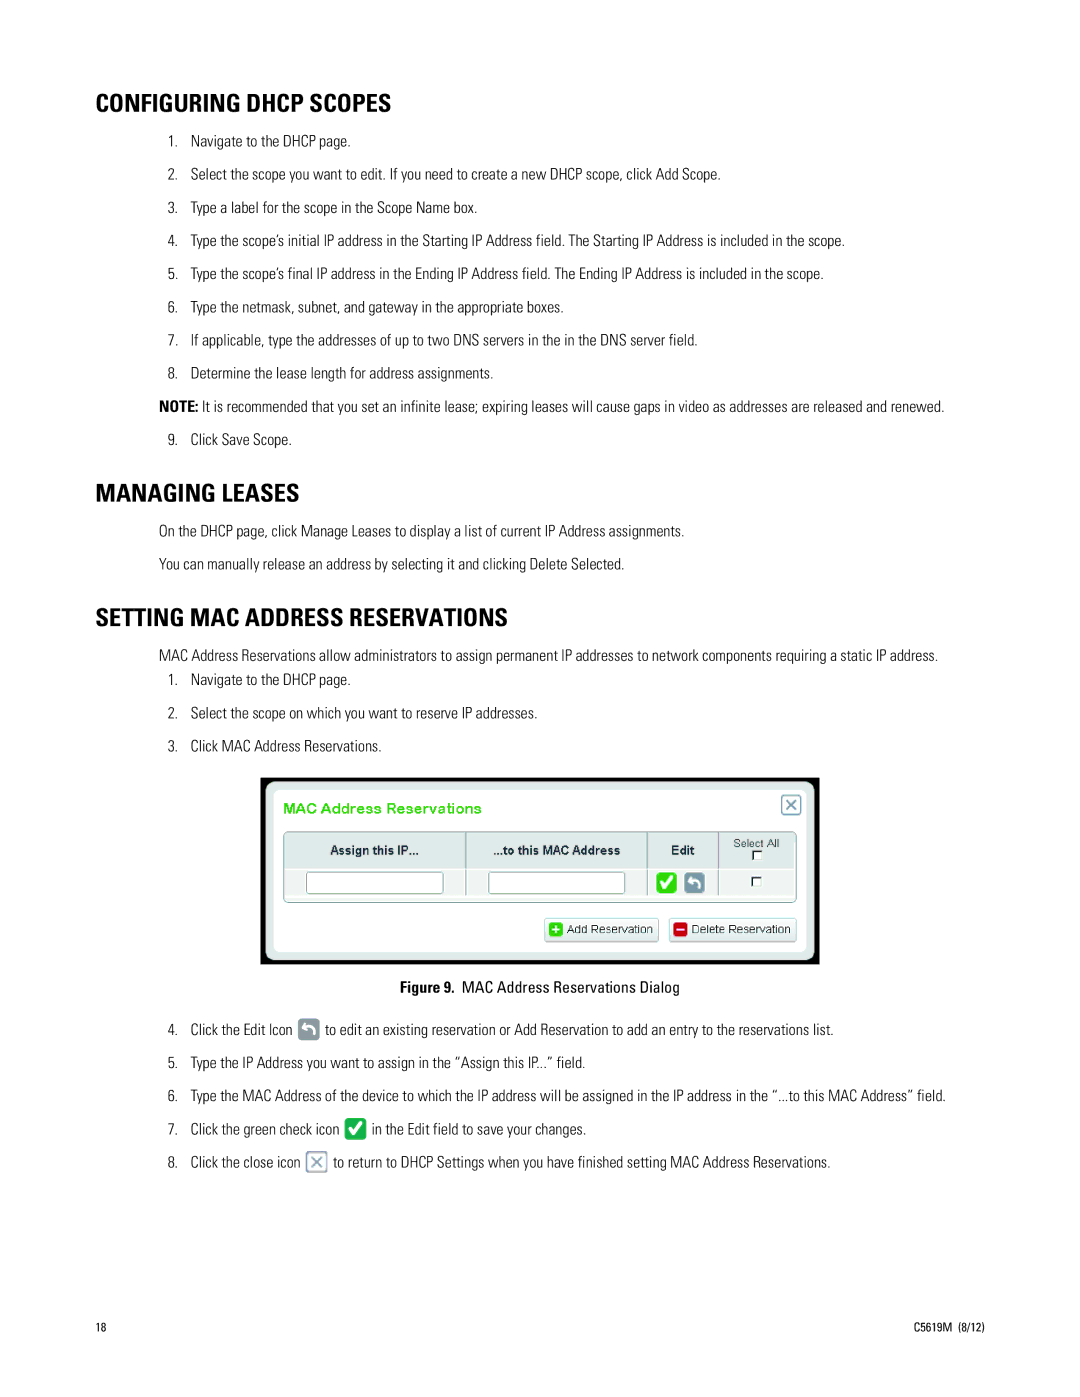
3.Click MAC Address Reservations.
Figure 9. MAC Address Reservations Dialog
4.Click the Edit Icon  to edit an existing reservation or Add Reservation to add an entry to the reservations list.
5.Type the IP Address you want to assign in the “Assign this IP...” field.
6.Type the MAC Address of the device to which the IP address will be assigned in the IP address in the “...to this MAC Address” field.
7.Click the green check icon ![]() in the Edit field to save your changes.
in the Edit field to save your changes.
8.Click the close icon ![]() to return to DHCP Settings when you have finished setting MAC Address Reservations.
to return to DHCP Settings when you have finished setting MAC Address Reservations.
18 | C5619M (8/12) |
