80YW0102 specifications
The Pella 80YW0102 is a standout window solution that embodies the ideal blend of aesthetics, performance, and advanced technology. Renowned for its energy efficiency, it meets the rigorous demands of modern homeowners who prioritize sustainability without compromising on style.Key features of the Pella 80YW0102 include its robust frame construction, which is designed to withstand various weather conditions, ensuring longevity and reliability. The window is crafted from high-quality materials that resist fading, cracking, and warping, promoting durability that homeowners can trust.
One of the standout technologies incorporated in the Pella 80YW0102 is its InsulShield protection, providing enhanced energy efficiency. This multi-layer glazing system is engineered to minimize heat transfer, keeping homes comfortably cool in the summer and warm in the winter. Notably, the windows are available with Low-E insulating glass, which reflects infrared light while allowing visible light to enter, improving indoor comfort and reducing energy bills.
Another prominent feature is the advanced weatherstripping system, which serves as a critical barrier against air and water infiltration. This not only enhances energy efficiency but also helps maintain a home’s indoor climate, making it an excellent choice for homeowners in diverse environments.
The Pella 80YW0102 also boasts a sleek design that complements a variety of architectural styles. Whether for a contemporary home or a traditional abode, the window's clean lines and elegant profiles can elevate the overall aesthetic. It is available in a range of finishes, allowing for personalized customization that aligns with homeowners’ vision.
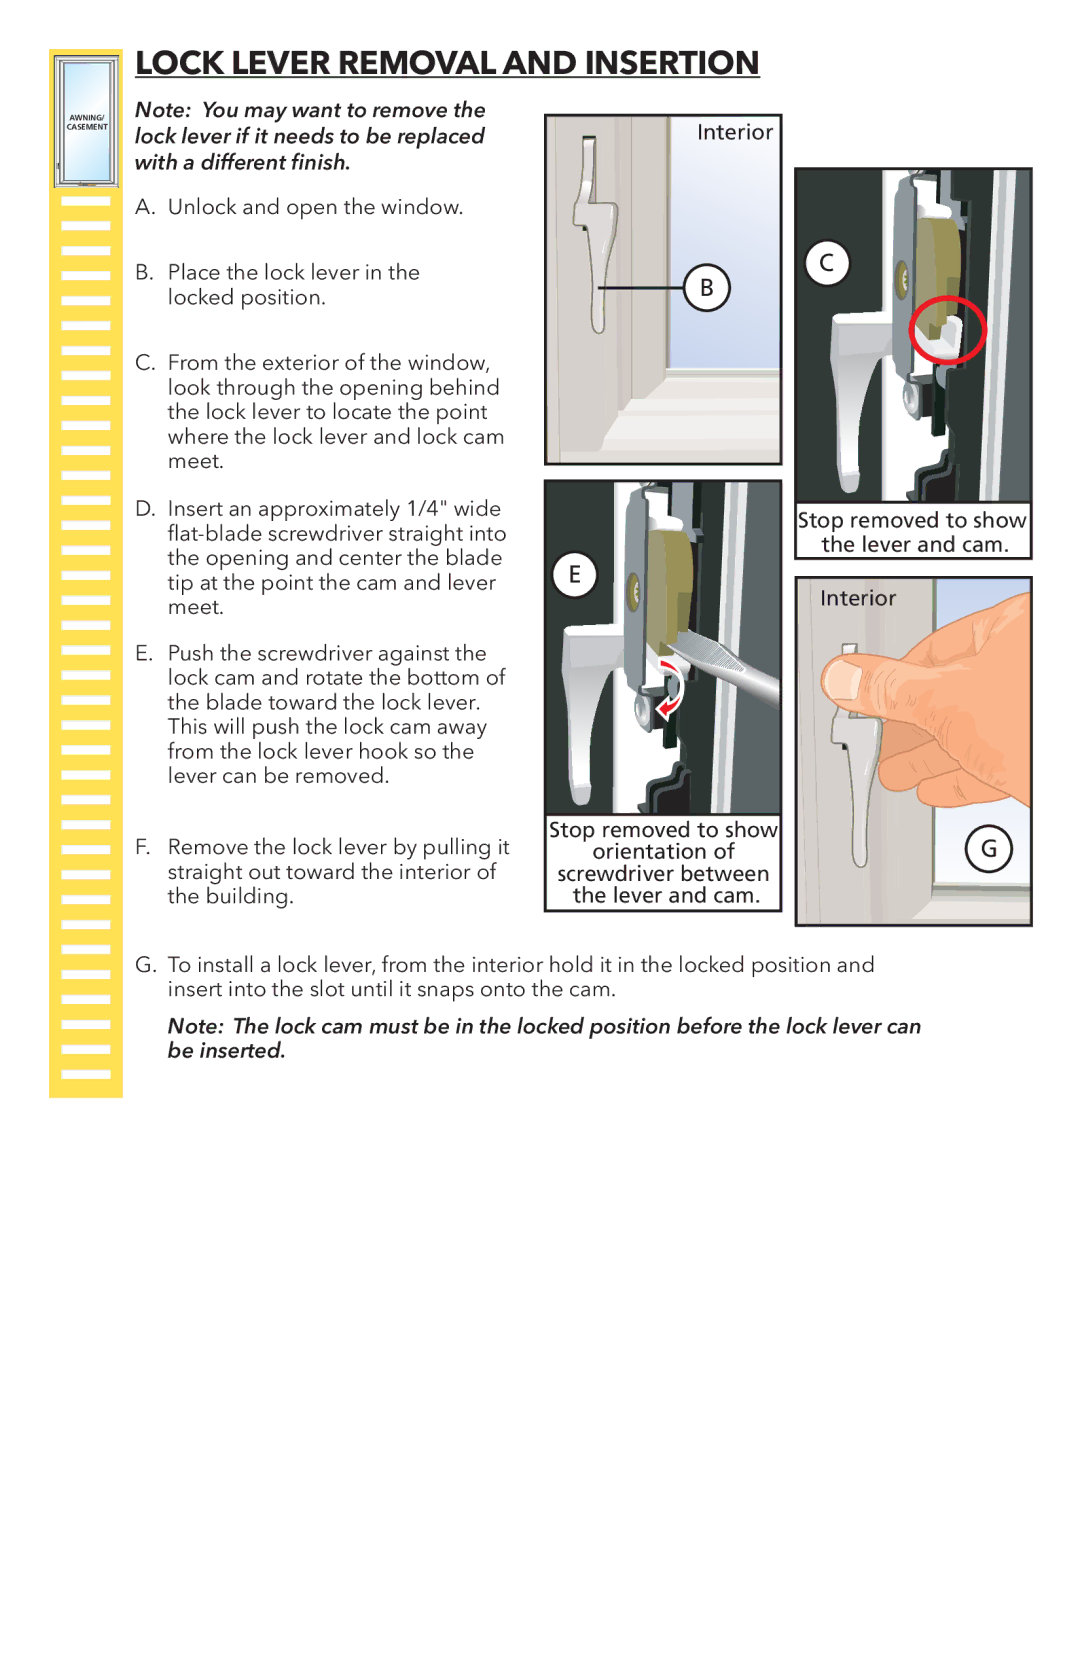
Additional characteristics include easy operation, as the window is designed for smooth opening and closing, enhancing accessibility and convenience. Safety features such as tamper-resistant locks provide peace of mind, ensuring that families feel secure in their living spaces.
Finally, the Pella 80YW0102 is environmentally friendly, reflecting the brand's commitment to sustainability. With its energy-efficient attributes and responsible manufacturing processes, this window not only enhances a home’s aesthetics but also contributes positively to the environment.
In summary, the Pella 80YW0102 is a superior choice for anyone seeking a combination of style, performance, and eco-friendliness in their home windows. Its advanced features and technologies set a standard in the industry, making it a worthy investment for the modern homeowner.

