27MDTR20 20MC4304 19MDTR20
Color TV with BUILT-IN VCR and DVD Player
Returning the enclosed card
Guarantees that your date of pur
Dear Magnavox product owner
For Customer Use
Safety Precautions
Safety and General Information
Declaration of Conformity
Important Safety Instructions
Safety and General Information cont’d
Table of Contents
Introduction
Color Systems
Playable Discs
Region Codes
Unacceptable Discs
Using the Remote Control
Remote Control Battery Installation
Battery Safety
TV/VCR/DVD Maintenance
Hooking Up the TV/VCR/DVD
Instructions continue on the next
Indoor Antenna
Hooking Up the TV/VCR/DVD cont’d
Instructions from the previous
Not supplied, example only
To Audio OUT Coaxial jack On TV/VCR/DVD
Optional Connections
Digital Stereo Hookups
To Stereo’s Coaxial Digital Audio in jack
Press VOL. / to adjust the volume
Watching TV
Playing a Videotape
+10
Playing a Disc
You also can close the tray by pressing
Remote Control Buttons
Remote Control Buttons cont’d
Front Panel
ANT. Jack Antenna
Power Cord
Rear Panel
Connect to a standard AC outlet 120V/60Hz
Menu Language, Auto Channel Programming
This function will not operate when the unit is in DVD mode
Press Setup when you are finished
To delete another channel, repeat steps
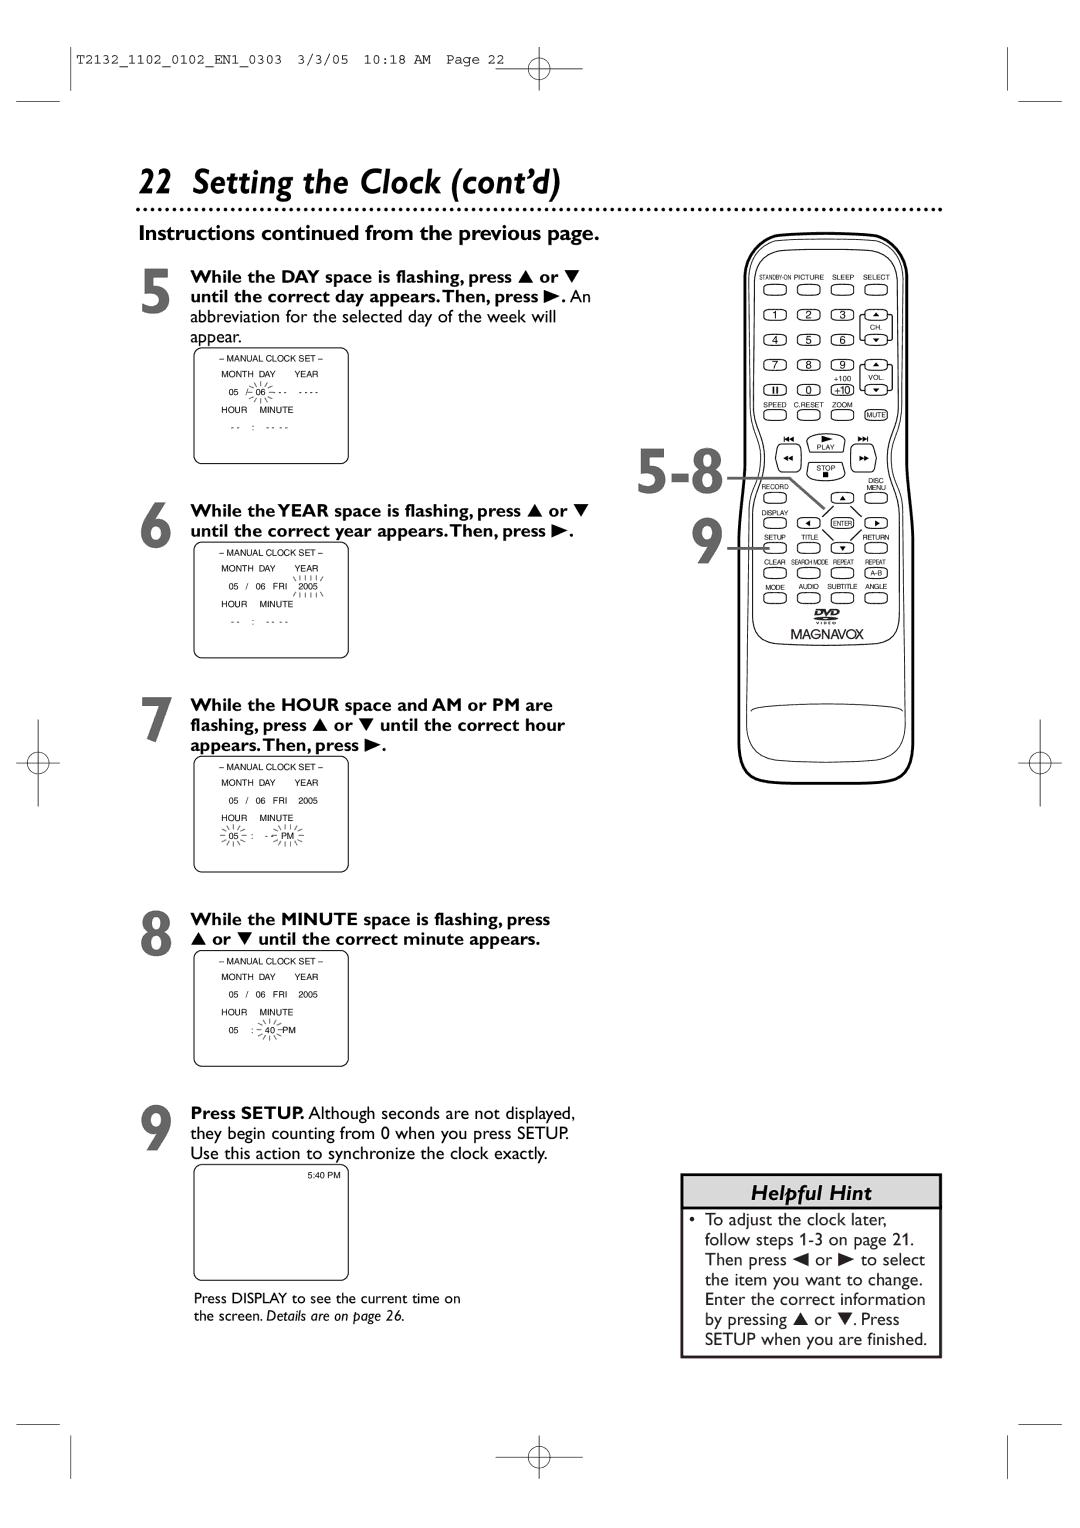
Setting the Clock
Manual Clock Setting
Setting the Clock cont’d
With Auto Clock selected, press Enter so
Auto Clock Setting
Before you begin
On appears beside Auto Clock
CH Search screen
Press Setup to remove the Auto Clock
Press Setup to access the menu again
Press to select Auto Clock CH
Daylight-Savings Time
Disable this feature
Press Setup to remove the menu
Press or to select D.S.T.Then, press
Status Displays
Picture Controls
Tape Speeds
Videotape Recording
Put a videotape in the TV/VCR/DVD
Hrs
One-Touch Recording
Press REC/OTR I on the front of the TV/VCR/DVD
Timer Recording
Before you begin, make sure
Timer Recording cont’d
Finally, press B
Press B
While END is selected, press or to select
Minute at which you want recording to end
Appears at the right end of the line
Cancelling Timer Recordings
Extending a Timer Recording
Correcting a Timer Recording
To cancel a Timer Recording that is in progress
Timer Recording Auto Return
Choose OFF instead
Rerecording Tape Duplication
Video OUT to Video
Press Enter to select OFF
Repeat Play B will appear on the screen briefly
Rental Playback
Press Setup to exit the menu
Choose OFF
Zero Return
Zero Return, Sleep Timer
Sleep Timer
Press Sleep until Sleep 0 Minute appears
Time Search
Insert a videotape
Index Search
Super High Speed Searching LP/SLP
Slow Motion
Forward and Reverse Searching SP/LP/SLP
Viewing a Still Picture
Automatic Rewind, Eject, Off
Automatic Operation Features
Automatic Tracking Adjustment
Manual Tracking
Press Setup Press or to select Caption
Closed Captions
TV Rating Explanations
Setting V-Chip
TV Rating Settings
Press or to select TV Rating Then, press Enter
Press or to select the TV Rating level at
Setting V-Chip cont’d
Press Setup to save your settings and remove the menus
Which you want to block viewing, then press
TV Rating Subratings
Press Setup Press or to select V-CHIP SET UP Press Enter
Press or to select TV Rating Press Enter
When you select TV-Y7
Press or L to select the rating you wish to
Mpaa Rating Explanations
Mpaa Rating Settings
Press or to select Mpaa Rating Then, press Enter
Its identity
Changing the Access Code
V-CHIP SET UP screen will reappear
Press or to select Change Code Then, press Enter
Multi-Channel Television Sound MTS
When a TV program is broadcast in stereo, Stereo
Appears in the top right corner of the screen.When a
Press Display to see the sound status. During
While receiving an MTS broadcast, press
Multi-Channel Television Sound MTS cont’d
For TV Audio
Audio repeatedly to select STEREO, SAP
For VCR Audio
For External Devices
Disc Menus
Title Menus
Fast Forward/Reverse Search
Specific Time Playback
Title/Chapter Playback, Specific Time Playback
Title/Chapter Playback
Example 1 hour, 23 minutes and 30 seconds → 2 → 3 → 3 →
Using j/E and i/g
Using Search Mode
Track Playback
Paused and Step-by-Step Playback
Paused and Step-by-Step Playback, Resume On
Resume On
Repeat
Repeat, A-B Repeat
Starting point A. If you make a mistake
05 1116 AM
Camera Angles
Subtitles, Camera Angles
Subtitles
Example below, six languages are available
Slow Motion, Zoom
Zoom
Audio Language
Audio Language, Stereo Sound
Stereo Sound
DVD Display
On-Screen Displays
Audio CD and Video CD Display
MP3/JPEG Displays
On-Screen Displays cont’d
Press Display again to remove the display
Black Level
During DVD or Video CD playback, press Mode
Black Level,Virtual Surround, Initializing
Virtual Surround
Random Playback
While playback is stopped, press Mode until
Random Playback, Program Playback
Program Playback
66 MP3/JPEG Playback
To stop play, press Stop C
Dual Playback
Press Select to put the DVD/VCR in DVD mode
MP3/JPEG Playback cont’d
Folder Playback
Language Settings
Language Settings cont’d
Language Codes
Press s or B to select press Enter
Display Settings
DISPLAY, then
Press Setup to exit the menus
Display Settings cont’d
Press K or L to select an item, then press
Audio Settings
Dolby Digital sound must be available on the DVD
Before you begin, press Select to put the TV/VCR/DVD
Parental Password
Press s or B to select PARENTAL, then press Enter
Press to select Password CHANGE, then
Parental Password cont’d
Press the Number buttons to enter a 4-digit
Press the Number buttons to enter your
Parental Levels
Press s or Bto select PARENTAL, then Press Enter
Press or to select Parental LEVEL, then press Enter
You cannot use the default password 4737 to play a DVD
Parental Levels cont’d
Press s or B to select Custom at the top
When playback is stopped, press
Others
Menu, then press Enter
Others cont’d
If you selected Angle ICON, press Enter
Glossary
Helpful Hints
Helpful Hints cont’d
Other Specifications
Specifications
Electrical Specifications
General TV/VCR
Limited Warranty
Magnavox Limited Warranty
Index