Contents
Electric, Magnetic and Electromagnetic Fields EMF
Safety warnings
General
Care of the screen
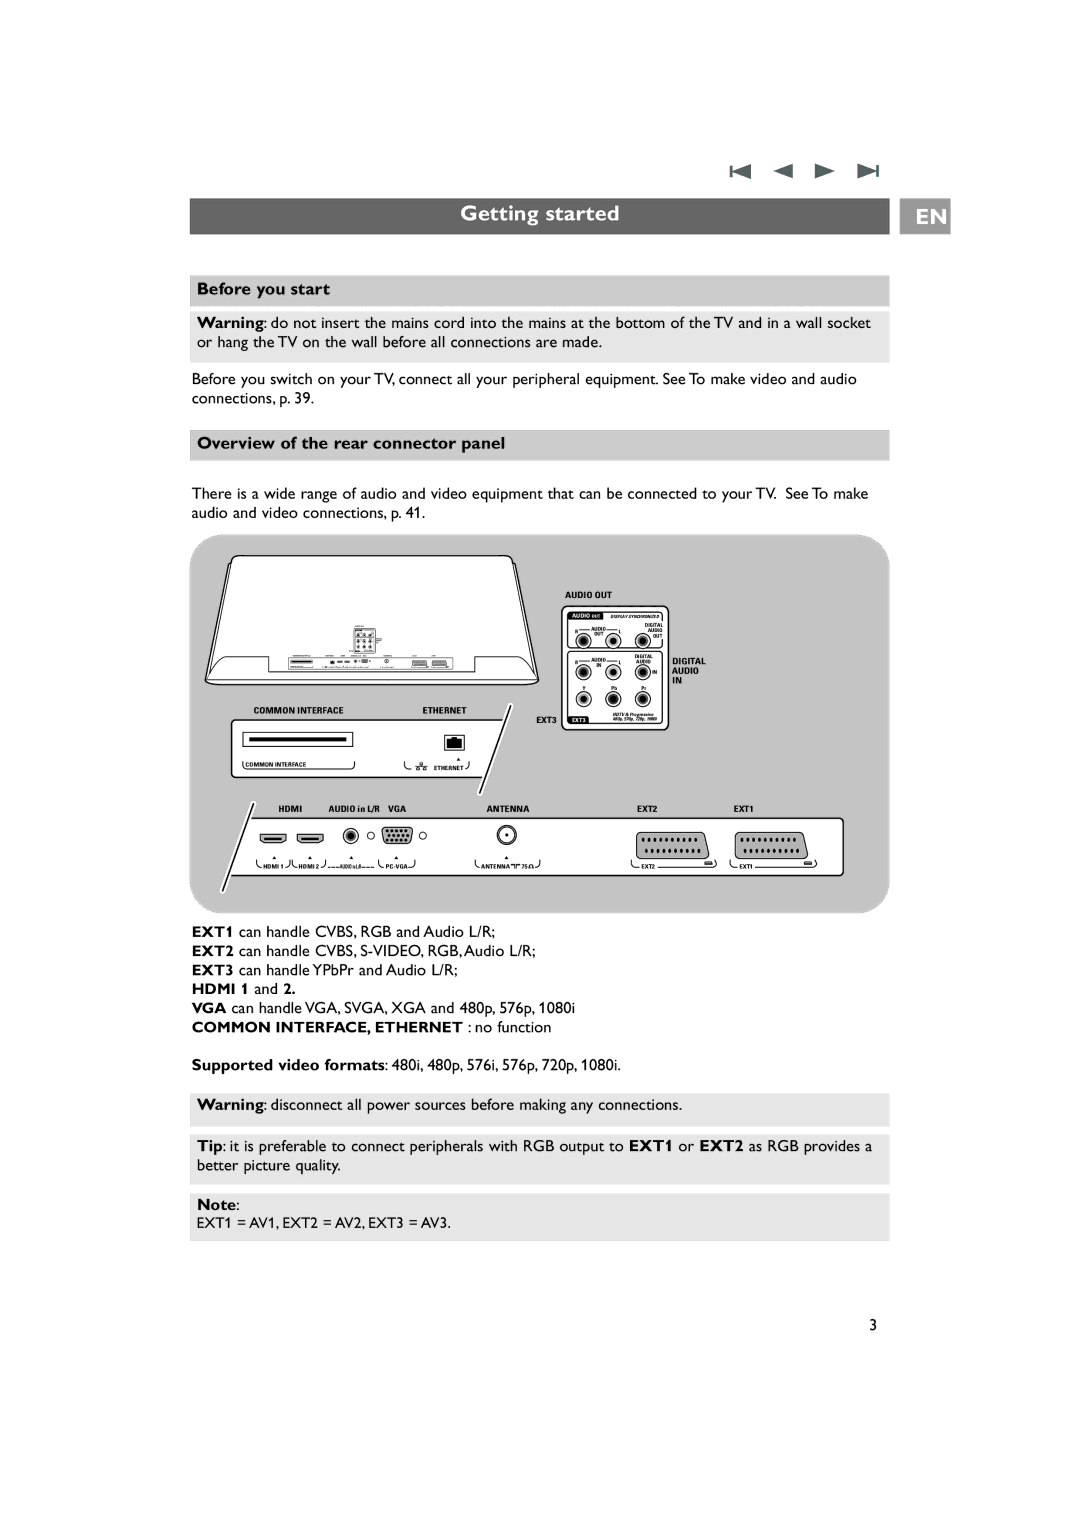
VGA can handle VGA, SVGA, XGA and 480p, 576p
Overview of the rear connector panel
Getting started
Before you start
Remote control
Connect the antenna
Connect the mains
Colour keys
Use of the remote control RC4420
Teletext On/Off Volume
Standby
AmbilightMODE
Define the position of the PIP screen
Dual screen/PIP
Keys at the right side of the TV
Use of the Option key
Switch the TV on
First time installation
Follow the instructions on screen
Complete the initial TV installation procedure
Press the red colour key again when the search is completed
Select your on-screen language
Settings assistant select your TV settings
How to navigate through the menus
Installation allows you
Introduction
Adjust picture, sound and ambilight settings
Use of the TV menu settings
Use of the Standards settings if present
Press the green colour key to store the selected setting
Individual settings for picture, sound and ambilight
Adjust picture menu settings
Dynamic contrast
Pixel Plus
Digital Natural Motion
Clear LCD
Picture format
Colour enhancement
Select Off, Minimum, Medium or Maximum Active control
Light sensor
Adjust sound menu settings
Adjust sound menu settings
Brightness
Allows you to adjust the light output of the ambilights
Enjoy Ambilight
Ambilight
Mode
Colour
For example
Colour boost
Ambilight in standby mode
Custom colour
Separation
PIP format
Adjust feature menu settings
Sleeptimer
Select Sleeptimer
Select Childlock
Childlock
Important you have forgotten your code
Set code/Change code
On timer
Only when Teletext is present Only one On timer can be set
Demo
Select your menu language
How to search for and store TV channels
Installation menu
Automatic installation
Manual installation
How to search for and store TV channels
Rename
Uninstall reinstall
Rearrange the channel number list
Reshuffle
Select the On Screen Display OSD
Set your preferences
Select your location
Select Teletext
Select the peripheral equipment with the cursor up/down
Select your connections
Digital Audio
Select Connections
Automatic software announcement
Reset the Factory settings
How to upgrade the TV software
USB device upgrade
To create a favourite list or to modify the list
Create your favourite list
To select a channel from the displayed favourite list
To select another favourite channel list
To view content from a Memory Card/USB device
Multimedia Browser
To insert a Memory card/USB device
Remove the Memory card/USB device
Press the MENU/BROWSE key on the remote control to
Switch off the main menu
To remove the Memory card/USB device
Following icons may appear
Multimedia Browser menu
Function keys at the bottom of the screen
Multimedia function keys on the remote control
Teletext
Reveal
Hypertext
Enlarge a Teletext
Teletext menu
To make video and audio connections
See Multimedia browser, p
To make video and audio connections Side panel overview
Camera, Camcorder, Game
Headphone
VCR
To make video and audio connections Rear panel overview
Connect a VCR or DVD recorder
With a eurocable
With the aerial cable only
With eurocables
With Component Video connectors
Connect two VCRs or VCR and DVD recorder
Connect a satellite receiver
Connect a DVD player, Cable box or game console
With a Hdmi connector
With a DVI connector With Digital audio
Connect a DVD player or Cable box
Connect a DVD player, a satellite receiver or Cable box
640 x
PC equipped with a VGA connector
PC equipped with a DVI connector With Digital audio
Connect a PC
Connect a Home Cinema amplifier
Digital Home Cinema amplifier
Analogue Home Cinema amplifier
Record a TV programme
Select Installation
Select connected equipment
Record with your recorder
Audio- and video equipment keys
To select between Normal and Expert mode
Troubleshooting
To cancel the selected mode
Annex 2 Philips TV software upgrade with portable memory
To prepare a portable memory for software upgrade
To verify the version of the TV software
Annex
Automatic software upgrade procedure
Manual software upgrade procedure
Following syntax should be used to create the text file
Annex 3 Philips TV-Slideshow Format with background music
General Rules
General Format
Tag Name Use Description
Supported XML-tags
Digital Content Issues
Annex 4 Philips TV Portable memory and USB issues
EN Annex 4 Philips TV Portable memory and USB issues
Digital Camera Issues
USB Memory Device Issues
PC VGA
Index
Avl audio volume leveller
Disposal of your old product
Recycling
Product information
Recycling Disposal of batteries