Let's
Look
Inside!
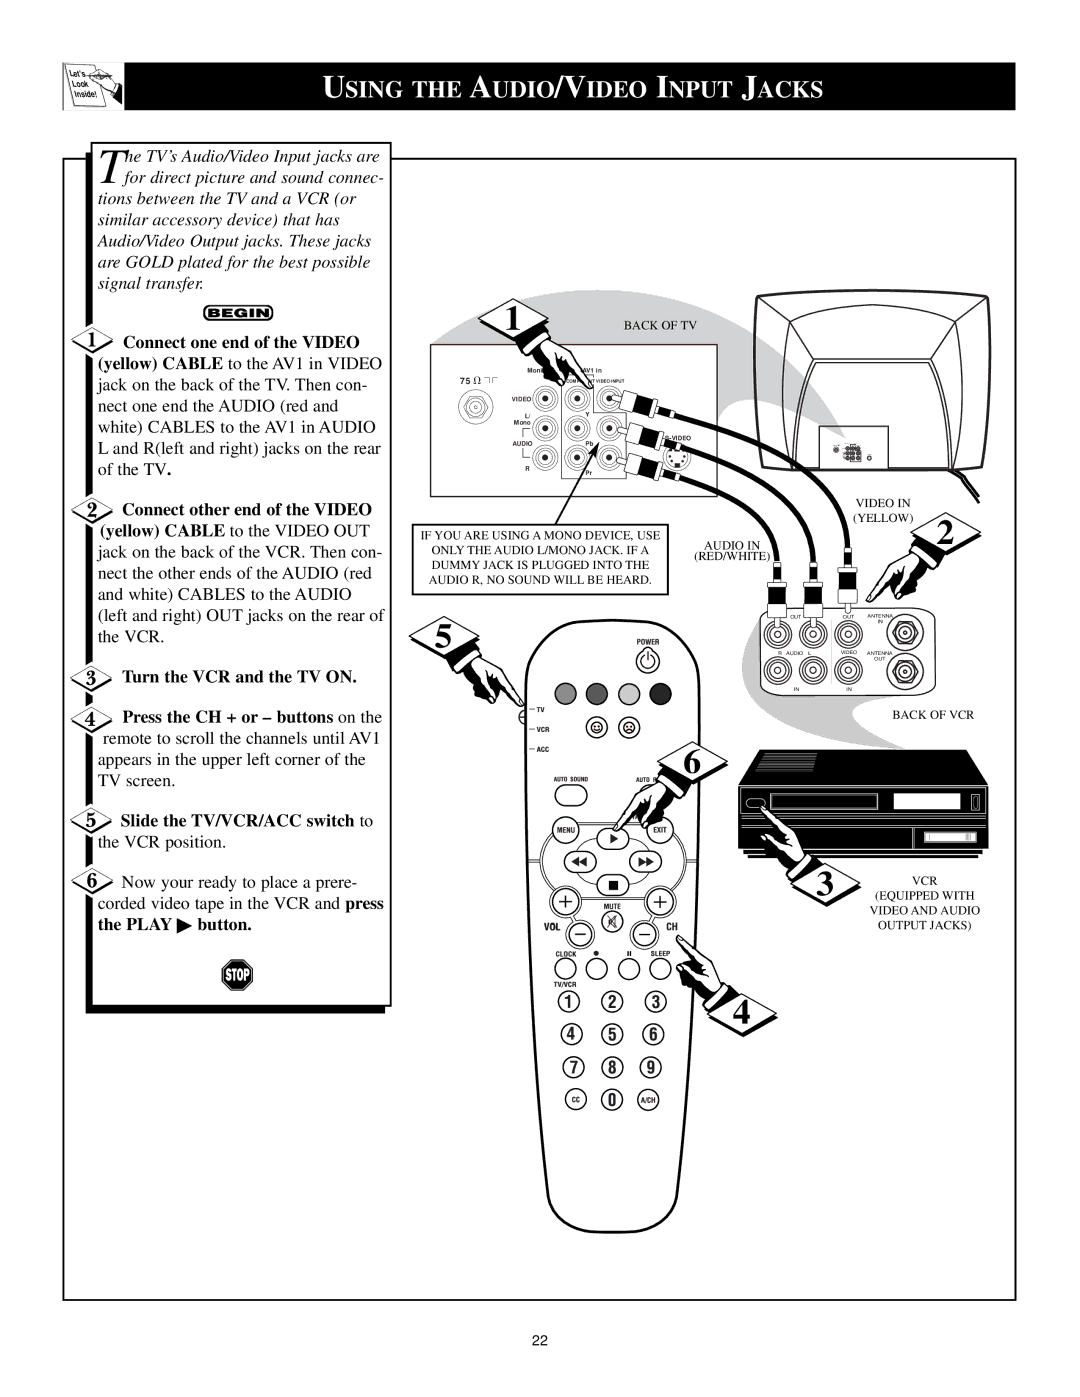
USING THE AUDIO/VIDEO INPUT JACKS
The TV’s Audio/Video Input jacks are for direct picture and sound connec-
tions between the TV and a VCR (or similar accessory device) that has Audio/Video Output jacks. These jacks are GOLD plated for the best possible signal transfer.
Connect one end of the VIDEO
(yellow) CABLE to the AV1 in VIDEO jack on the back of the TV. Then con- nect one end the AUDIO (red and white) CABLES to the AV1 in AUDIO L and R(left and right) jacks on the rear of the TV.
Connect other end of the VIDEO
(yellow) CABLE to the VIDEO OUT jack on the back of the VCR. Then con- nect the other ends of the AUDIO (red and white) CABLES to the AUDIO (left and right) OUT jacks on the rear of the VCR.
 Turn the VCR and the TV ON.
1 | BACK OF TV |
Monitor out | AV1 in |
75 V | COMPONENT VIDEO INPUT |
VIDEO |
|
L/ | Y |
Mono |
|
AUDIO | |
Pb | |
R | Pr |
|
IF YOU ARE USING A MONO DEVICE, USE | AUDIO IN | |
ONLY THE AUDIO L/MONO JACK. IF A | ||
(RED/WHITE) | ||
DUMMY JACK IS PLUGGED INTO THE | ||
| ||
AUDIO R, NO SOUND WILL BE HEARD. |
| |
|
|
OUT ![]()
5
R AUDIO L
IN
VIDEO IN (YELLOW)
OUT ANTENNA
IN
VIDEO ANTENNA
OUT
IN
2
![]() Press the CH + or – buttons on the remote to scroll the channels until AV1 appears in the upper left corner of the TV screen.
Press the CH + or – buttons on the remote to scroll the channels until AV1 appears in the upper left corner of the TV screen.
Slide the TV/VCR/ACC switch to
the VCR position.
![]() Now your ready to place a prere- corded video tape in the VCR and press
Now your ready to place a prere- corded video tape in the VCR and press
the PLAY button.
BACK OF VCR
6
3 | VCR |
(EQUIPPED WITH | |
| VIDEO AND AUDIO |
VOL | OUTPUT JACKS) |
4
22