Prepare the remote control
![]() Caution
Caution
•• Risk of explosion! Keep batteries away from heat, sunshine or fire. Never discard batteries in fire.
•• Risk of decreased battery life! Never mix different brands or types of batteries.
•• Risk of product damage! When the remote control is not used for long periods, remove the batteries.
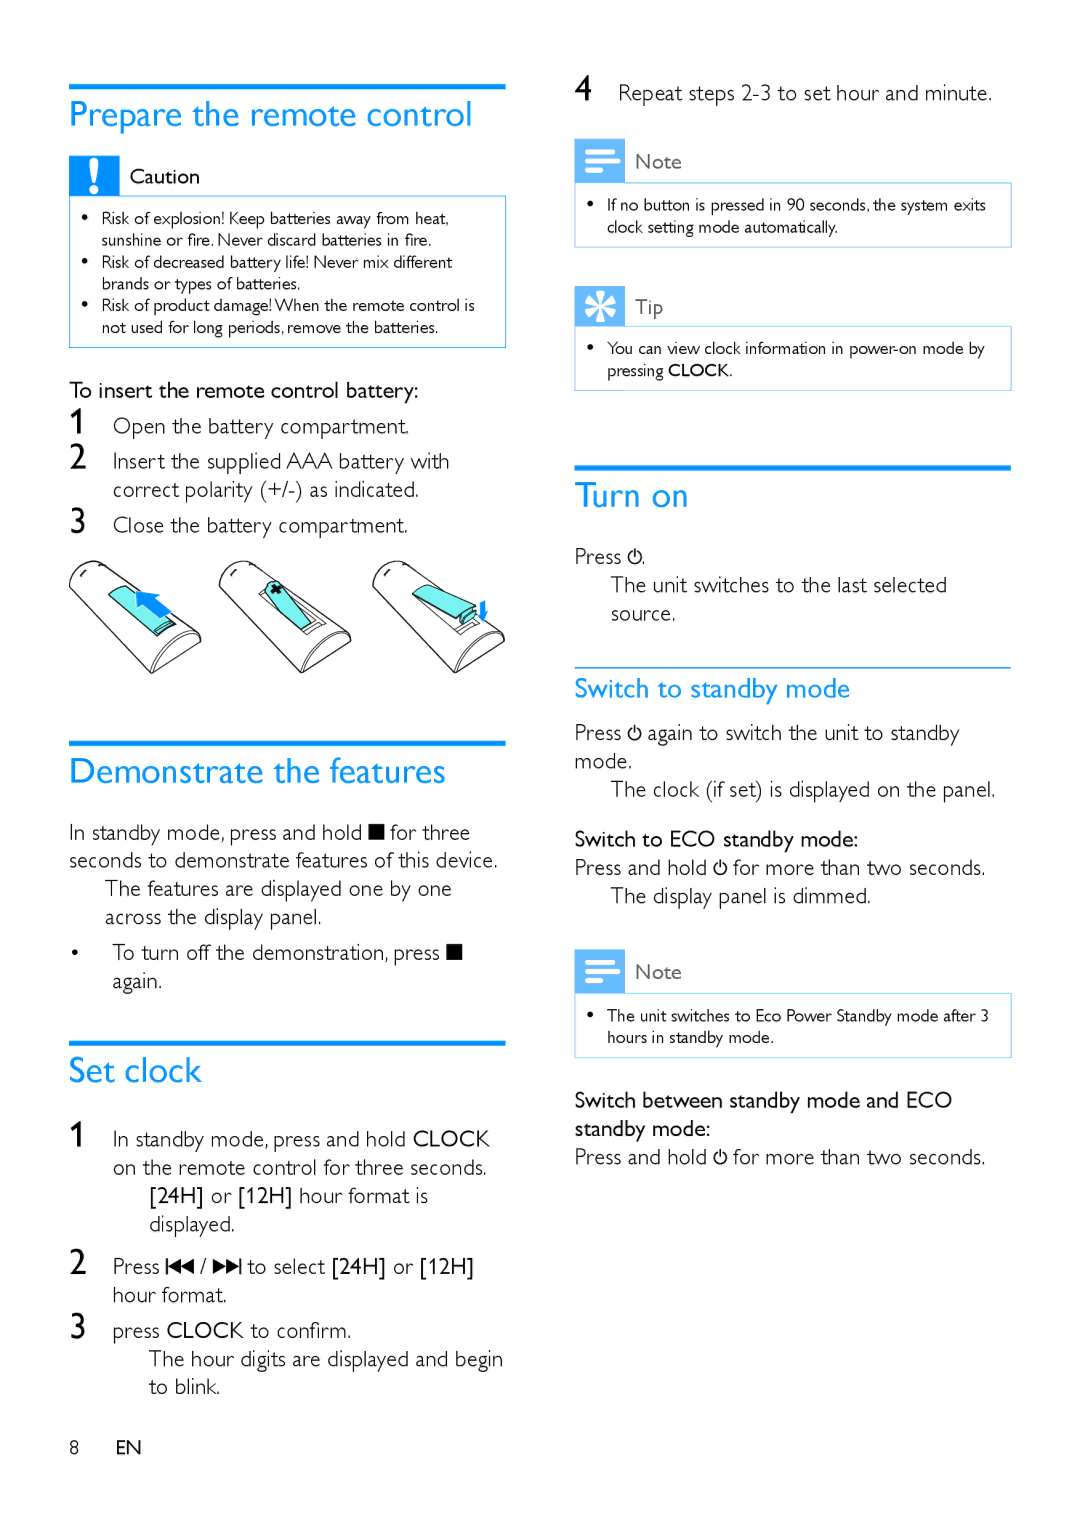
To insert the remote control battery:
1
2
3
Demonstrate the features
In standby mode, press and hold ![]() for three seconds to demonstrate features of this device.
for three seconds to demonstrate features of this device.
»»The features are displayed one by one across the display panel.
•To turn off the demonstration, press ![]() again.
again.
Set clock
1 In standby mode, press and hold CLOCK on the remote control for three seconds.
»»[24H] or [12H] hour format is displayed.
2 Press ![]() /
/ ![]()
![]() to select [24H] or [12H] hour format.
to select [24H] or [12H] hour format.
3 press CLOCK to confirm.
»»The hour digits are displayed and begin to blink.
4 Repeat steps
![]() Note
Note
•• If no button is pressed in 90 seconds, the system exits clock setting mode automatically.
![]() Tip
Tip
•• You can view clock information in
Turn on
Press ![]() .
.
»»The unit switches to the last selected source.
Switch to standby mode
Press ![]() again to switch the unit to standby mode.
again to switch the unit to standby mode.
»»The clock (if set) is displayed on the panel.
Switch to ECO standby mode:
Press and hold ![]() for more than two seconds.
for more than two seconds.
»»The display panel is dimmed.
![]() Note
Note
•• The unit switches to Eco Power Standby mode after 3 hours in standby mode.
Switch between standby mode and ECO standby mode:
Press and hold ![]() for more than two seconds.
for more than two seconds.
8EN