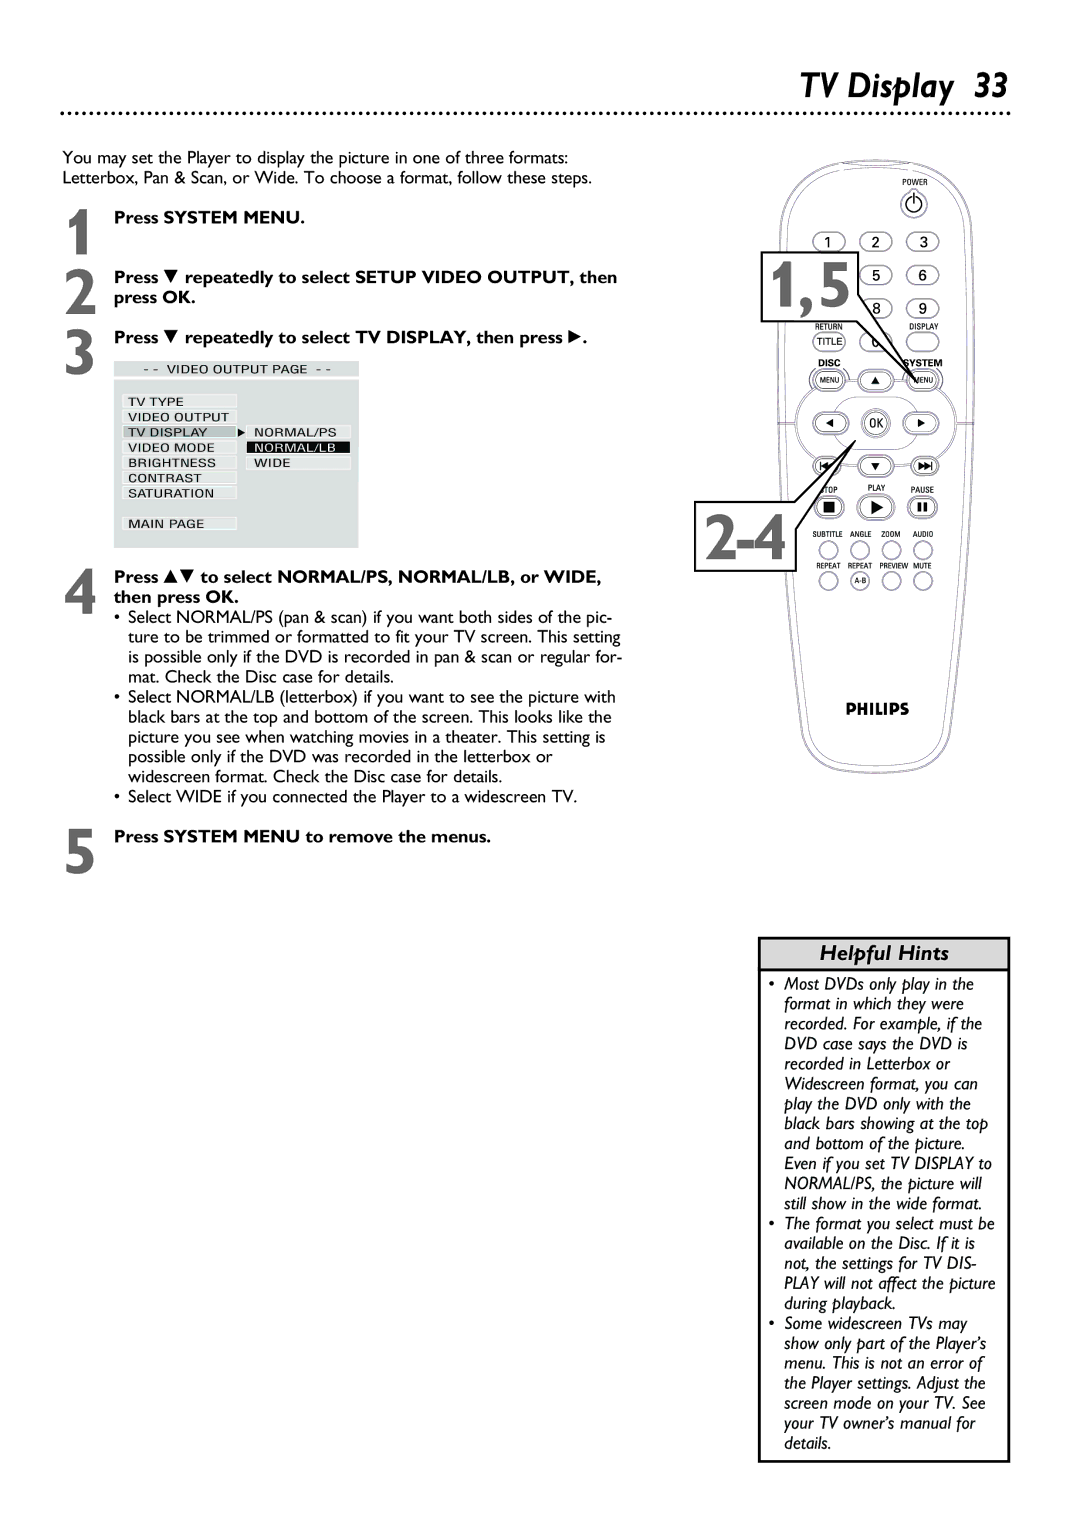
You may set the Player to display the picture in one of three formats: Letterbox, Pan & Scan, or Wide. To choose a format, follow these steps.
1
| Press 9 repeatedly to select SETUP VIDEO OUTPUT, then | |
2 press OK. |
| |
3 | Press 9 repeatedly to select TV DISPLAY, then press :. | |
- - VIDEO OUTPUT PAGE - - | ||
|
| |
| TV TYPE |
|
| VIDEO OUTPUT |
|
| TV DISPLAY | F NORMAL/PS |
| VIDEO MODE | NORMAL/LB |
| BRIGHTNESS | WIDE |
| CONTRAST |
|
| SATURATION |
|
MAIN PAGE
4 Press 89 to select NORMAL/PS, NORMAL/LB, or WIDE, then press OK.
•Select NORMAL/PS (pan & scan) if you want both sides of the pic- ture to be trimmed or formatted to fit your TV screen. This setting is possible only if the DVD is recorded in pan & scan or regular for- mat. Check the Disc case for details.
•Select NORMAL/LB (letterbox) if you want to see the picture with black bars at the top and bottom of the screen. This looks like the picture you see when watching movies in a theater. This setting is possible only if the DVD was recorded in the letterbox or widescreen format. Check the Disc case for details.
•Select WIDE if you connected the Player to a widescreen TV.
5 Press SYSTEM MENU to remove the menus.
TV Display 33
1,5
Helpful Hints
•Most DVDs only play in the format in which they were recorded. For example, if the DVD case says the DVD is recorded in Letterbox or Widescreen format, you can play the DVD only with the black bars showing at the top and bottom of the picture. Even if you set TV DISPLAY to NORMAL/PS, the picture will still show in the wide format.
•The format you select must be available on the Disc. If it is not, the settings for TV DIS- PLAY will not affect the picture during playback.
•Some widescreen TVs may show only part of the Player’s menu. This is not an error of the Player settings. Adjust the screen mode on your TV. See your TV owner’s manual for details.
