E9015ED_EN.qx3 03.7.29 6:32 PM Page 9

Setting Up your System

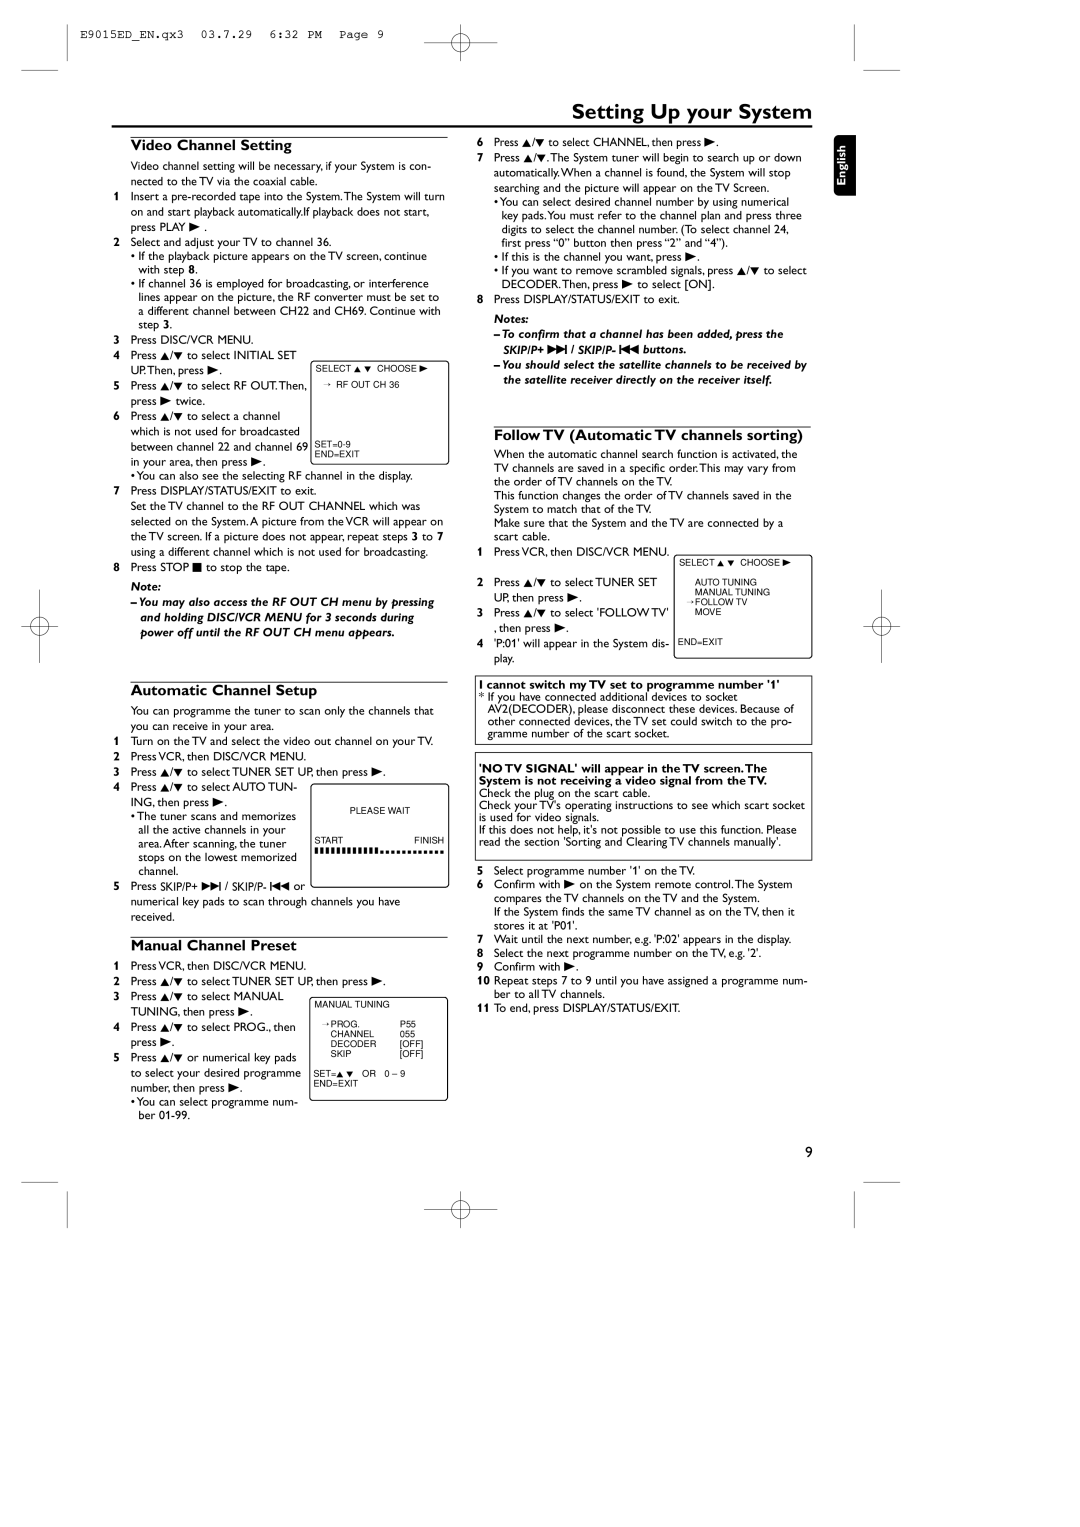
Video Channel Setting

Video channel setting will be necessary, if your System is con- nected to the TV via the coaxial cable.

1Insert a pre-recorded tape into the System.The System will turn on and start playback automatically.If playback does not start, press PLAY B .

2Select and adjust your TV to channel 36.

If the playback picture appears on the TV screen, continue with step 8.

If channel 36 is employed for broadcasting, or interference lines appear on the picture, the RF converter must be set to a different channel between CH22 and CH69. Continue with step 3.

6

Press K/L to select CHANNEL, then press B.

7

Press K/L.The System tuner will begin to search up or down


automatically.When a channel is found, the System will stop


searching and the picture will appear on the TV Screen.


• You can select desired channel number by using numerical


key pads.You must refer to the channel plan and press three


digits to select the channel number. (To select channel 24,


first press “0” button then press “2” and “4”).


• If this is the channel you want, press B.


• If you want to remove scrambled signals, press K/L to select


DECODER.Then, press B to select [ON].

8

Press DISPLAY/STATUS/EXIT to exit.


Notes:


– To confirm that a channel has been added, press the

English

3Press DISC/VCR MENU.

4Press K/L to select INITIAL SET UP.Then, press B.

5Press K/L to select RF OUT.Then, press B twice.

6Press K/L to select a channel which is not used for broadcasted between channel 22 and channel 69

SELECT K L CHOOSE B

RF OUT CH 36

SET=0-9

END=EXIT

SKIP/P+ G / SKIP/P- H buttons.

– You should select the satellite channels to be received by

the satellite receiver directly on the receiver itself.

Follow TV (Automatic TV channels sorting)

When the automatic channel search function is activated, the

in your area, then press B.

You can also see the selecting RF channel in the display. 7 Press DISPLAY/STATUS/EXIT to exit.

Set the TV channel to the RF OUT CHANNEL which was selected on the System. A picture from the VCR will appear on the TV screen. If a picture does not appear, repeat steps 3 to 7 using a different channel which is not used for broadcasting.

8 Press STOP C to stop the tape.

Note:

You may also access the RF OUT CH menu by pressing and holding DISC/VCR MENU for 3 seconds during power off until the RF OUT CH menu appears.

Automatic Channel Setup

You can programme the tuner to scan only the channels that you can receive in your area.

1Turn on the TV and select the video out channel on your TV.

2Press VCR, then DISC/VCR MENU.

3Press K/L to select TUNER SET UP, then press B.

4Press K/L to select AUTO TUN-

ING, then press B.

• The tuner scans and memorizes


PLEASE WAIT


all the active channels in your

START

FINISH

area. After scanning, the tuner

stops on the lowest memorized

❚ ❚ ❚ ❚ ❚ ❚ ❚ ❚ ❚ ❚ ❚ ❚ ❚ ❚ ❚ ❚ ❚ ❚ ❚ ❚ ❚ ❚ ❚ ❚


channel.

5Press SKIP/P+ G / SKIP/P- H or

numerical key pads to scan through channels you have received.

Manual Channel Preset

1Press VCR, then DISC/VCR MENU.

2Press K/L to select TUNER SET UP, then press B.

3Press K/L to select MANUAL


TUNING, then press B.

MANUAL TUNING


4

Press K/L to select PROG., then

PROG.


P55


press B.

CHANNEL


055


DECODER


[OFF]

5

Press K/L or numerical key pads

SKIP


[OFF]


to select your desired programme

SET=K L OR

0

– 9


number, then press B.

END=EXIT


You can select programme num- ber 01-99.

TV channels are saved in a specific order.This may vary from the order of TV channels on the TV.

This function changes the order of TV channels saved in the System to match that of the TV.

Make sure that the System and the TV are connected by a scart cable.

1

Press VCR, then DISC/VCR MENU.

SELECT K L CHOOSE B


2

Press K/L to select TUNER SET

AUTO TUNING


UP, then press B.

MANUAL TUNING


FOLLOW TV

3

Press K/L to select 'FOLLOW TV'

MOVE

, then press B.

4'P:01' will appear in the System dis- END=EXIT play.

I cannot switch my TV set to programme number '1'

*If you have connected additional devices to socket AV2(DECODER), please disconnect these devices. Because of other connected devices, the TV set could switch to the pro- gramme number of the scart socket.

'NO TV SIGNAL' will appear in the TV screen.The System is not receiving a video signal from the TV. Check the plug on the scart cable.

Check your TV's operating instructions to see which scart socket is used for video signals.

If this does not help, it's not possible to use this function. Please read the section 'Sorting and Clearing TV channels manually'.

5Select programme number '1' on the TV.

6Confirm with B on the System remote control.The System compares the TV channels on the TV and the System.

If the System finds the same TV channel as on the TV, then it stores it at 'P01'.

7Wait until the next number, e.g. 'P:02' appears in the display.

8Select the next programme number on the TV, e.g. '2'.

9Confirm with B.

10Repeat steps 7 to 9 until you have assigned a programme num- ber to all TV channels.

11To end, press DISPLAY/STATUS/EXIT.

9

Page 9
Image 9
Philips E9015ED, MX5100VR/00 manual Video Channel Setting, Follow TV Automatic TV channels sorting, Automatic Channel Setup

MX5100VR/00, E9015ED, 0VMN03813 specifications

Philips has long been a trusted name in consumer electronics, and among its diverse lineup of products, the 0VMN03813, E9015ED, and MX5100VR/00 stand out for their innovative features and reliable performance. Each of these models is designed to cater to the needs of modern users who demand versatility and efficiency in their devices.

Starting with the Philips 0VMN03813, this model exemplifies cutting-edge technology and user-friendly design. With a powerful processor, it ensures smooth operation for various applications. The display quality is exceptional, providing vibrant colors and sharp images, making it an ideal choice for multimedia consumption. Additionally, the 0VMN03813 is equipped with advanced connectivity options, including Wi-Fi and Bluetooth, enabling easy connection to other devices and internet access for streaming and downloading.

Next in line is the Philips E9015ED, a product that focuses on delivering high sound quality. This model is tailored for audiophiles who appreciate rich audio experiences. The E9015ED incorporates enhanced noise-cancellation technology, allowing users to immerse themselves in their favorite music without distractions. With a robust battery life, users can enjoy long listening sessions without the worry of frequent recharging. The design is sleek and ergonomic, ensuring comfort during extended use.

Lastly, the Philips MX5100VR/00 adds another dimension to the product lineup. This model is particularly innovative in its approach to user interaction, featuring intuitive controls and an easy-to-navigate interface. The MX5100VR/00 excels in versatility, functioning seamlessly across multiple platforms and devices. It is perfect for both casual users and professionals who rely on precision and efficiency for their tasks. The enhanced durability of this model means that it can withstand the rigors of daily use, making it an excellent investment for anyone in need of a reliable technology solution.

In conclusion, the Philips 0VMN03813, E9015ED, and MX5100VR/00 are exemplary products that highlight the brand's commitment to quality and innovation. Each product caters to specific user needs, equipped with modern technologies and features designed to improve performance and usability. Whether for entertainment, audio enjoyment, or efficient multitasking, these models represent the forefront of Philips' offerings in the tech market.