Connections
English
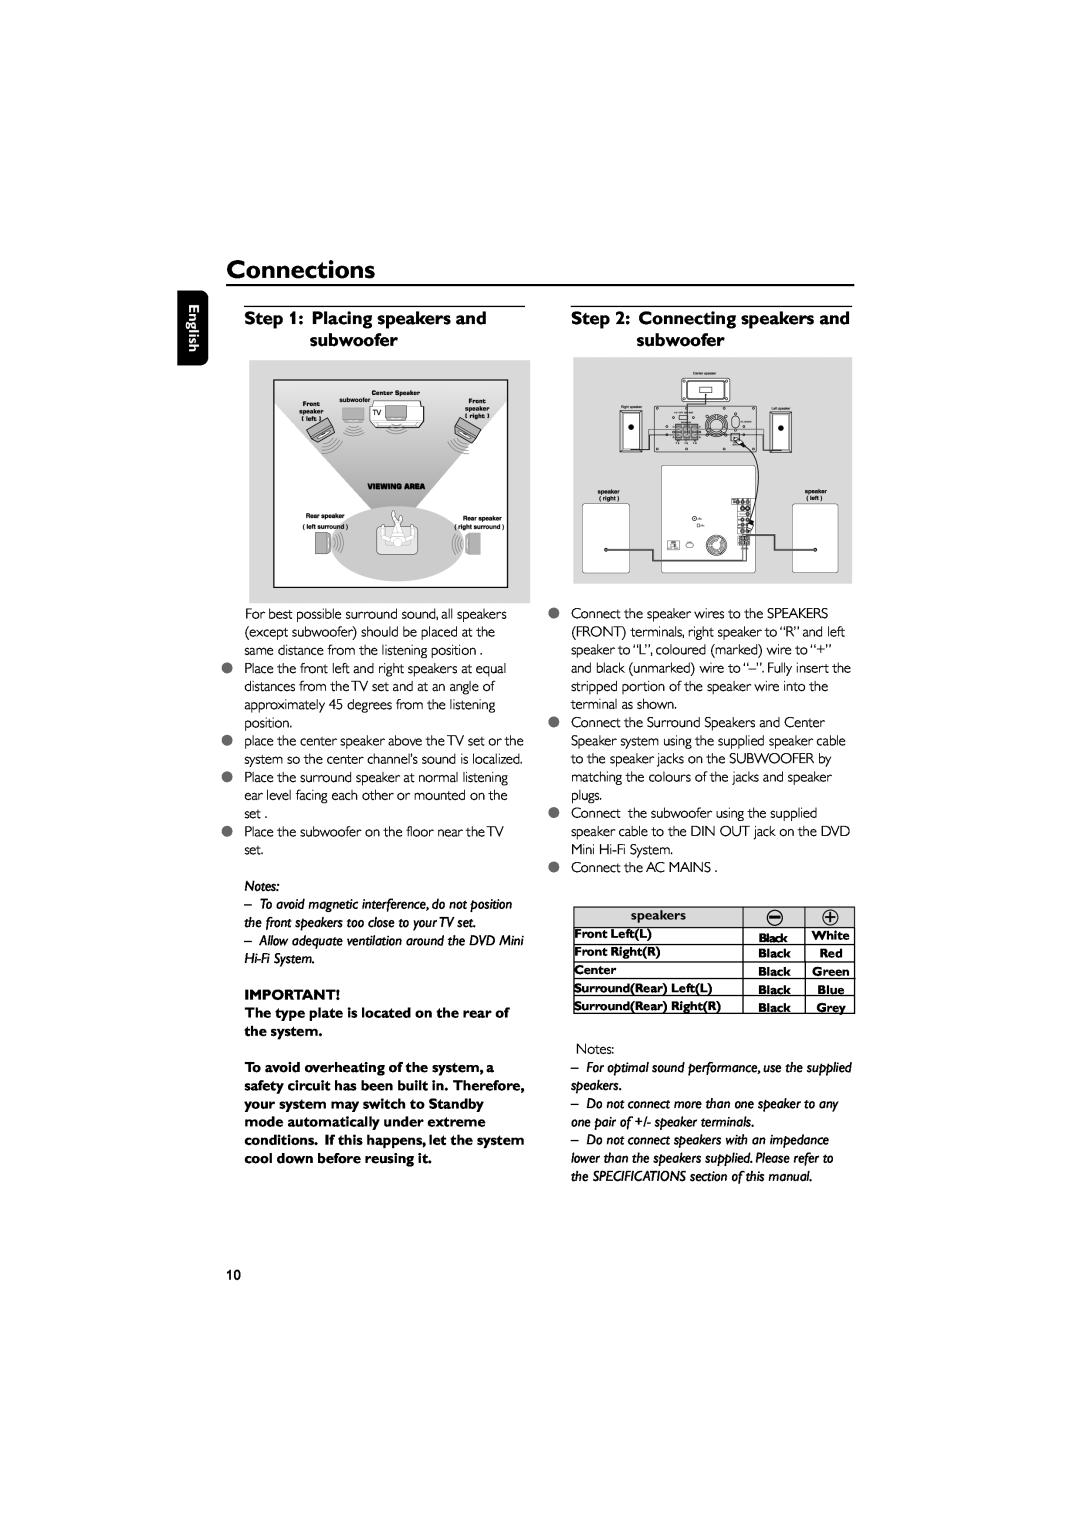
Step 1: Placing speakers and
subwoofer |
|
subwoofer |
|
Rear speaker | Rear speaker |
| |
( left surround ) | ( right surround ) |
For best possible surround sound, all speakers (except subwoofer) should be placed at the same distance from the listening position .
●Place the front left and right speakers at equal distances from the TV set and at an angle of approximately 45 degrees from the listening position.
●place the center speaker above the TV set or the system so the center channel’s sound is localized.
●Place the surround speaker at normal listening ear level facing each other or mounted on the set .
●Place the subwoofer on the floor near the TV set.
Notes:
–To avoid magnetic interference, do not position the front speakers too close to your TV set.
–Allow adequate ventilation around the DVD Mini
IMPORTANT!
The type plate is located on the rear of the system.
To avoid overheating of the system, a safety circuit has been built in. Therefore, your system may switch to Standby mode automatically under extreme conditions. If this happens, let the system cool down before reusing it.
Step 2: Connecting speakers and subwoofer
●Connect the speaker wires to the SPEAKERS (FRONT) terminals, right speaker to “R” and left speaker to “L”, coloured (marked) wire to “+” and black (unmarked) wire to
●Connect the Surround Speakers and Center Speaker system using the supplied speaker cable to the speaker jacks on the SUBWOOFER by matching the colours of the jacks and speaker plugs.
●Connect the subwoofer using the supplied speaker cable to the DIN OUT jack on the DVD Mini
●Connect the AC MAINS .
speakers | – | + |
Front Left(L) | Black | White |
Front Right(R) | Black | Red |
Center | Black | Green |
Surround(Rear) Left(L) | Black | Blue |
Surround(Rear) Right(R) | Black | Grey |
Notes:
–For optimal sound performance, use the supplied speakers.
–Do not connect more than one speaker to any one pair of +/- speaker terminals.
–Do not connect speakers with an impedance lower than the speakers supplied. Please refer to the SPECIFICATIONS section of this manual.
10