8.
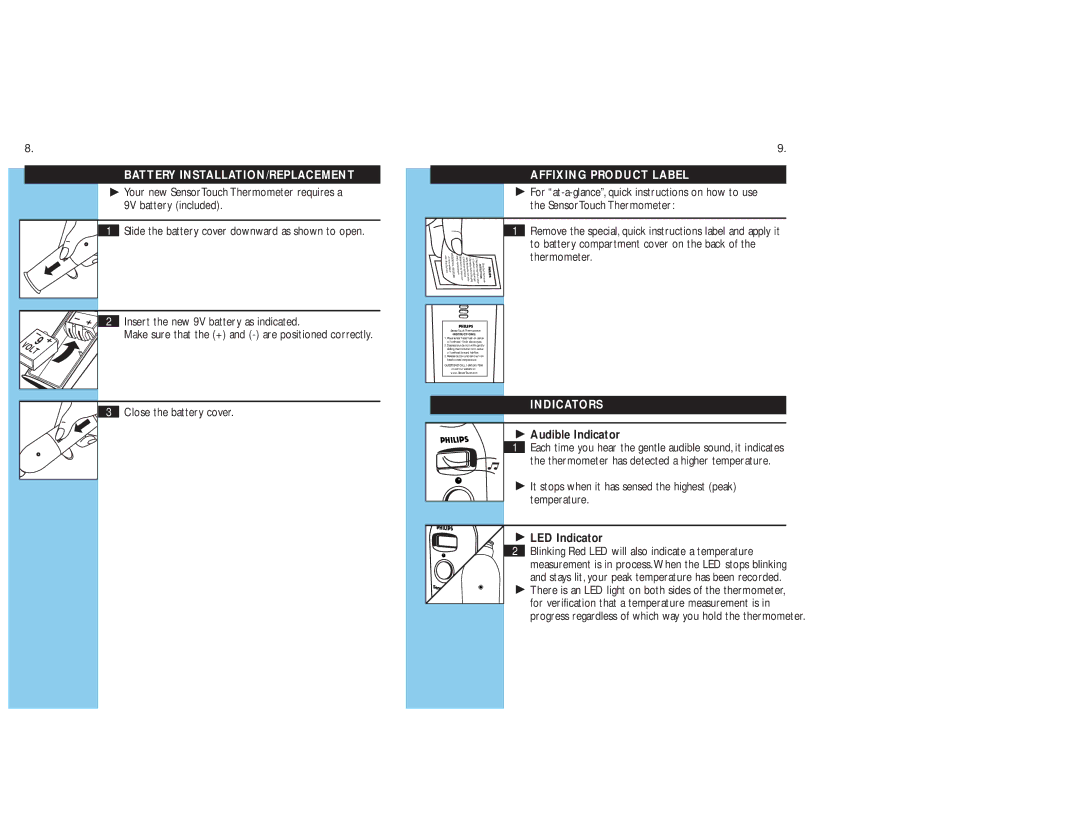
BATTERY INSTALLATION/REPLACEMENT
![]() Your new SensorTouch Thermometer requires a 9V battery (included).
Your new SensorTouch Thermometer requires a 9V battery (included).
9.
AFFIXING PRODUCT LABEL
![]() For
For
1Slide the battery cover downward as shown to open.
|
|
|
| 3 |
|
|
|
|
|
|
|
www or |
| head | . |
|
|
|
|
|
|
| |
|
| of |
| 2 |
|
|
| ||||
|
|
| . | of | 1. |
| |||||
. | visitQUESTIONS? | to Release | forehead | sliding | Depress | Place |
| ||||
SensorT | forehead, |
| |||||||||
our | CALL | read | button |
| SensorT | ||||||
ouch |
| 1 |
|
|
| blue |
| ||||
website | - |
| and | toward |
| 1 sensor | |||||
. | 800 |
|
|
|
| inch | head | ouch | |||
com | at | 243 | temperature |
| thermometer button | ||||||
|
| - |
| from |
|
|
| flush |
| ||
|
| 7884 |
| remove hairline |
| while above |
| ||||
|
|
|
| from | center | gently | eyes | center | Thermometer | ||
|
|
|
|
|
| . | |||||
|
|
|
|
|
|
|
|
| |||
1Remove the special, quick instructions label and apply it to battery compartment cover on the back of the thermometer.
| 2 Insert the new 9V battery as indicated. |
9 | Make sure that the (+) and |
| |
V |
|
O |
|
LT |
|
3 Close the battery cover.
SensorTouch Thermometer
INSTRUCTIONS:
1.Place sensor head flush on center of forehead, 1 inch above eyes.
2.Depress blue button while gently sliding thermometer from center of forehead toward hairline.
3.Release button and remove from head to read temperature
QUESTIONS? CALL
INDICATORS
 Audible Indicator
1Each time you hear the gentle audible sound, it indicates
the thermometer has detected a higher temperature.
![]() It stops when it has sensed the highest (peak) temperature.
It stops when it has sensed the highest (peak) temperature.
 LED Indicator
2 Blinking Red LED will also indicate a temperature measurement is in process.When the LED stops blinking and stays lit, your peak temperature has been recorded.
 There is an LED light on both sides of the thermometer,
for verification that a temperature measurement is in progress regardless of which way you hold the thermometer.
