Connections
Step 5: Connecting the power cord
IMPORTANT!
–Never make or change any connection with the power switched on.
After everything is connected properly, plug in the AC power cord to the power outlet.
Optional: Connecting additional equipment
IMPORTANT!
–Some discs are
cannot record the disc through a VCR or digital recording device.
–When making connections, make sure the colour of cables matches the colour of jacks.
–Always refer to the owner's manual of the other equipment for complete connection and usage details.
AUDIO OUT
L
R
A |
C DIGITAL IN
|
| VIDEO IN |
| AUDIO IN |
|
AUDIO | R | B |
INPUT | L |
|
D
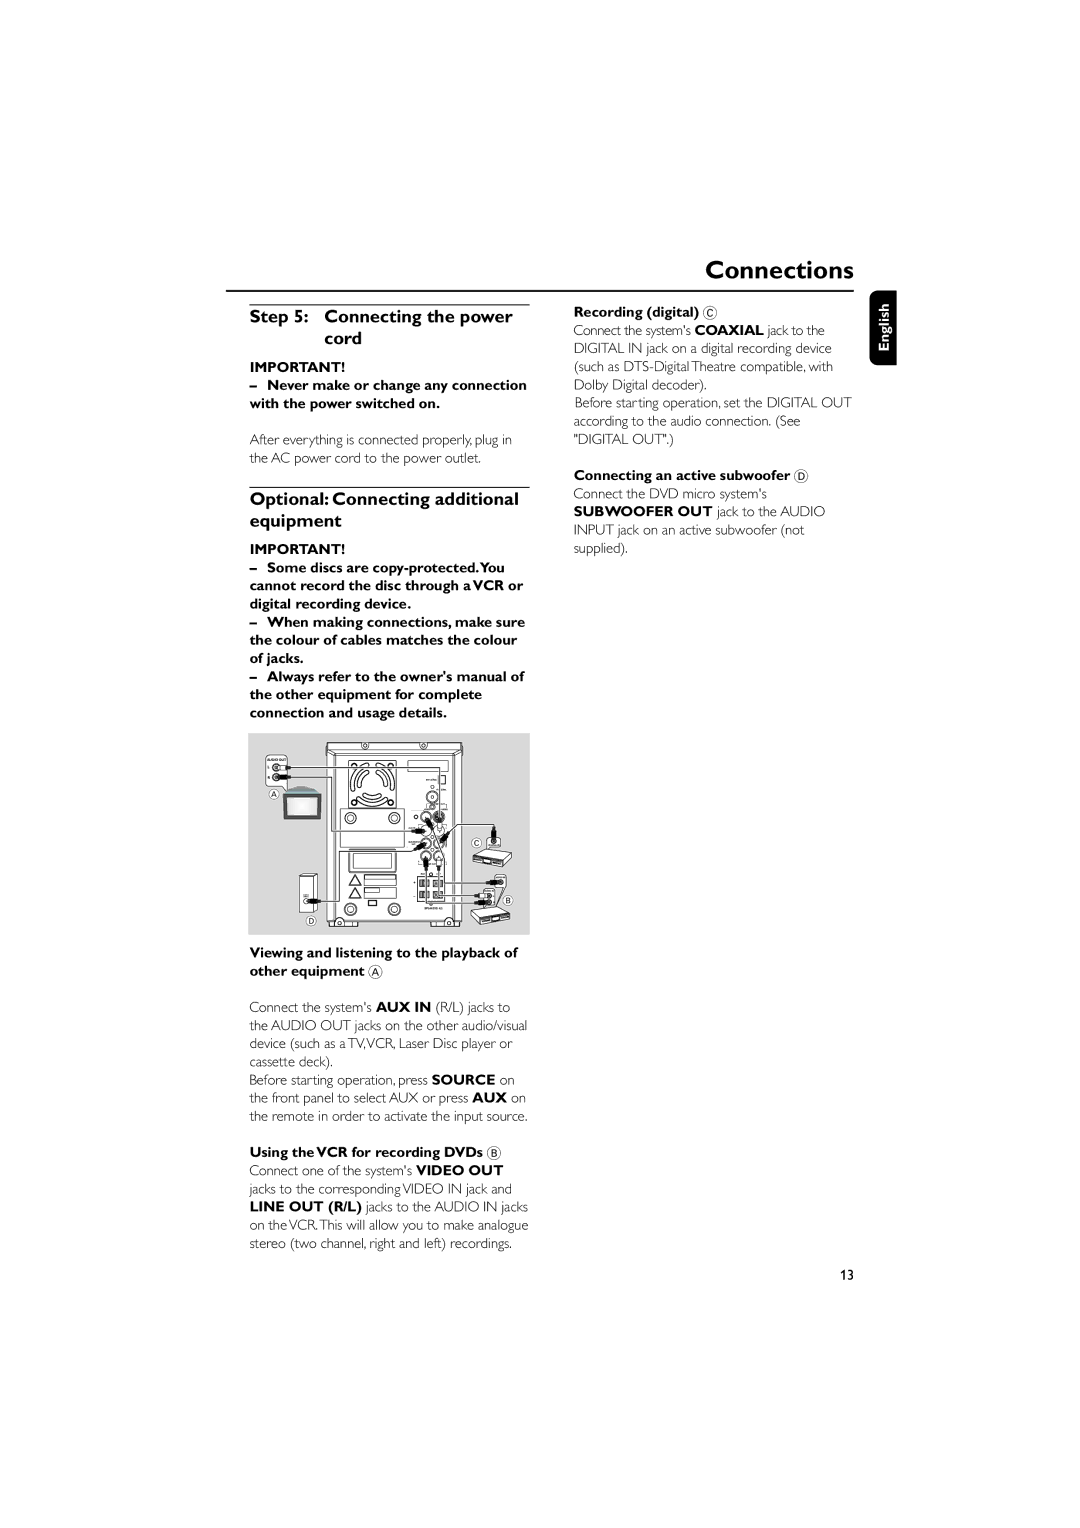
Viewing and listening to the playback of other equipment A
Connect the system's AUX IN (R/L) jacks to the AUDIO OUT jacks on the other audio/visual device (such as a TV,VCR, Laser Disc player or cassette deck).
Before starting operation, press SOURCE on the front panel to select AUX or press AUX on the remote in order to activate the input source.
Using the VCR for recording DVDs B
Connect one of the system's VIDEO OUT jacks to the corresponding VIDEO IN jack and LINE OUT (R/L) jacks to the AUDIO IN jacks on the VCR.This will allow you to make analogue stereo (two channel, right and left) recordings.
Recording (digital) C
Connect the system's COAXIAL jack to the DIGITAL IN jack on a digital recording device (such as
Before starting operation, set the DIGITAL OUT according to the audio connection. (See "DIGITAL OUT".)
Connecting an active subwoofer D
Connect the DVD micro system's SUBWOOFER OUT jack to the AUDIO INPUT jack on an active subwoofer (not supplied).
English
13