Preparing your baby monitor EN
–Charging will take longer than 16 hours when the parent unit is switched on during charging.To shorten the charging time, the parent unit should be switched off.
➜The parent unit is now ready for use!
General notes:
–When the units are switched off, in case of battery operated use, the batteries still discharge slowly.
–When the batteries are almost empty, the battery check light of the parent unit
Place the parent unit in the charging base
Using your baby monitor
Use this baby monitor for its intended household use as described in this manual.
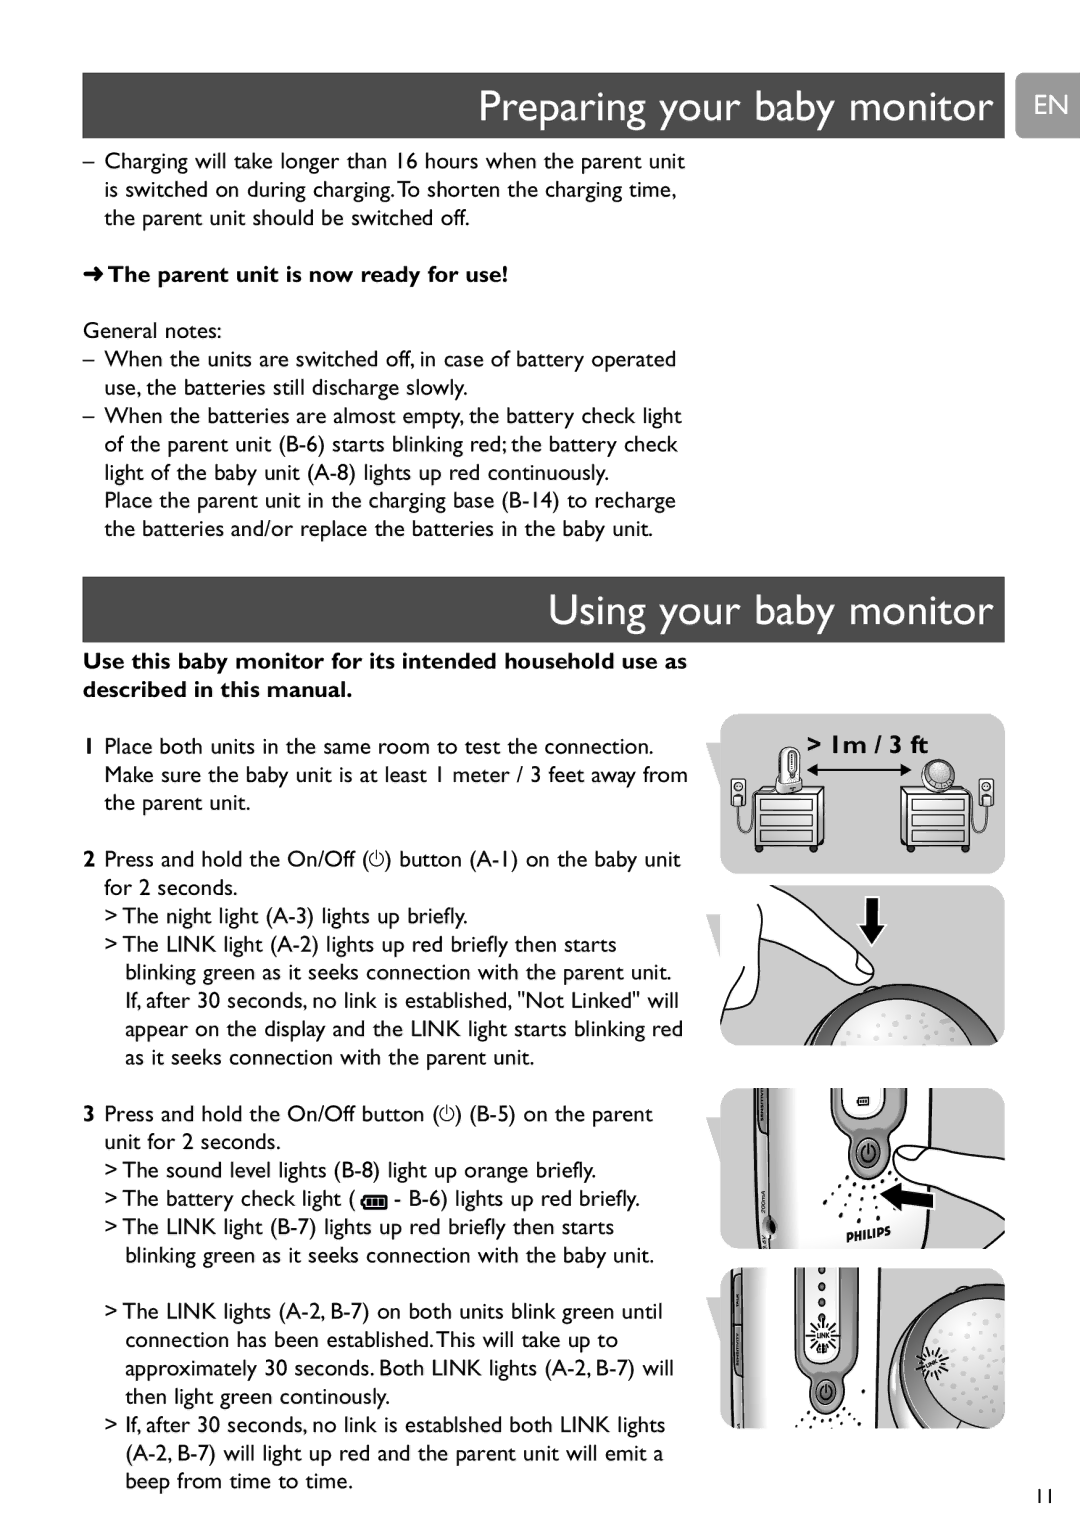
1 Place both units in the same room to test the connection. | > 1m / 3 ft |
Make sure the baby unit is at least 1 meter / 3 feet away from |
|
the parent unit. |
|
2Press and hold the On/Off (y) button
>The night light
>The LINK light
If, after 30 seconds, no link is established, "Not Linked" will appear on the display and the LINK light starts blinking red as it seeks connection with the parent unit.
3 Press and hold the On/Off button (y)
> The sound level lights
> The battery check light ( ![]() -
-
blinking green as it seeks connection with the baby unit.
> The LINK lights
> If, after 30 seconds, no link is establshed both LINK lights
11