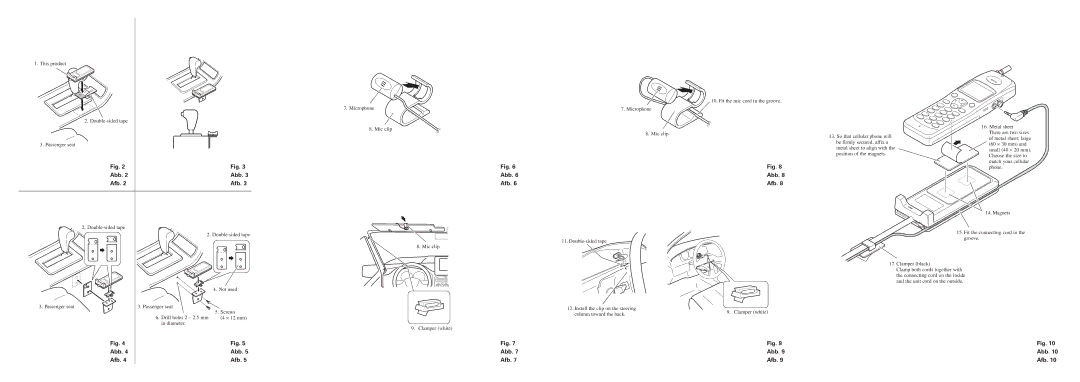
1. This product
7. Microphone | 7. Microphone |
2. Double-sided tape
8. Mic clip
8. Mic clip
3. Passenger seat
Fig. 2 | Fig. 3 | Fig. 6 |
Abb. 2 | Abb. 3 | Abb. 6 |
Afb. 2 | Afb. 3 | Afb. 6 |
2. Double-sided tape
2.
11.
8. Mic clip
|
| 4. Not used |
|
3. Passenger seat | 3. Passenger seat | 5. Screws | 12. Install the clip on the steering |
|
| ||
|
| column toward the back. | |
| 6. Drill holes 2 – 2.5 mm | (4 ⋅ 12 mm) | |
|
| ||
| in diameter. | 9. | Clamper (white) |
|
| ||
Fig. 4 |
| Fig. 5 | Fig. 7 |
Abb. 4 |
| Abb. 5 | Abb. 7 |
Afb. 4 |
| Afb. 5 | Afb. 7 |
10. Fit the mic cord in the groove.
| 16. Metal sheet | |
13. So that cellular phone will | There are two sizes | |
of metal sheet; large | ||
be firmly secured, affix a | ||
(60 ⋅ 30 mm) and | ||
metal sheet to align with the | small (40 ⋅ 20 mm). | |
position of the magnets. | Choose the size to | |
| ||
Fig. 8 | match your cellular | |
phone. | ||
Abb. 8 |
| |
Afb. 8 |
| |
| 14. Magnets | |
| 15. Fit the connecting cord in the | |
| groove. | |
17. Clamper (black) | ||
| Clamp both cords together with | |
| the connecting cord on the inside | |
| and the unit cord on the outside. | |
9. Clamper (white)
Fig. 9 | Fig. 10 |
Abb. 9 | Abb. 10 |
Afb. 9 | Afb. 10 |
