Installation
DIN |
| Fixing the Front Panel | |
|
| If you do not operate the Detaching and Replacing the Front Panel Function, use the sup- | |
Installation using the screw holes on the side of the unit | plied fixing screws and holder to fix the front panel to this unit. | ||
1. Remove the frame. (Fig. 9) |
| 1. Attach the holder to the front panel. (Fig. 12) | |
|
| ||
Frame |
|
| |
8 |
|
| |
Insert9 | the release pin into the hole in |
| |
the bottom of the frame and pull out |
| ||
to remove the frame. |
| ||
(When reattaching the frame, point | Fig. 12 | ||
the side with a groove downwards | |||
| |||
and attach it.) | 2. Replace the front panel to the unit. (Fig. 13) | ||
|
| ||
Fig. 9
2. Fastening the unit to the factory radio mounting bracket. (Fig. 10) (Fig. 11)
Select a position where the screw holes of the bracket and | Fig. 13 | |
the screw holes of the head unit become aligned (are fitted), | ||
| ||
and tighten the screws at 2 places on each side. Use either | 3. Fix the front panel to the unit using fixing screws. (Fig. 14) | |
truss screws (5 × 8 mm) or flush surface screws | ||
| ||
(5 × 9 mm), depending on the shape of the screw holes in | Fixing screw | |
the bracket. | ||
10 |
|
Fig. 10
| Fig. 14 |
Screw | |
11 |
|
Dashboard13 or Console
Factory radio mounting bracket12
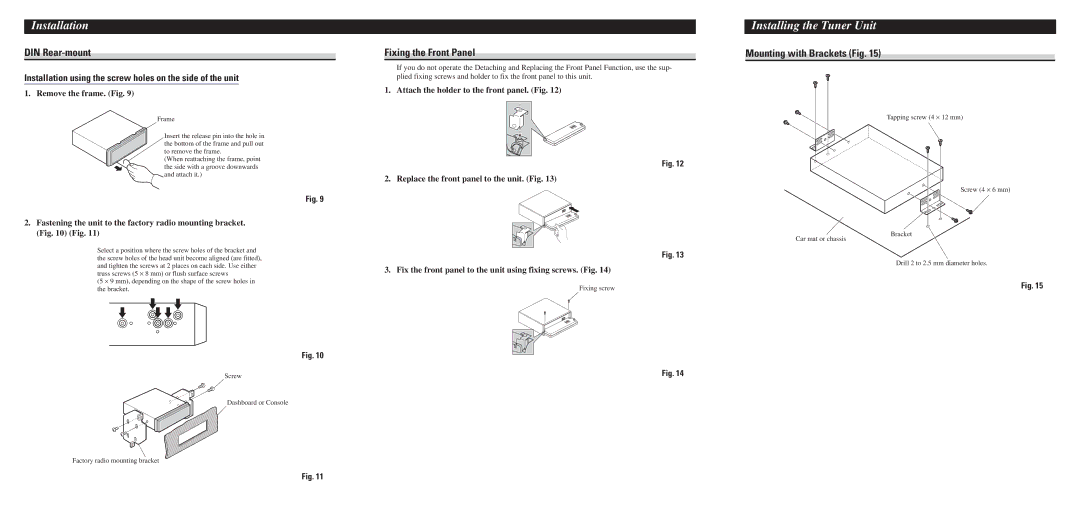
Installing the Tuner Unit
Mounting with Brackets (Fig. 15)
Tapping screw (4 × 12 mm)
Screw (4 × 6 mm)
Bracket
Car mat or chassis
Drill 2 to 2.5 mm diameter holes.
Fig. 15
Fig. 11