02Connecting up
Connecting using the component video output
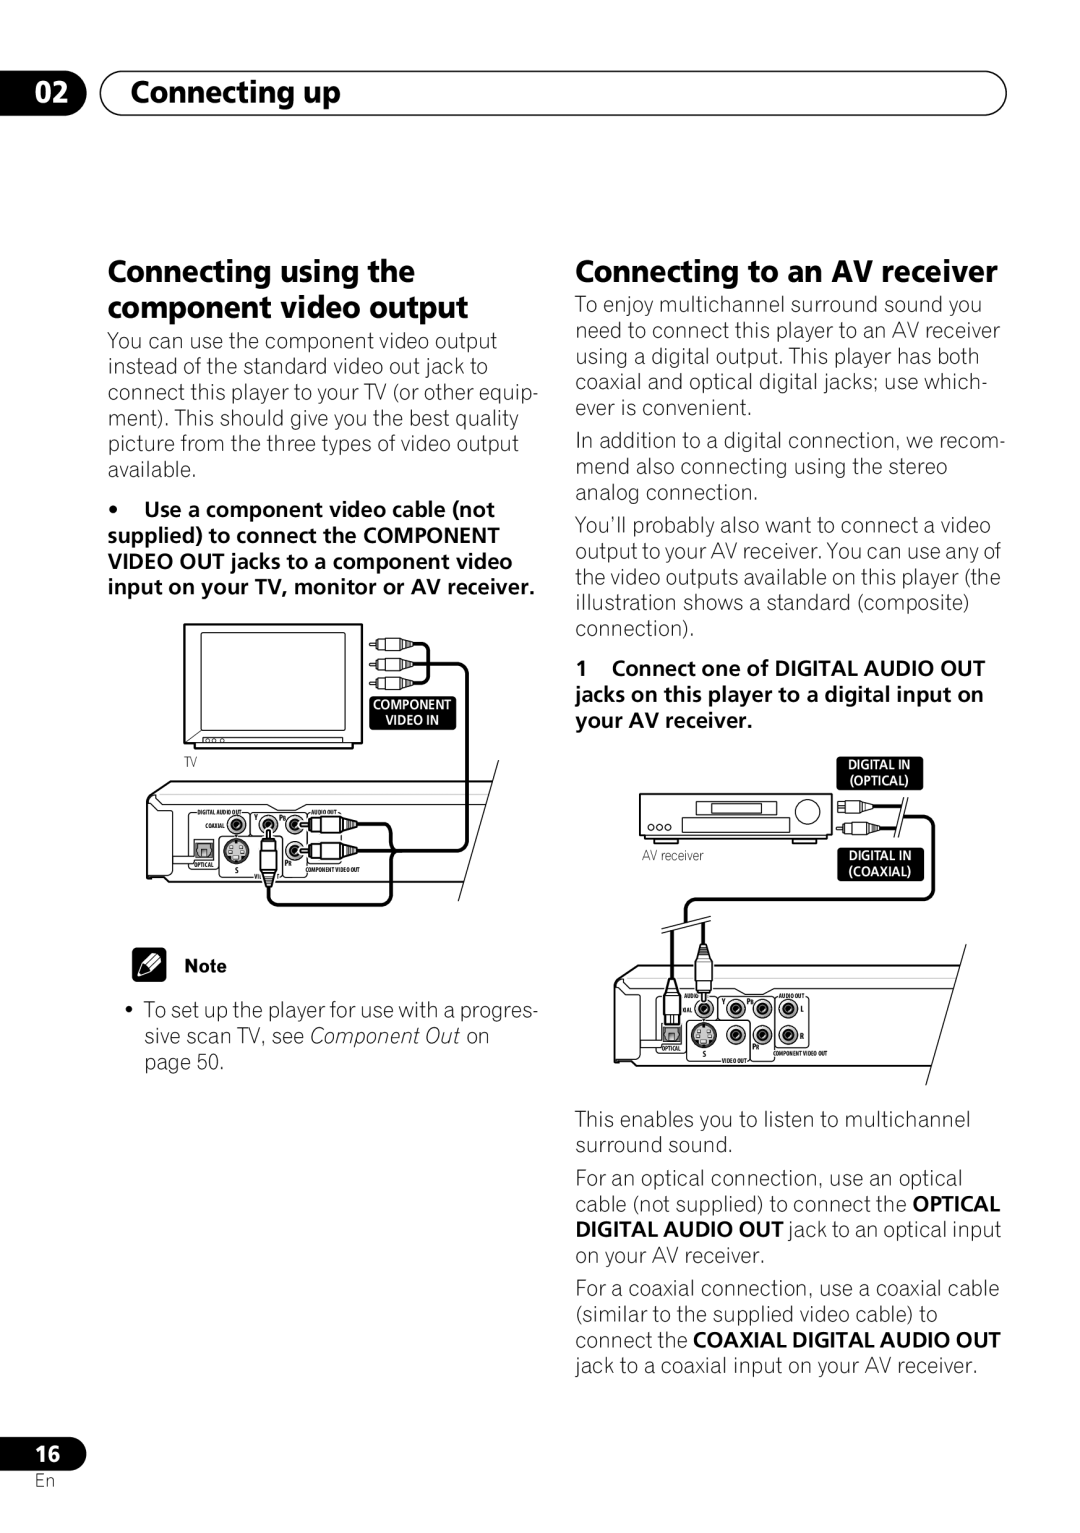
You can use the component video output instead of the standard video out jack to connect this player to your TV (or other equip- ment). This should give you the best quality picture from the three types of video output available.
•Use a component video cable (not supplied) to connect the COMPONENT VIDEO OUT jacks to a component video input on your TV, monitor or AV receiver.
| COMPONENT |
| VIDEO IN |
TV |
|
DIGITAL AUDIO OUT | AUDIO OUT |
Y | PB |
COAXIAL | L |
| R |
OPTICAL | PR |
S | COMPONENT VIDEO OUT |
VIDEO OUT |
|
• To set up the player for use with a progres- sive scan TV, see Component Out on page 50.
Connecting to an AV receiver
To enjoy multichannel surround sound you need to connect this player to an AV receiver using a digital output. This player has both coaxial and optical digital jacks; use which- ever is convenient.
In addition to a digital connection, we recom- mend also connecting using the stereo analog connection.
You’ll probably also want to connect a video output to your AV receiver. You can use any of the video outputs available on this player (the illustration shows a standard (composite) connection).
1Connect one of DIGITAL AUDIO OUT jacks on this player to a digital input on your AV receiver.
DIGITAL IN (OPTICAL)
AV receiver | DIGITAL IN |
| (COAXIAL) |
DIGITAL AUDIO OUT | AUDIO OUT |
Y | PB |
COAXIAL | L |
| R |
OPTICAL | PR |
S | COMPONENT VIDEO OUT |
VIDEO OUT |
|
This enables you to listen to multichannel surround sound.
For an optical connection, use an optical cable (not supplied) to connect the OPTICAL DIGITAL AUDIO OUT jack to an optical input on your AV receiver.
For a coaxial connection, use a coaxial cable (similar to the supplied video cable) to connect the COAXIAL DIGITAL AUDIO OUT jack to a coaxial input on your AV receiver.
16
En
