
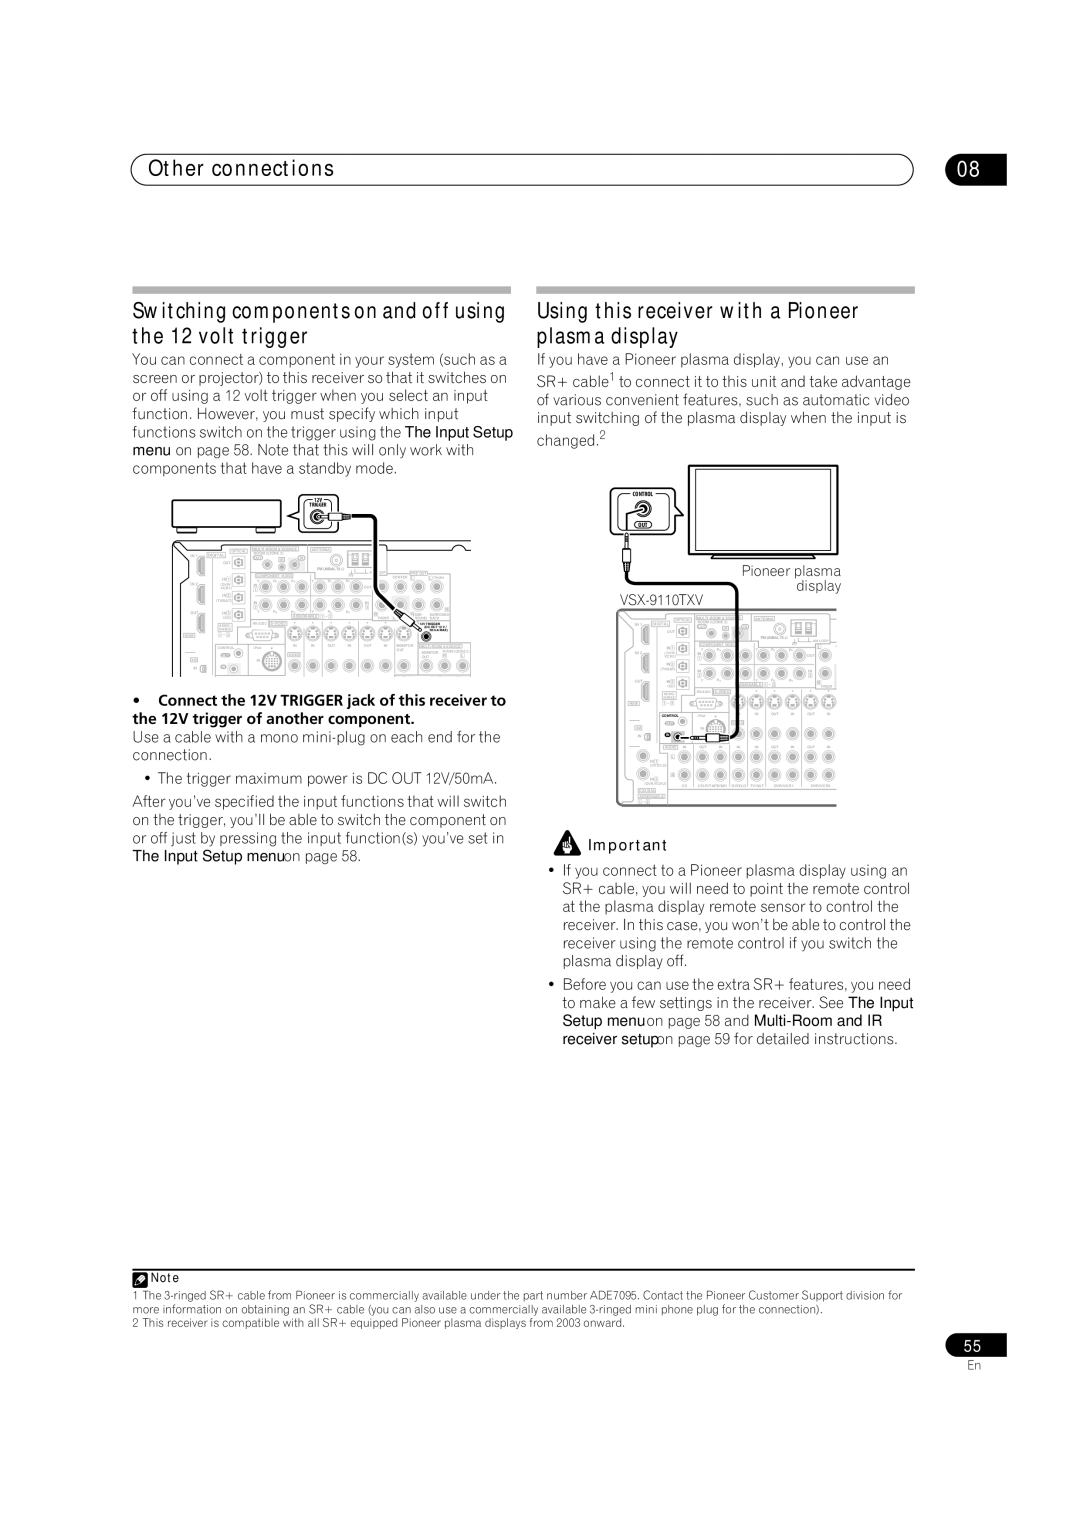
VSX-9110TXV-K specifications
The Pioneer VSX-9110TXV-K is a high-performance AV receiver designed to cater to the demanding needs of home theater enthusiasts. Combining advanced technology with versatile features, this model stands as a solid choice for anyone looking to enhance their audio-visual experience.One of the standout features of the VSX-9110TXV-K is its robust power output capability. With 7.1 channels, the receiver delivers a substantial 100 watts per channel, ensuring that movies, music, and games come to life with pristine clarity and impactful sound. The robust amplification not only provides a powerful output but also ensures that every audio detail is captured, from the softest whispers to the loudest explosions.
In terms of connectivity, the VSX-9110TXV-K boasts multiple HDMI inputs, allowing users to connect various devices such as Blu-ray players, gaming consoles, and streaming devices with ease. It supports 4K Ultra HD video pass-through, ensuring compatibility with the latest high-definition sources. The receiver also features advanced audio decoding technologies, including Dolby Atmos and DTS:X, which create an immersive surround sound environment that transports users right into the center of the action.
The receiver also incorporates Pioneer’s proprietary technologies, such as MCACC (Multi-Channel Acoustic Calibration System), which analyzes the acoustics of the room and automatically adjusts the speaker settings for optimal sound. This ensures a balanced listening experience, tailored specifically to the user’s environment.
The intuitive user interface and comprehensive remote control simplify navigation through the receiver's extensive features. With easy access to streaming services and a variety of input options, users can effortlessly switch between different audio and video sources.
Moreover, the VSX-9110TXV-K is equipped with advanced zone control, allowing users to enjoy audio in multiple rooms simultaneously. This feature enhances the versatility of the receiver, making it perfect for entertaining guests or simply enjoying music throughout the home.
In summary, the Pioneer VSX-9110TXV-K blends power, innovation, and user-friendly features, making it a standout choice for creating a captivating home theater experience. With its rich array of capabilities, it caters to both casual viewers and audiophiles alike, ensuring that every audio and visual experience is nothing short of exceptional.