L80-029 specifications
The Pitco Frialator L80-029 is a high-performance commercial deep fryer designed to meet the demanding needs of restaurants and food service establishments. With its robust construction and innovative design, the L80-029 is suited for frying a wide variety of foods, from French fries to chicken wings, ensuring consistent quality and temperature control.One of the main features of the L80-029 is its efficient heating system which utilizes a set of powerful burners. These burners are designed to deliver high BTU output, allowing the fryer to reach optimal cooking temperatures quickly. This capability not only enhances cooking efficiency but also helps reduce oil absorption in foods, resulting in healthier fried products.
The L80-029 is equipped with a unique heating element that is positioned below the fry pot. This design minimizes cold spots and ensures even heating throughout the oil, leading to perfectly cooked items every time. This fryer also incorporates a reliable temperature control system that maintains precise frying temperatures, critical for achieving the desired texture and flavor in fried items.
Another significant characteristic of the Pitco L80-029 is its convenience and ease of use. The fryer comes with adjustable legs, making it simple to position in any kitchen layout. The front-mounted thermostat and easy-to-read indicators provide users with intuitive operation and oversight of the cooking process. This user-friendly design allows kitchen staff to operate the fryer effectively without extensive training.
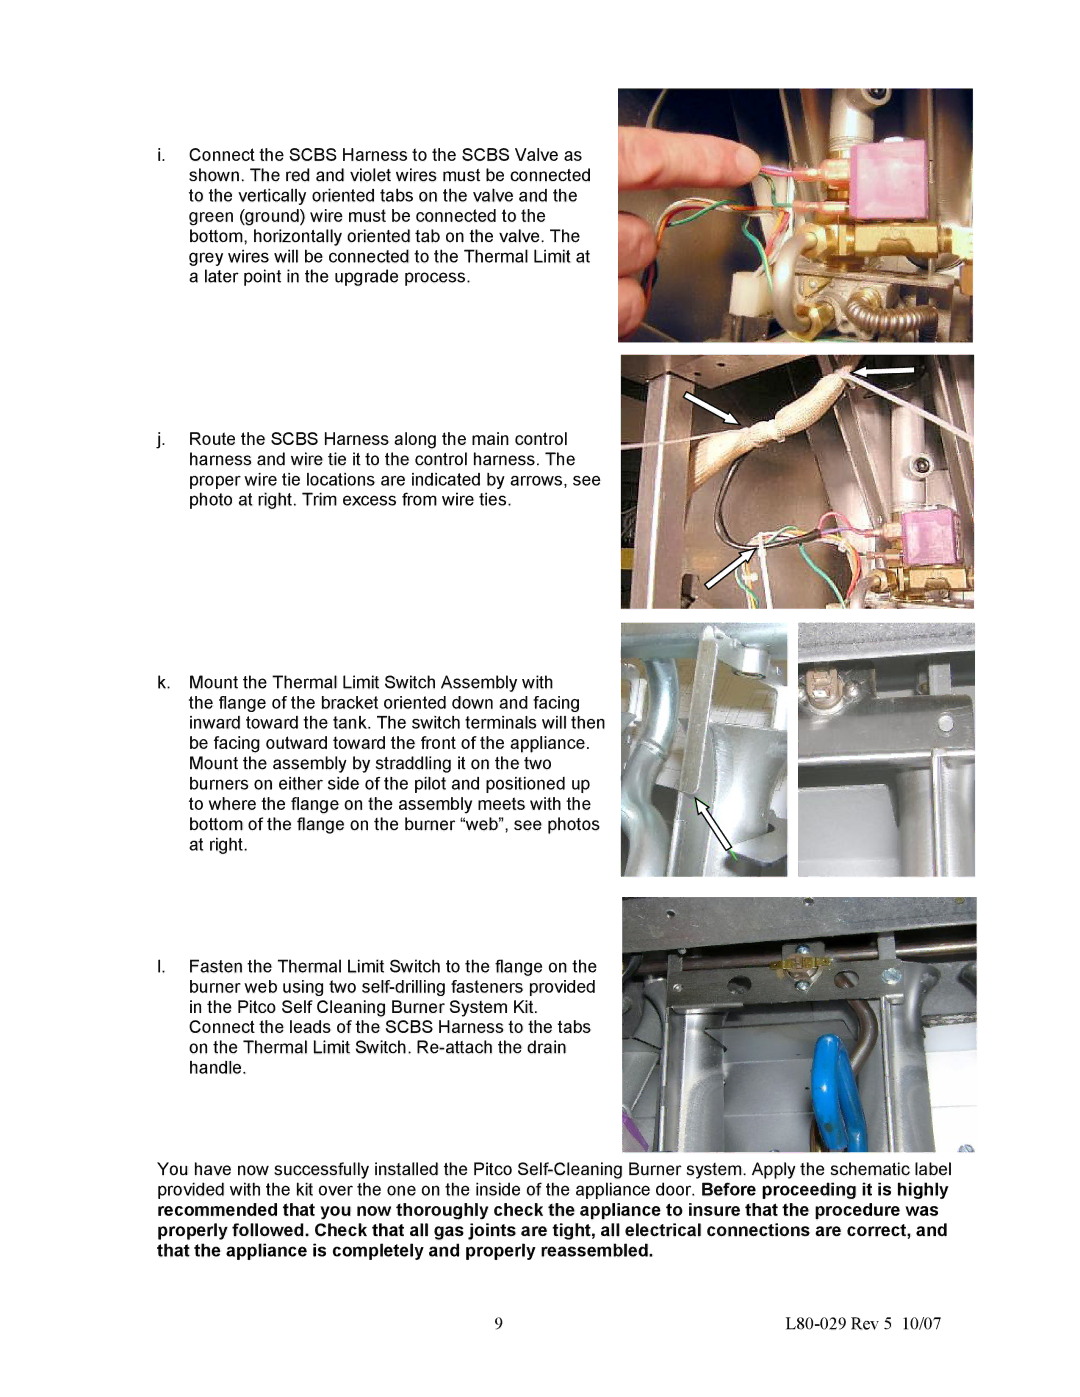
Safety features are integral to the design of the L80-029. It includes a high-limit switch that prevents overheating and potential hazards, safeguarding both the equipment and operators. The fryer's stainless-steel construction not only enhances its durability but also simplifies cleaning and maintenance, ensuring a long lifespan even in the busiest of kitchens.
Furthermore, the Pitco Frialator L80-029 is designed with energy efficiency in mind. The efficient heat transfer and oil management technology help to reduce overall operating costs while maintaining high frying performance.
In summary, the Pitco Frialator L80-029 stands out in the commercial cooking equipment market due to its powerful heating system, ease of use, safety features, and energy-efficient design. These attributes make it a reliable choice for any kitchen looking to deliver high-quality fried foods efficiently and consistently.

