
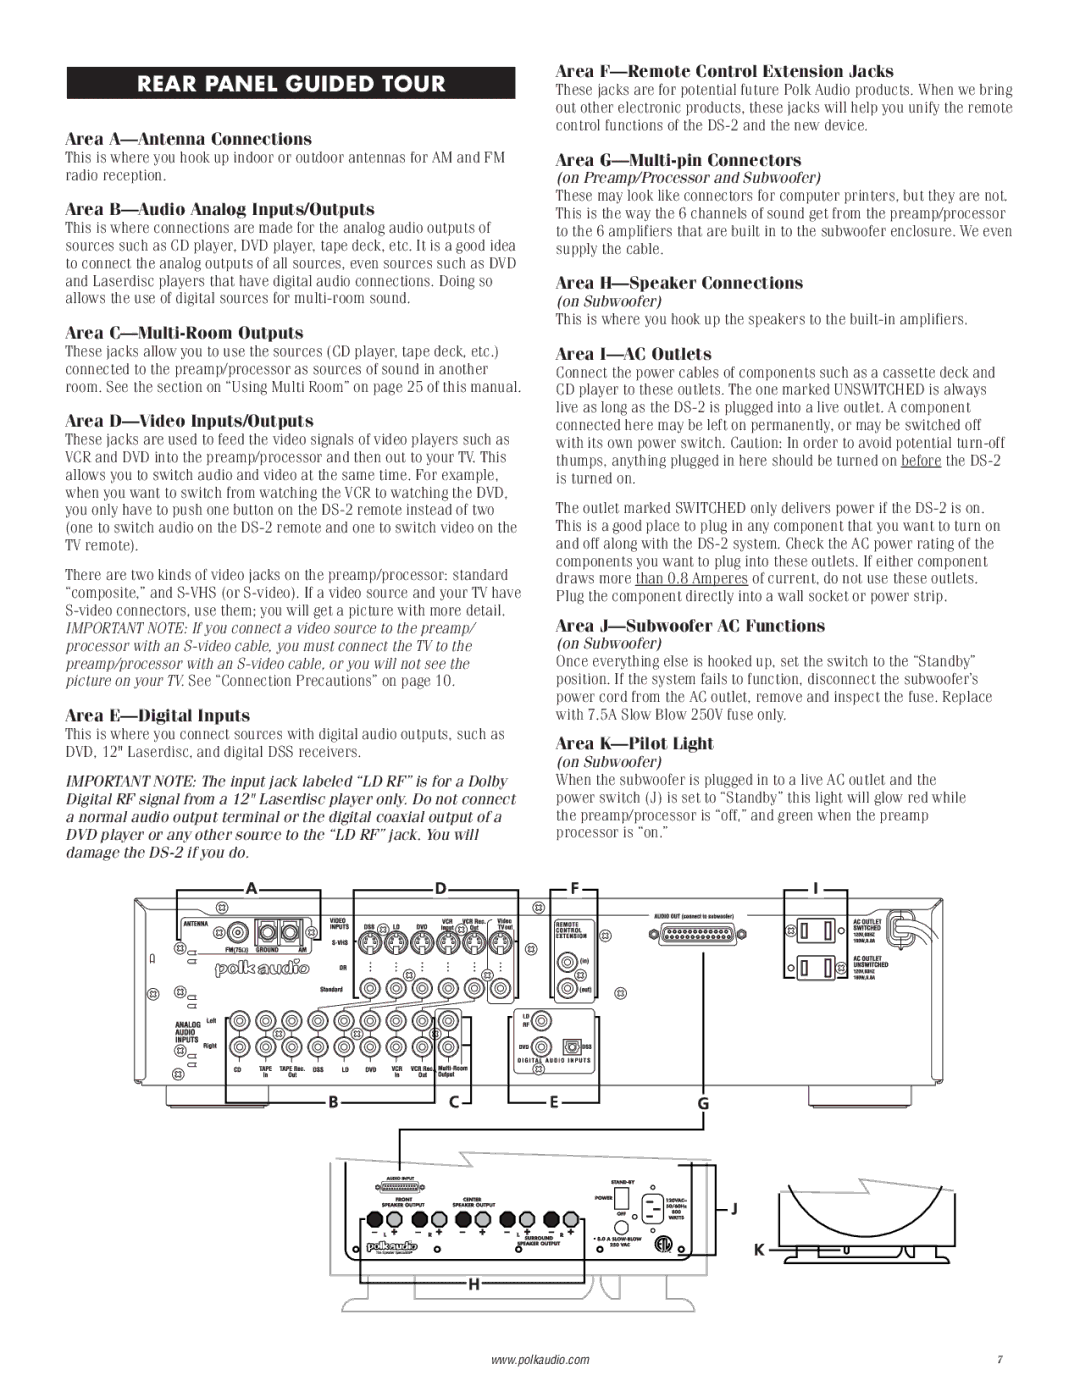
2 specifications
Polk Audio is a renowned name in the audio equipment industry, celebrated for its high-quality speakers and innovative sound technologies. Among its diverse product lineup, the Polk Audio 2 stands out as a versatile and high-performance speaker system designed for both home theater and music enthusiasts.One of the primary features of the Polk Audio 2 is its dynamic balance technology, which ensures that sound is clear and accurate across all frequencies. This technology minimizes distortion and enhances detail, providing an immersive audio experience that brings movies and music to life. The speaker incorporates premium materials, including a robust MDF cabinet that reduces unwanted resonances, resulting in a cleaner and more precise sound.
The Polk Audio 2 is designed with versatility in mind, making it an ideal choice for various setups. The compact size allows for easy placement in different environments, whether you’re setting up a dorm room, a small apartment, or a dedicated home theater. The system typically includes two satellite speakers and a powerful subwoofer, delivering rich bass and crisp highs that ensure a balanced sound.
Another key characteristic of the Polk Audio 2 is its compatibility with various audio systems and technologies. The speakers are designed to work effectively with both traditional receivers and modern wireless setups. This adaptability allows users to enjoy their favorite music and movies seamlessly, regardless of the technology they are using.
The build quality of the Polk Audio 2 reflects the brand’s commitment to superior craftsmanship. The speakers feature stylish finishes that complement any decor, making them not just functional but also aesthetically pleasing. Additionally, the user-friendly design makes installation straightforward, ensuring that you can set up your audio system quickly and easily.
In conclusion, the Polk Audio 2 offers a blend of advanced features, durable construction, and versatile compatibility. With dynamic balance technology, a compact design, and elegant aesthetics, it provides an exceptional listening experience suitable for any setting, whether it’s casual listening or an immersive movie night. Polk Audio continues to be a trusted choice for audio aficionados seeking quality sound and performance.