INITIAL SETTINGS
Your powered subwoofer offers a range of settings.
The unit’s initial settings are as follows:
•Phase: 0
•Volume: 50% (20, on a scale from 0-40)
•PRO setting: mid-room
The settings that are best for you depend upon your subwoofer placement, electronics and personal taste. After you’ve become familiar with what the settings do, experiment with alternate options to find the ones that work best for your system setup. You’ll find an informative article on “Subwoofer Positioning and Adjustment” in the set up section at: www.polkaudio.com/education/article.php?id=19.
FINE TUNING YOUR SUBWOOFER
•Volume: Adjust by ear using a wide variety of CDs and video sources. Adjust for deep, powerful bass without “boominess.”
•Low Pass Filter Control: This control, which is located on the back of
the amplifier, adjusts the frequency range over which the subwoofer operates. When using smaller main speakers the upper range of the control will probably yield the best results. With larger speakers the lower end of the control range will probably sound best, but always let your ear be the final judge. If male vocals sound “thin,” turn this control up until the voice sounds rich but not “boomy.” If male vocals sound too “thick” or “chesty,” turn this control down until the voice sounds natural.
NOTE: The low pass filter control has no effect on subwoofer response when the subwoofer is connected with option #1 (LFE input).
•4 Button Phase Control (0°, 90°, 180° and 270° settings): This control enables the subwoofer to blend more seamlessly with your main speakers. Sit in your favorite listening position. Using the subwoofer’s remote control, play music (not a movie) with a walking bass line. We recommend playing jazz or country music. Now listen carefully for the point at which the subwoofer transitions to your main speakers. This is the crossover point, and it should occur below the frequency range of a male human voice. Whichever phase setting sounds louder or fuller at the subwoofer’s crossover (transition) point is the optimum setting. If after trying all four possible phase settings you cannot hear any difference, leave the phase setting at “0.”
DSWmicroPRO REMOTE CONTROL
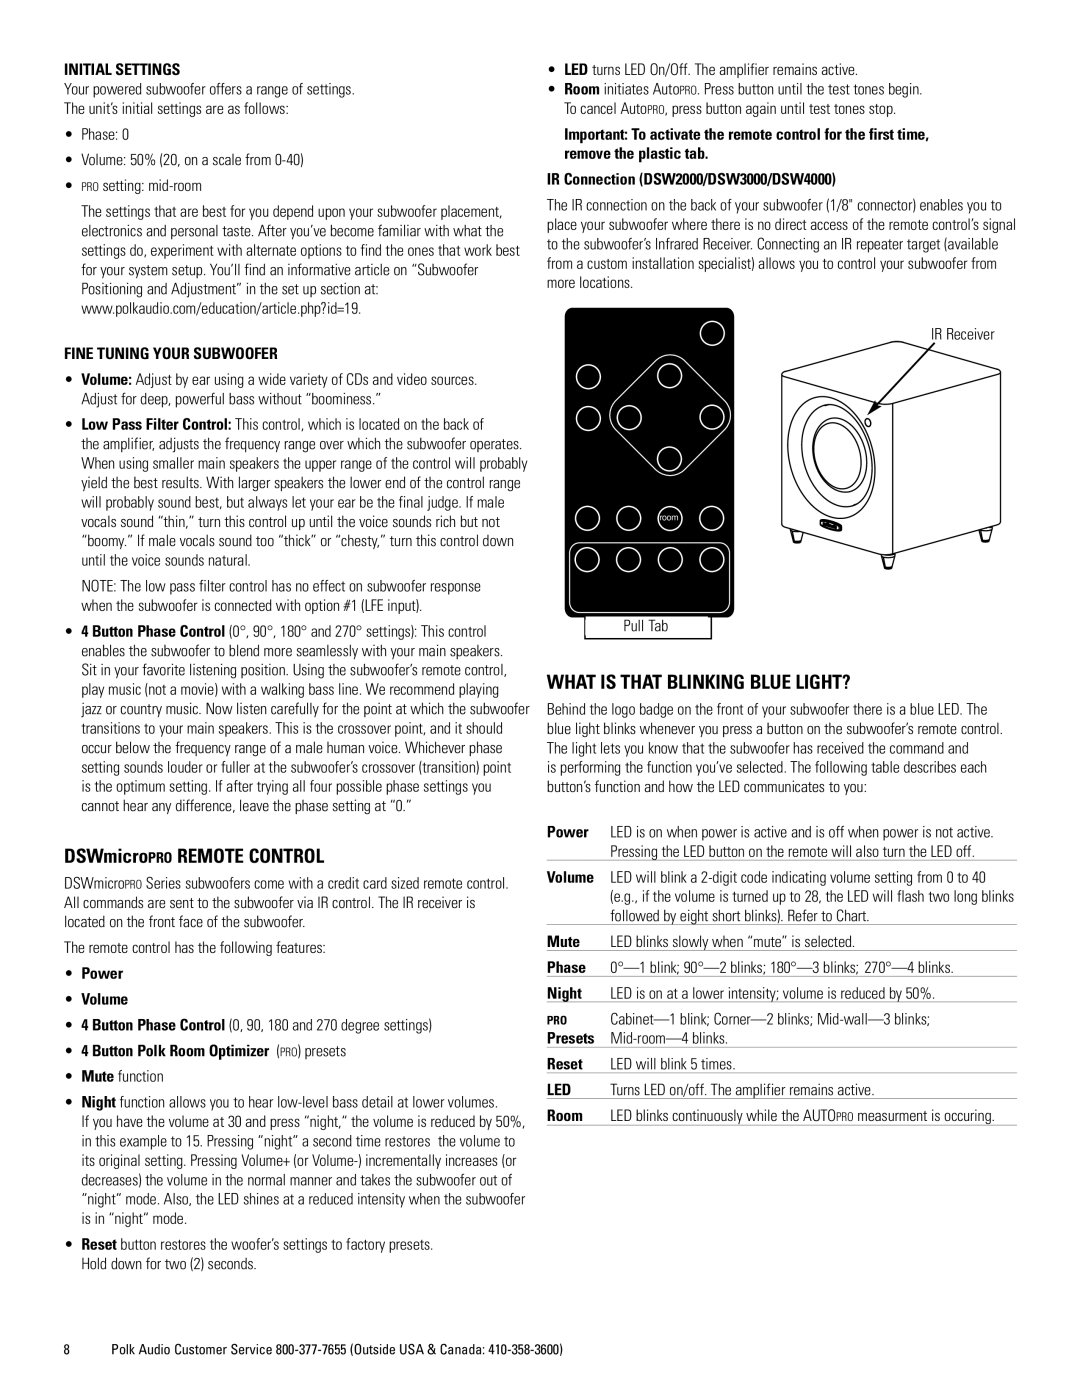
DSWmicroPRO Series subwoofers come with a credit card sized remote control. All commands are sent to the subwoofer via IR control. The IR receiver is located on the front face of the subwoofer.
The remote control has the following features:
•Power
•Volume
•4 Button Phase Control (0, 90, 180 and 270 degree settings)
•4 Button Polk Room Optimizer (PRO) presets
•Mute function
•Night function allows you to hear low-level bass detail at lower volumes.
If you have the volume at 30 and press “night,“ the volume is reduced by 50%, in this example to 15. Pressing “night“ a second time restores the volume to its original setting. Pressing Volume+ (or Volume-) incrementally increases (or decreases) the volume in the normal manner and takes the subwoofer out of “night“ mode. Also, the LED shines at a reduced intensity when the subwoofer is in “night“ mode.
•Reset button restores the woofer’s settings to factory presets. Hold down for two (2) seconds.
•LED turns LED On/Off. The amplifier remains active.
•Room initiates AutoPRO. Press button until the test tones begin. To cancel AutoPRO, press button again until test tones stop.
Important: To activate the remote control for the first time, remove the plastic tab.
IR Connection (DSW2000/DSW3000/DSW4000)
The IR connection on the back of your subwoofer (1/8" connector) enables you to place your subwoofer where there is no direct access of the remote control’s signal to the subwoofer’s Infrared Receiver. Connecting an IR repeater target (available from a custom installation specialist) allows you to control your subwoofer from more locations.
IR Receiver
room
Pull Tab
WHAT IS THAT BLINKING BLUE LIGHT?
Behind the logo badge on the front of your subwoofer there is a blue LED. The blue light blinks whenever you press a button on the subwoofer’s remote control. The light lets you know that the subwoofer has received the command and
is performing the function you’ve selected. The following table describes each button’s function and how the LED communicates to you:
Power LED is on when power is active and is off when power is not active. Pressing the LED button on the remote will also turn the LED off.
Volume LED will blink a 2-digit code indicating volume setting from 0 to 40 (e.g., if the volume is turned up to 28, the LED will flash two long blinks followed by eight short blinks). Refer to Chart.
Mute LED blinks slowly when “mute” is selected.
Phase 0°—1 blink; 90°—2 blinks; 180°—3 blinks; 270°—4 blinks.
Night LED is on at a lower intensity; volume is reduced by 50%.
PRO Cabinet—1 blink; Corner—2 blinks; Mid-wall—3 blinks; Presets Mid-room—4 blinks.
Reset LED will blink 5 times.
LED Turns LED on/off. The amplifier remains active.
Room LED blinks continuously while the AUTOPRO measurment is occuring.

