4 | Ceiling DocCam II — Introduction |
Product overview
Camera enclosure
E
BC
F
A
G
D
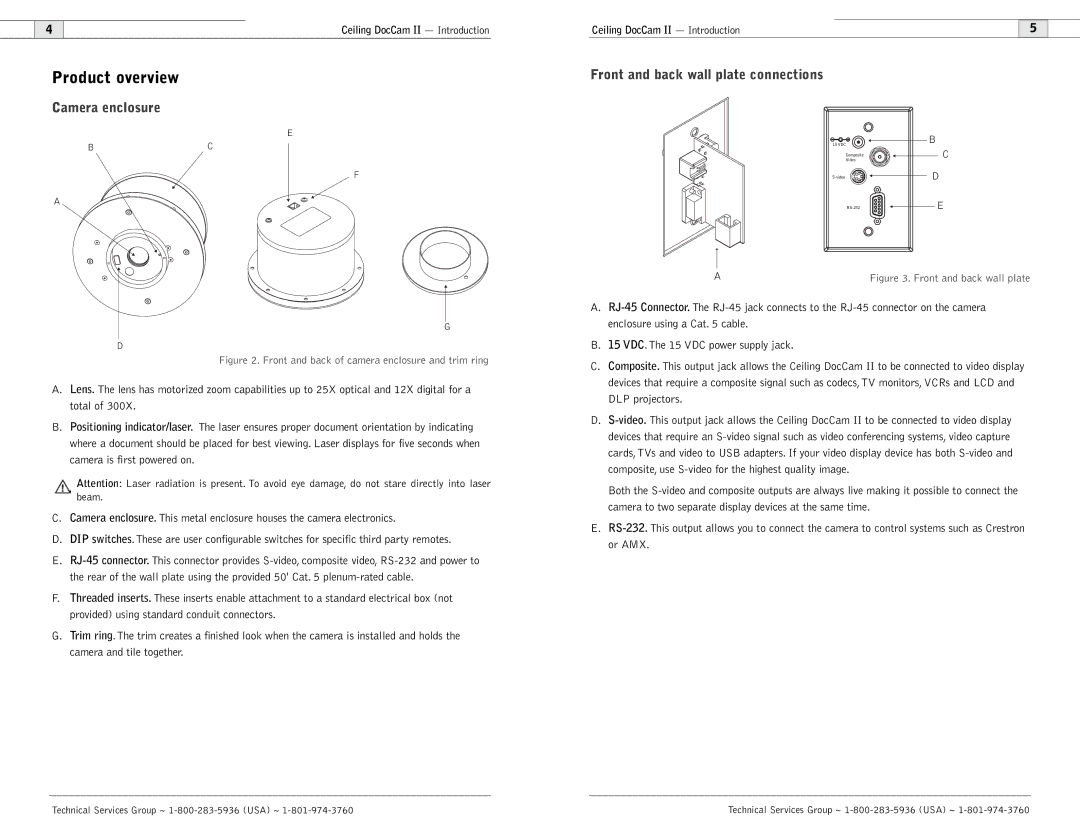
Figure 2. Front and back of camera enclosure and trim ring
A.Lens. The lens has motorized zoom capabilities up to 25X optical and 12X digital for a total of 300X.
B.Positioning indicator/laser. The laser ensures proper document orientation by indicating where a document should be placed for best viewing. Laser displays for five seconds when camera is first powered on.
Attention: Laser radiation is present. To avoid eye damage, do not stare directly into laser beam.
C.Camera enclosure. This metal enclosure houses the camera electronics.
D.DIP switches.These are user configurable switches for specific third party remotes.
E.
F.Threaded inserts. These inserts enable attachment to a standard electrical box (not provided) using standard conduit connectors.
G.Trim ring.The trim creates a finished look when the camera is installed and holds the camera and tile together.
Ceiling DocCam II — Introduction |
| 5 |
|
Front and back wall plate connections
15 VDC | B |
Composite | C |
Video |
|
D | |
E |
A | Figure 3. Front and back wall plate |
A.
B.15 VDC.The 15 VDC power supply jack.
C.Composite. This output jack allows the Ceiling DocCam II to be connected to video display devices that require a composite signal such as codecs,TV monitors, VCRs and LCD and DLP projectors.
D.
Both the
E.
Technical Services Group ~ | Technical Services Group ~ |
