5.Drain water from air tank by opening drain valve
Water will condense in the air tank. If not drained, water will corrode and weaken the air tank causing a risk of air
tank rupture.
6.After the water has been drained, close the drain valve (clockwise). The air compressor can now be stored.
NOTE: If drain valve is plugged, release all air pressure. The valve can then be removed, cleaned, then reinstalled.
Oil
Drain tank to release air pressure before removing the dipstick or oil drain plug.
Compressor head and cylinder sleeve are very hot. Do not touch.
Checking
1.Set the On/Auto/Off lever to "OFF".
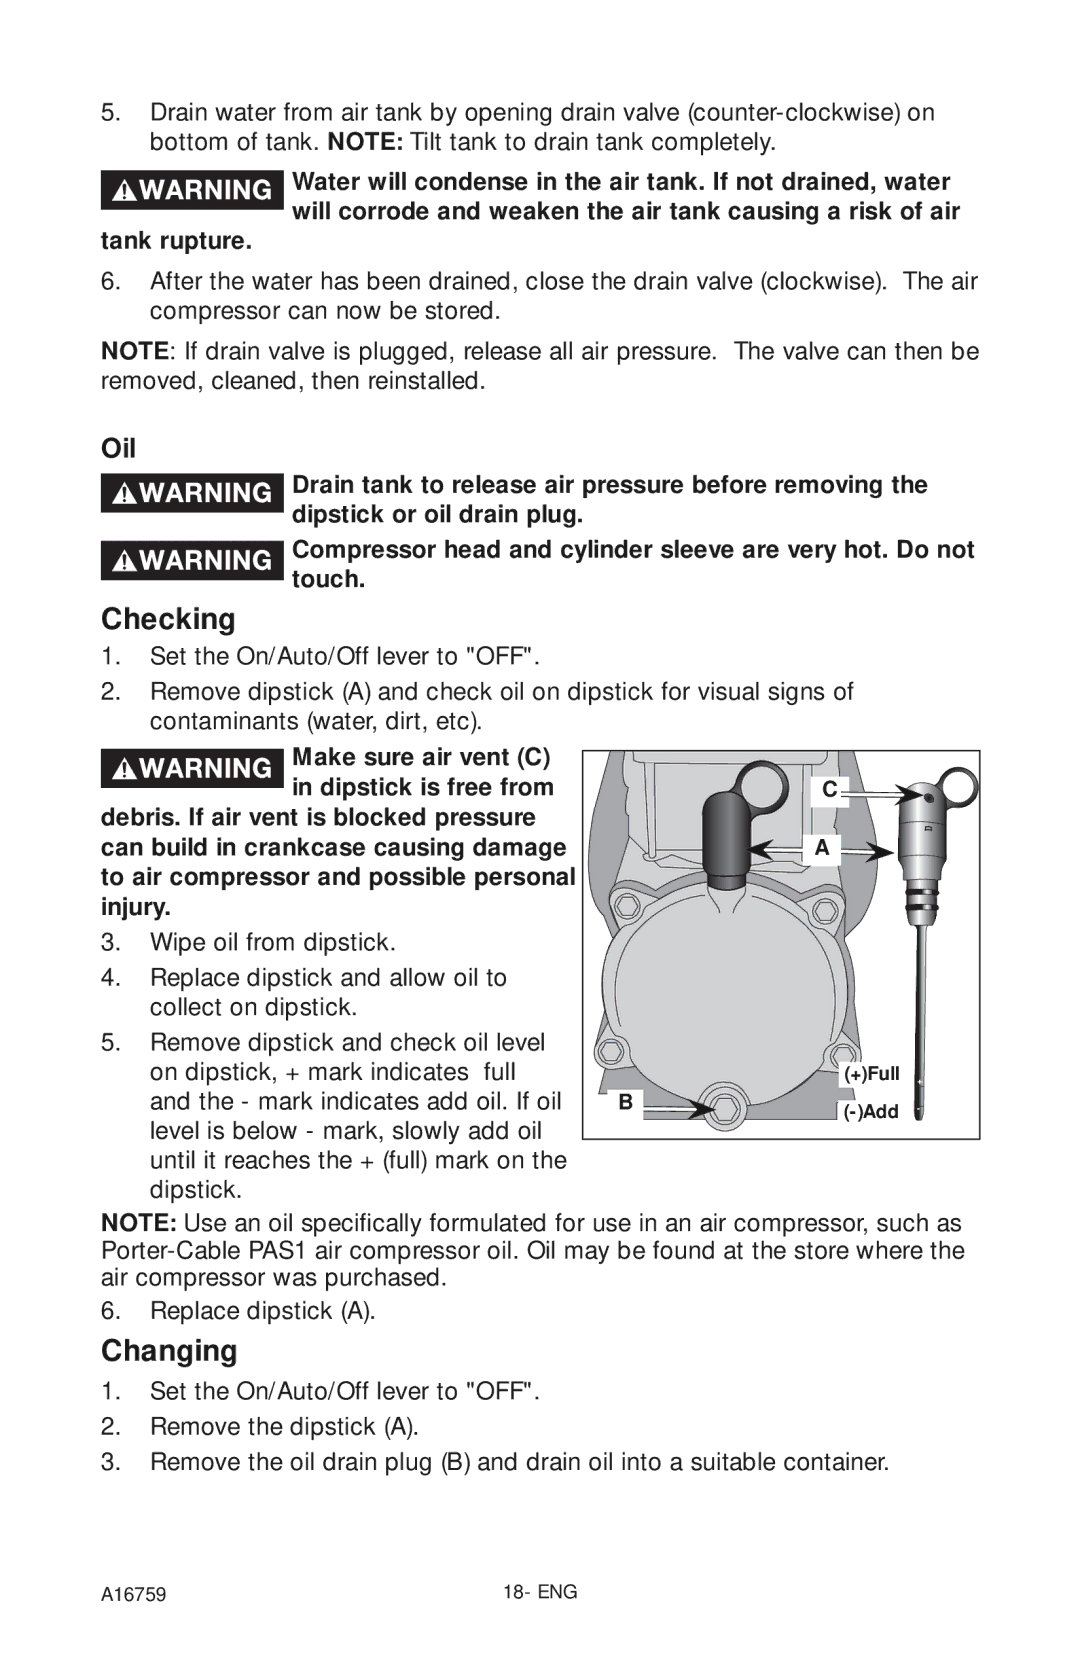
2.Remove dipstick (A) and check oil on dipstick for visual signs of contaminants (water, dirt, etc).
Make sure air vent (C) in dipstick is free from
debris. If air vent is blocked pressure can build in crankcase causing damage to air compressor and possible personal injury.
3.Wipe oil from dipstick.
4.Replace dipstick and allow oil to collect on dipstick.
5.Remove dipstick and check oil level on dipstick, + mark indicates full and the - mark indicates add oil. If oil level is below - mark, slowly add oil until it reaches the + (full) mark on the dipstick.
C![]()
![]()
![]() A
A ![]()
| (+)Full | + |
B | - | |
|
|
NOTE: Use an oil specifically formulated for use in an air compressor, such as
6.Replace dipstick (A).
Changing
1.Set the On/Auto/Off lever to "OFF".
2.Remove the dipstick (A).
3.Remove the oil drain plug (B) and drain oil into a suitable container.
A16759 | 18- ENG |