INSTALLATION
1.Install the special drywall dust bag into your vacuum cleaner, following the instructions supplied with the vacuum cleaner. If this dust bag does not fit your vacuum cleaner correctly, purchase and install a suitable filter bag that is rated for drywall dust.
![]() To reduce the risk of personal injury, use a dust bag rated for drywall dust. Failure to do so will increase the level of airborne dust particles in the work area. Continued and prolonged exposure to high concentrations of airborne dust may affect your respiratory system function.
To reduce the risk of personal injury, use a dust bag rated for drywall dust. Failure to do so will increase the level of airborne dust particles in the work area. Continued and prolonged exposure to high concentrations of airborne dust may affect your respiratory system function.
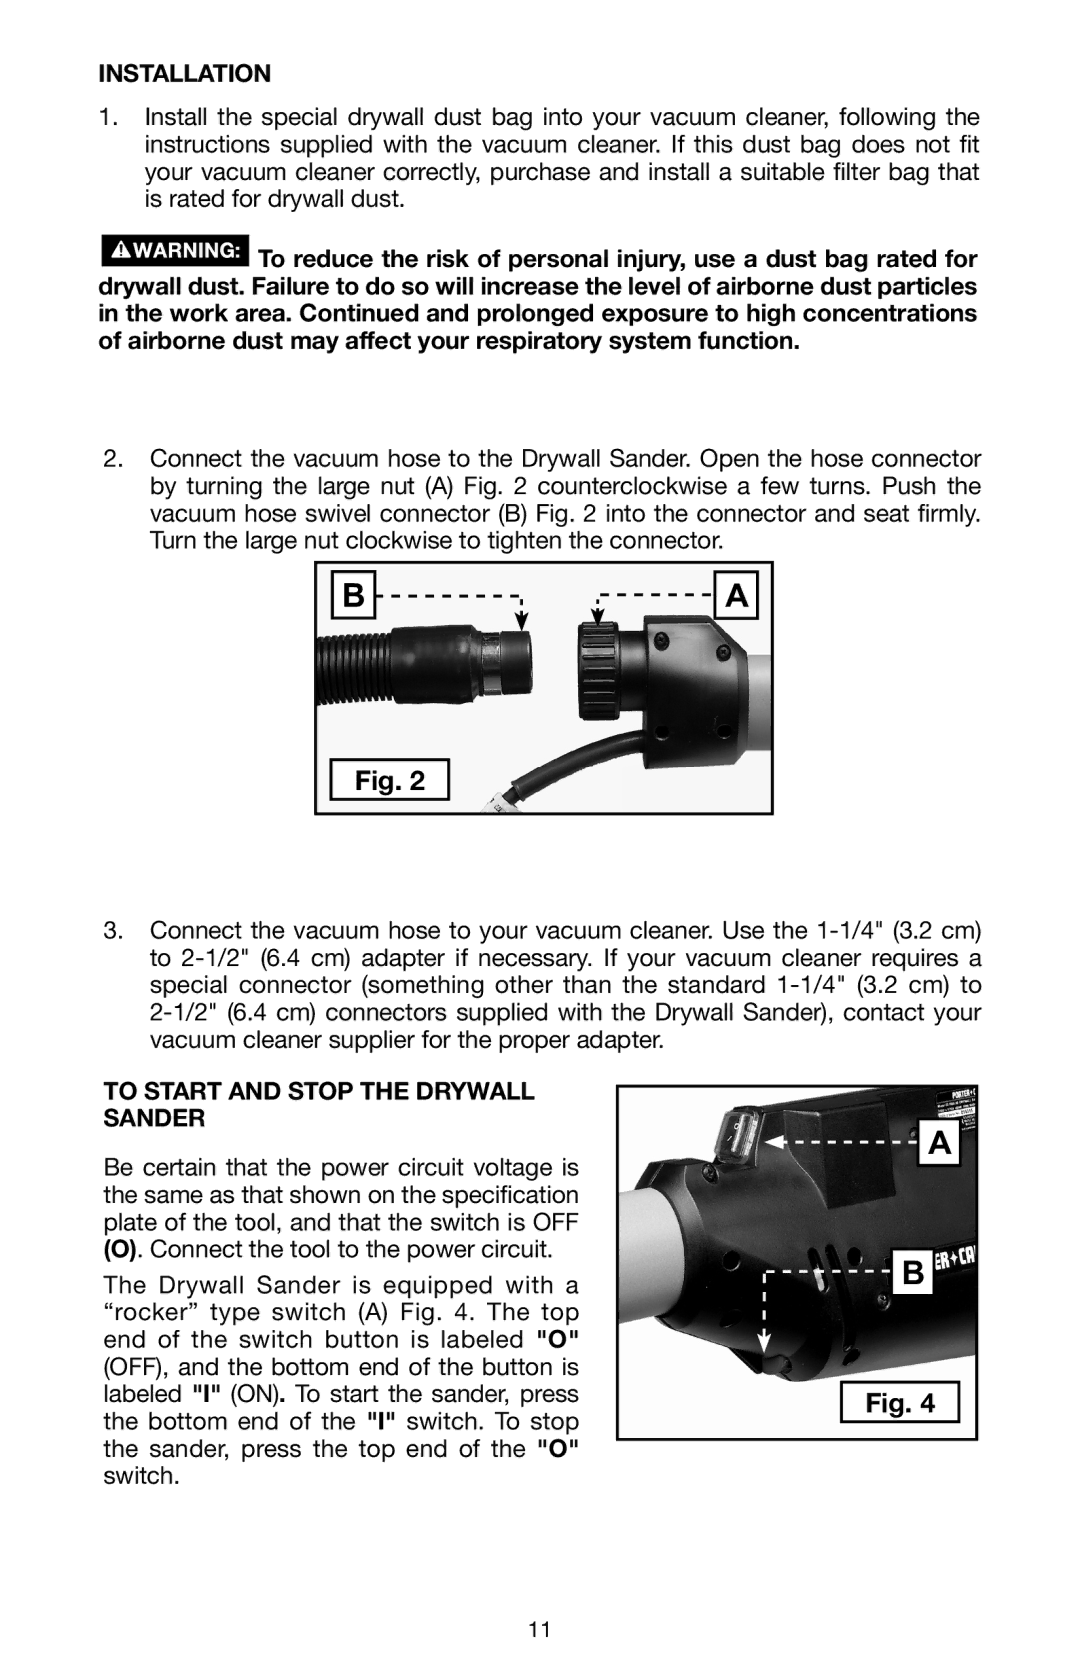
2.Connect the vacuum hose to the Drywall Sander. Open the hose connector by turning the large nut (A) Fig. 2 counterclockwise a few turns. Push the vacuum hose swivel connector (B) Fig. 2 into the connector and seat firmly. Turn the large nut clockwise to tighten the connector.
B | A |
Fig. 2
3.Connect the vacuum hose to your vacuum cleaner. Use the
TO START AND STOP THE DRYWALL SANDER
Be certain that the power circuit voltage is the same as that shown on the specification plate of the tool, and that the switch is OFF
(O). Connect the tool to the power circuit.
The Drywall Sander is equipped with a “rocker” type switch (A) Fig. 4. The top end of the switch button is labeled "O" (OFF), and the bottom end of the button is labeled "I" (ON). To start the sander, press the bottom end of the "I" switch. To stop the sander, press the top end of the "O" switch.
![]()
![]() A
A
![]() B
B
Fig. 4
11