SSaw cuts to one side or at an angle. S Saw has to be forced through the cut.
Tools required:
S3/16 inch (4,5 mm) diameter round file and file holder
SFlat file
SDepth gauge tool
TO SHARPEN CHAIN:
1.Disconnect spark plug.
2.Check chain for proper tension. Adjust chain tension if necessary. See CHECK CHAIN TENSION section.
3.Sharpen cutters.
S To sharpen the cutters, position the file holder level (90˚) so that it rests on the top edges of the cutter and depth gauge.
NOTE: The chain has both left and right hand cutters.
File Holder
File
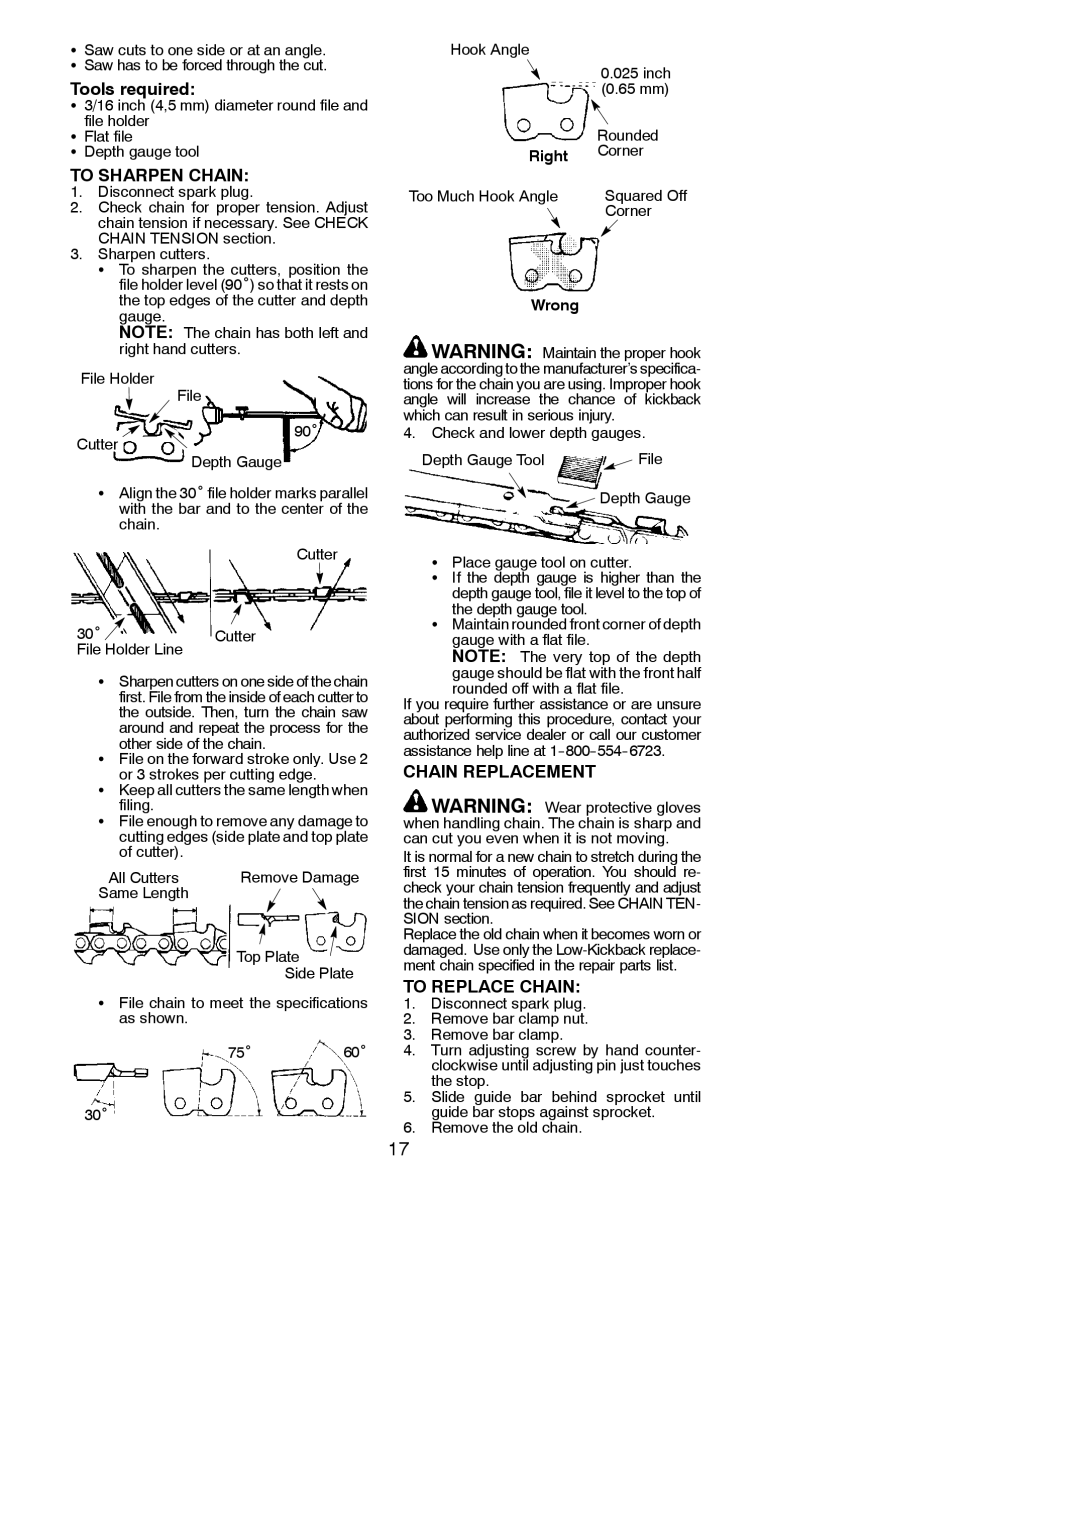
Hook Angle
| 0.025 inch |
| (0.65 mm) |
| Rounded |
Right | Corner |
| |
Too Much Hook Angle | Squared Off |
| Corner |
Wrong
![]() WARNING: Maintain the proper hook angle according to the manufacturer’s specifica- tions for the chain you are using. Improper hook angle will increase the chance of kickback which can result in serious injury.
WARNING: Maintain the proper hook angle according to the manufacturer’s specifica- tions for the chain you are using. Improper hook angle will increase the chance of kickback which can result in serious injury.
Cutter
90˚
4.Check and lower depth gauges.
Depth Gauge
SAlign the 30˚ file holder marks parallel with the bar and to the center of the chain.
Cutter
30˚ | Cutter |
File Holder Line |
|
SSharpen cutters on one side of the chain first. File from the inside of each cutter to the outside. Then, turn the chain saw around and repeat the process for the
other side of the chain.
SFile on the forward stroke only. Use 2
or 3 strokes per cutting edge.
SKeep all cutters the same length when filing.
SFile enough to remove any damage to cutting edges (side plate and top plate of cutter).
All Cutters | Remove Damage |
Same Length |
|
| Top Plate |
| Side Plate |
SFile chain to meet the specifications as shown.
75˚60˚
30˚
![]() Depth Gauge
Depth Gauge
SPlace gauge tool on cutter.
SIf the depth gauge is higher than the depth gauge tool, file it level to the top of
the depth gauge tool.
SMaintain rounded front corner of depth gauge with a flat file.
NOTE: The very top of the depth gauge should be flat with the front half
rounded off with a flat file.
If you require further assistance or are unsure about performing this procedure, contact your authorized service dealer or call our customer assistance help line at
CHAIN REPLACEMENT
![]() WARNING: Wear protective gloves when handling chain. The chain is sharp and can cut you even when it is not moving.
WARNING: Wear protective gloves when handling chain. The chain is sharp and can cut you even when it is not moving.
It is normal for a new chain to stretch during the first 15 minutes of operation. You should re- check your chain tension frequently and adjust the chain tension as required. See CHAIN TEN- SION section.
Replace the old chain when it becomes worn or damaged. Use only the
TO REPLACE CHAIN:
1.Disconnect spark plug.
2.Remove bar clamp nut.
3.Remove bar clamp.
4.Turn adjusting screw by hand counter- clockwise until adjusting pin just touches the stop.
5.Slide guide bar behind sprocket until guide bar stops against sprocket.
6.Remove the old chain.
17