10.Insert the ends of the lines through exit holes in the sides of the cover.
Line exit hole
Cover
11.Reinstall the spool and cover onto the trimmer head. Push until cover snaps into place.
Dust Cup
2.Remove trimmer head by turning coun- terclockwise (looking from bottom of unit).
3.Thread replacement trimmer head onto the shaft by turning clockwise. Only tighten hand tight!
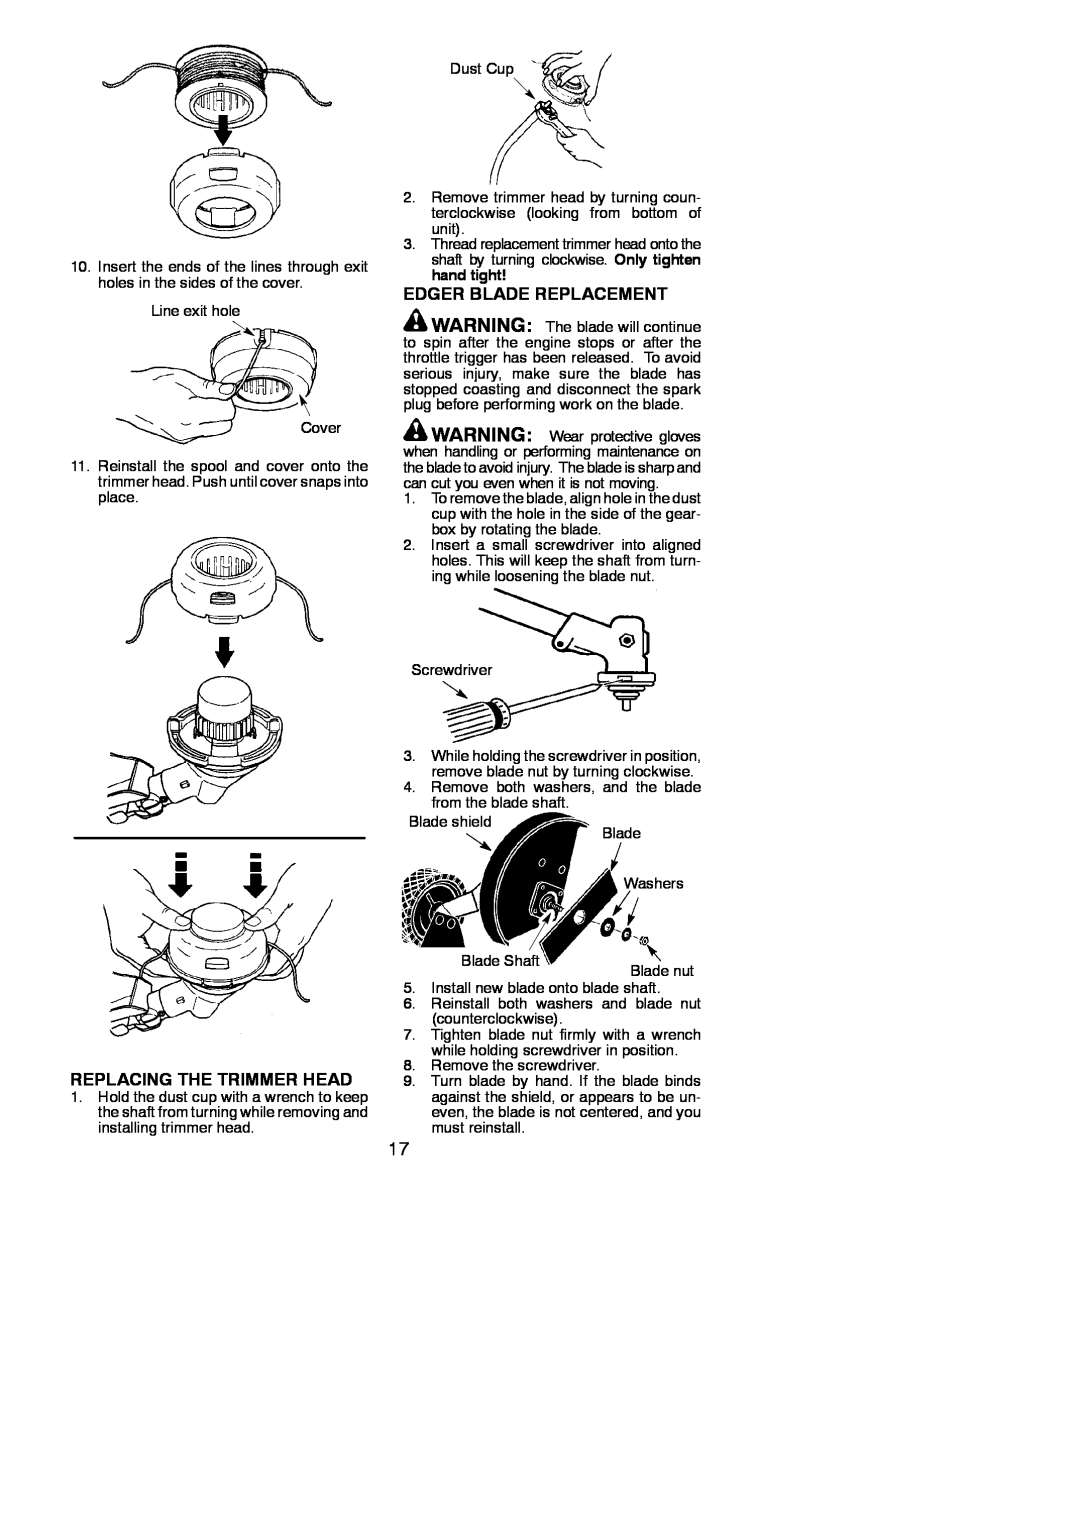
EDGER BLADE REPLACEMENT
![]() WARNING: The blade will continue to spin after the engine stops or after the throttle trigger has been released. To avoid serious injury, make sure the blade has stopped coasting and disconnect the spark plug before performing work on the blade.
WARNING: The blade will continue to spin after the engine stops or after the throttle trigger has been released. To avoid serious injury, make sure the blade has stopped coasting and disconnect the spark plug before performing work on the blade.
![]() WARNING: Wear protective gloves when handling or performing maintenance on the blade to avoid injury. The blade is sharp and can cut you even when it is not moving.
WARNING: Wear protective gloves when handling or performing maintenance on the blade to avoid injury. The blade is sharp and can cut you even when it is not moving.
1.To remove the blade, align hole in the dust cup with the hole in the side of the gear- box by rotating the blade.
2.Insert a small screwdriver into aligned holes. This will keep the shaft from turn- ing while loosening the blade nut.
Screwdriver
REPLACING THE TRIMMER HEAD
1.Hold the dust cup with a wrench to keep the shaft from turning while removing and installing trimmer head.
3.While holding the screwdriver in position, remove blade nut by turning clockwise.
4.Remove both washers, and the blade from the blade shaft.
Blade shield
Blade
| Washers |
Blade Shaft | Blade nut |
|
5.Install new blade onto blade shaft.
6.Reinstall both washers and blade nut (counterclockwise).
7.Tighten blade nut firmly with a wrench while holding screwdriver in position.
8.Remove the screwdriver.
9.Turn blade by hand. If the blade binds against the shield, or appears to be un- even, the blade is not centered, and you must reinstall.
17