Lock Knobs and Swivel Handles
Referring to Figure 4:
1.Thread the swivel handles (A) into the front and side handwheels (C) and tighten with a 14mm wrench.
2.Screw lock knobs (B) into the threaded openings on the end of the shafts located in the middle of the handwheels (C).
Note: Do not tighten the lock knobs all the way at this time.
Figure 4
Dust Chute
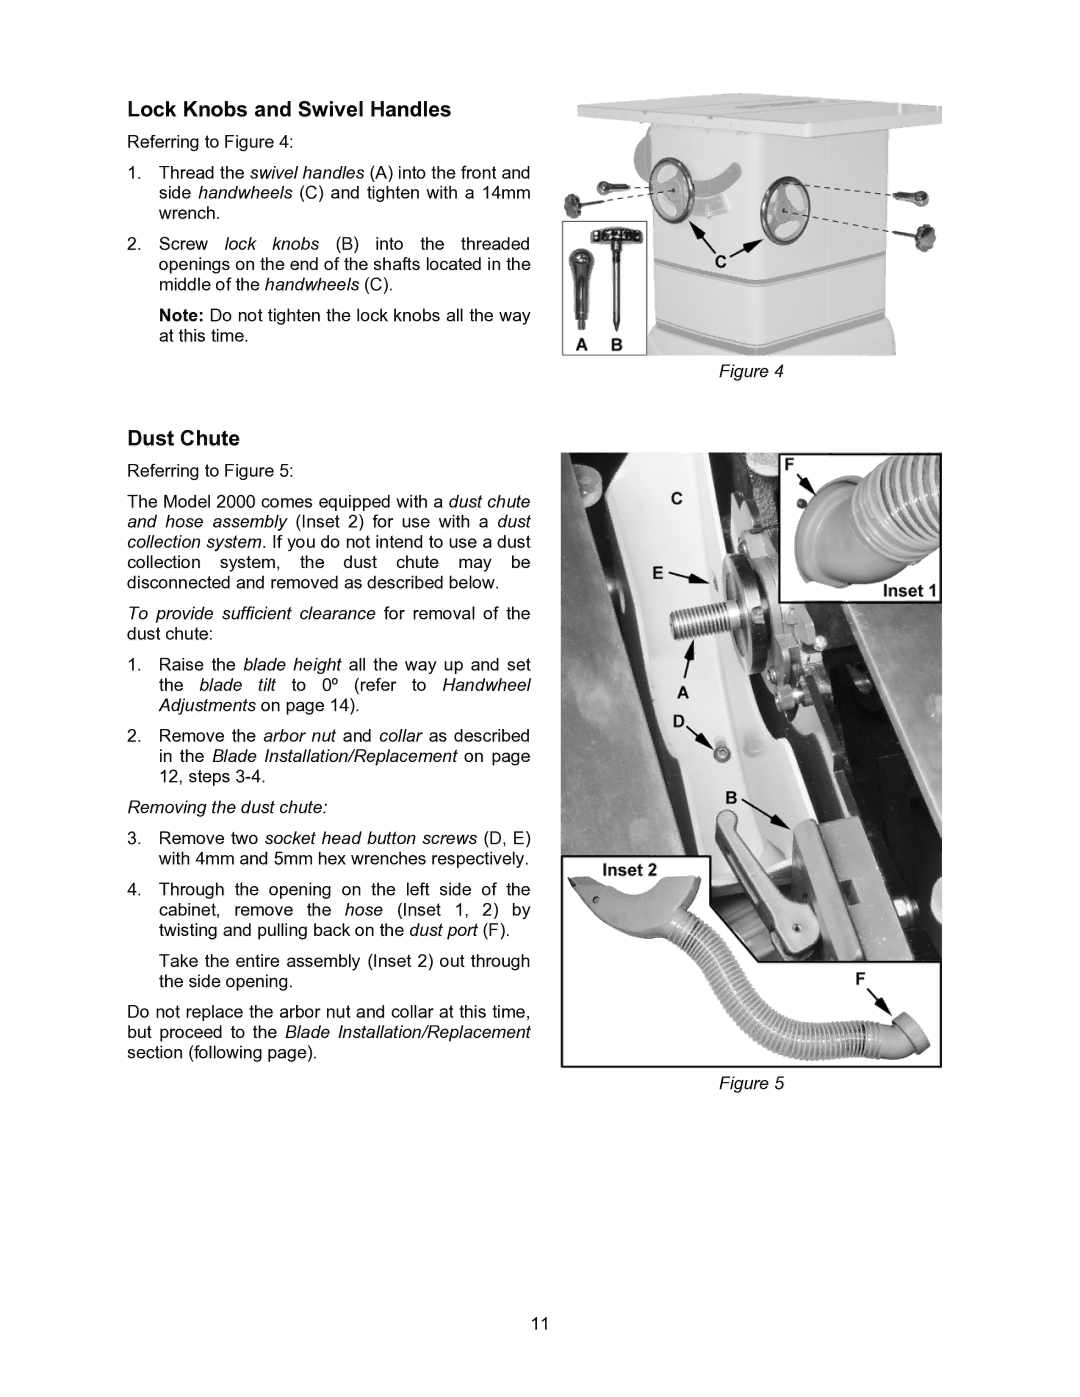
Referring to Figure 5:
The Model 2000 comes equipped with a dust chute and hose assembly (Inset 2) for use with a dust collection system. If you do not intend to use a dust collection system, the dust chute may be disconnected and removed as described below.
To provide sufficient clearance for removal of the dust chute:
1.Raise the blade height all the way up and set the blade tilt to 0º (refer to Handwheel Adjustments on page 14).
2.Remove the arbor nut and collar as described in the Blade Installation/Replacement on page 12, steps
Removing the dust chute:
3.Remove two socket head button screws (D, E) with 4mm and 5mm hex wrenches respectively.
4.Through the opening on the left side of the cabinet, remove the hose (Inset 1, 2) by twisting and pulling back on the dust port (F).
Take the entire assembly (Inset 2) out through the side opening.
Do not replace the arbor nut and collar at this time, but proceed to the Blade Installation/Replacement section (following page).
Figure 5
11