Miter Slot Alignment
![]() Disconnect machine from power source before making this adjustment.
Disconnect machine from power source before making this adjustment.
To check the alignment of the miter slot to the blade:
1.Raise the blade to its maximum height at the 90º vertical position (0º on scale).
2.Mark one tooth with a grease pencil and position the tooth slightly above the top edge of the table at the front.
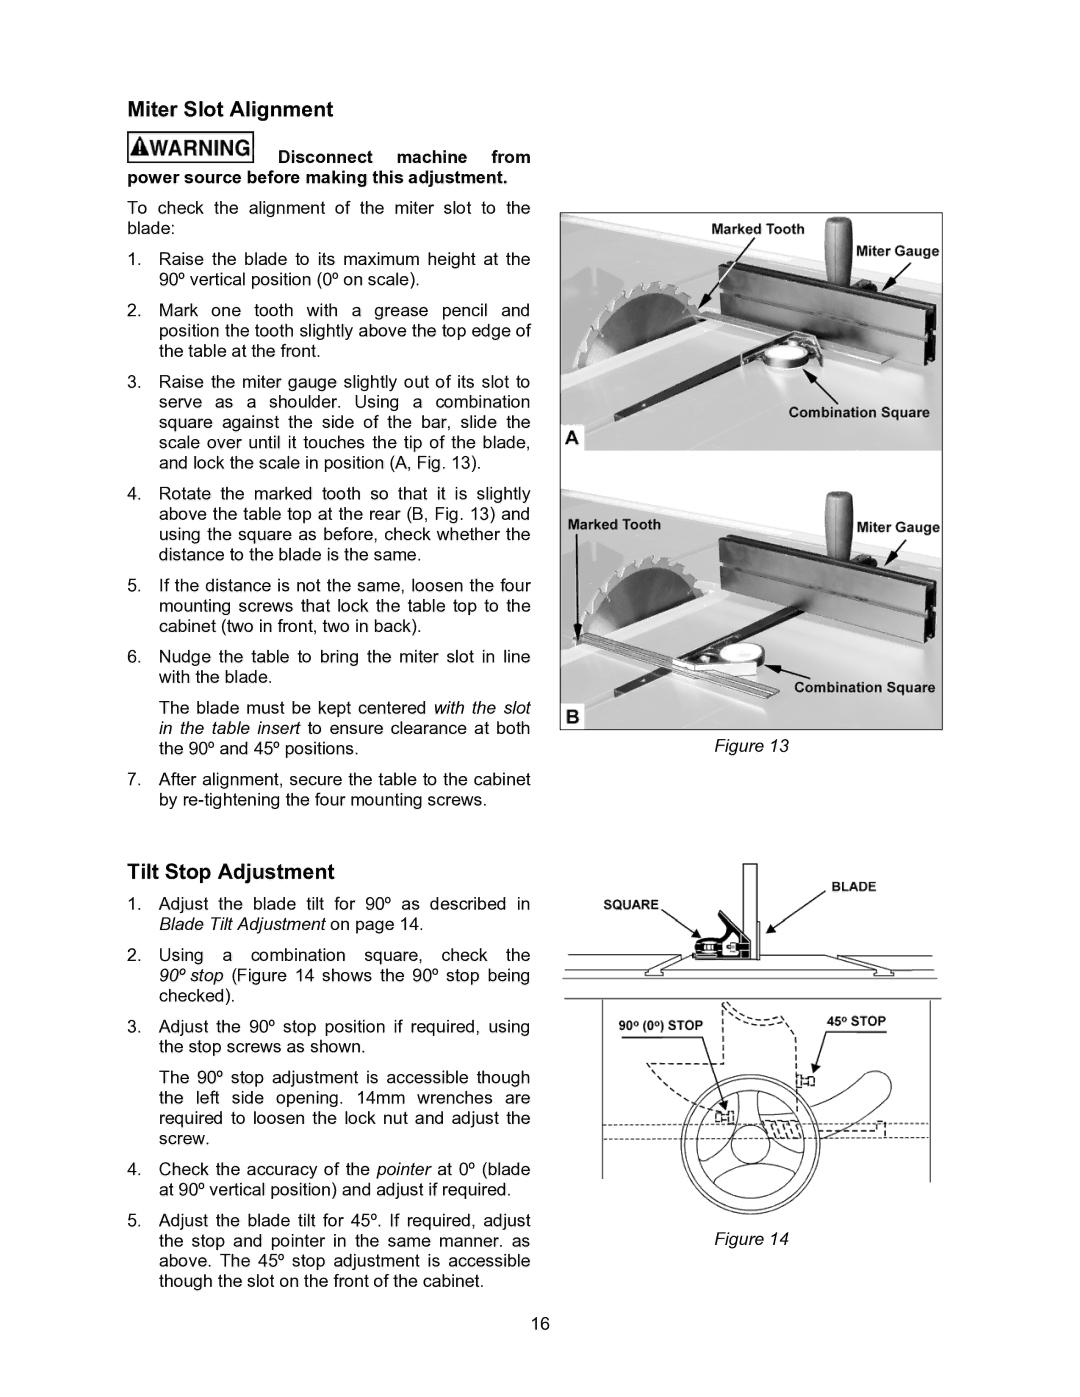
3.Raise the miter gauge slightly out of its slot to serve as a shoulder. Using a combination square against the side of the bar, slide the scale over until it touches the tip of the blade, and lock the scale in position (A, Fig. 13).
4.Rotate the marked tooth so that it is slightly above the table top at the rear (B, Fig. 13) and using the square as before, check whether the distance to the blade is the same.
5.If the distance is not the same, loosen the four mounting screws that lock the table top to the cabinet (two in front, two in back).
6.Nudge the table to bring the miter slot in line with the blade.
The blade must be kept centered with the slot in the table insert to ensure clearance at both the 90º and 45º positions.
7.After alignment, secure the table to the cabinet by
Tilt Stop Adjustment
1.Adjust the blade tilt for 90º as described in Blade Tilt Adjustment on page 14.
2.Using a combination square, check the 90º stop (Figure 14 shows the 90º stop being checked).
3.Adjust the 90º stop position if required, using the stop screws as shown.
The 90º stop adjustment is accessible though the left side opening. 14mm wrenches are required to loosen the lock nut and adjust the screw.
4.Check the accuracy of the pointer at 0º (blade at 90º vertical position) and adjust if required.
5.Adjust the blade tilt for 45º. If required, adjust the stop and pointer in the same manner. as above. The 45º stop adjustment is accessible though the slot on the front of the cabinet.
16
Figure 13
Figure 14